How To Design A BGA Breakout Module

Surface mount devices can take some adjusting to for hackers primarily used to working with through-hole components. Despite this, the lure of the hottest new parts has enticed even the most reticent to learn to work with the technology. Of course, time rolls on and BGA parts bring further difficulties. [Nate] from SparkFun worked on the development of the RedBoard Artemis, and broke down the challenges involved.

The RedBoard Artemis is an Arduino-compatible devboard built around the Ambiq Apollo3 chip. In addition to packing Bluetooth and 1 MB of Flash, it’s also capable of running TensorFlow models and using tiny amounts of power. The chip comes in an 81-Ball Grid Array at 0.5mm pitch, which meant SparkFun’s usual PCB fabrication methods weren’t going to cut it.

An initial run of prototype boards was run using 4 layers, blind and buried vias, and other fancy tricks to break out all the necessary signals. While this worked well, it was expensive and inefficient. The only part of the board that needed such fabrication was around the chip itself; the rest of the board could be produced with cheaper 2-layer methods. To improve this for mass production, instead, an SMD module was created to house the Apollo3, which could then be dropped into new designs on cheaper boards as necessary.

[Nate] does a great job of explaining the engineering involved, as well as sharing useful tips for others going down a similar path. So far, this is just part 1, with future posts promising to cover the RF shield design and FCC certification process. [Nate] has always been keen to share his wisdom, and we can’t wait to see what comes next!

3D-Printed Magazines Tame The SMD Tape Beast

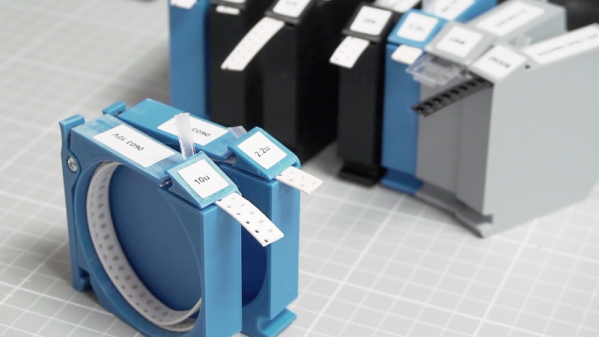
Chances are pretty good that you’ve got a box or a bin somewhere in your shop with coils of SMD component tapes in it. If you’re lucky, the coils are somewhat contained in their conductive Mylar bags; if you’re more like us, the tapes are flopping around loose in an attempt to seemingly tie themselves together. In either case, these 3D-printed SMD magazines will bring a little order to the chaos, and make board assembly a little bit easier.

When we saw [Robin Reiter]’s build, we thought these would be cassettes for some sort of pick-and-place machine. But while they certainly look like they could be adapted to an automated PnP setup, [Robin]’s main goal was to provide organized storage for loose tapes. Each magazine has a circular reservoir to hold the coiled tape, with an exit slot at the front and a wedge that directs the cover tape in the opposite direction. This removes the cover tape to expose the components, clears it away from the pickup area, and as a bonus, allows the component tape to be advanced just by pulling back on the cover. Each magazine has a spring-loaded latch that clips onto a base that looks a bit like a DIN-rail; the weighted base holds several magazines and makes it easy to set up a manual pick-and-place session. The video below shows all the details.

For certain personality types, this really scratches an itch. We love the modular design, and the organization that these would bring to our shop would really help clean things up a bit. And if [Robin] were ever to take this design to the next level, adding something like this could be useful.

Continue reading “3D-Printed Magazines Tame The SMD Tape Beast”

Fail Of The Week: How Not To Re-Reflow

There’s no question that surface-mount technology has been a game-changer for PCB design. It means easier automated component placement and soldering, and it’s a big reason why electronics have gotten so cheap. It’s not without problems, though, particularly when you have no choice but to include through-hole components on your SMT boards.

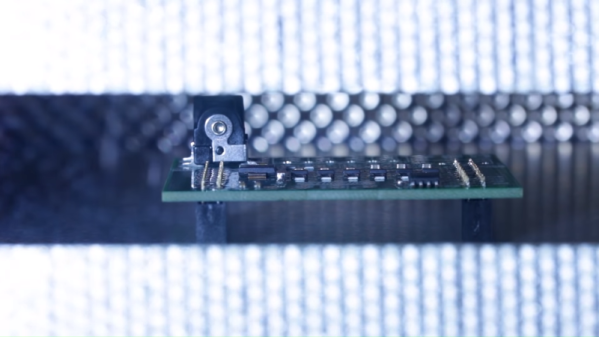
[James Clough] ran into this problem recently, and he tried to solve it by reflowing through-hole connectors onto assembled SMT boards. The boards are part of his electronic lead screw project, an accessory for lathes that makes threading operations easier and more flexible. We covered the proof-of-concept for the project; he’s come a long way since then and is almost ready to start offering the ELS for sale. The PCBs were partially assembled by the board vendor, leaving off a couple of through-hole connectors and the power jack. [James]’ thought was to run the boards back through his reflow oven to add the connectors, so he tried a few experiments first on the non-reflow rated connectors. The Phoenix-style connectors discolored and changed dimensionally after a trip through the oven, and the plastic on the pin headers loosened its grip on the pins. The female header socket and the power jack fared better, so he tried reflowing them, but it didn’t work out too well, at least for the headers. He blames poor heat conduction due to the lack of contact between the board and the reflow oven plate, and we agree; perhaps an aluminum block milled to fit snugly between the header sockets would help.

Hats off to [James] for trying to save his future customers a few steps on assembly, but it’s pretty clear there are no good shortcuts here. And we highly recommend the electronic leadscrew playlist to anyone interested in the convergence of machine tools and electronics.

Continue reading “Fail Of The Week: How Not To Re-Reflow”

Cheap Stereo Microscope Helps With SMD

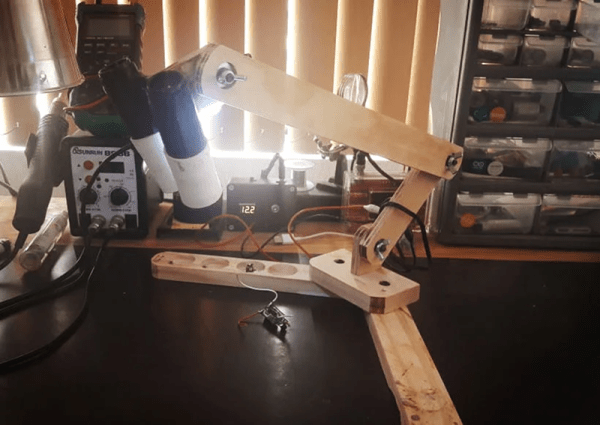
Soldering is best done under magnification. Parts become ever smaller and eyes get weaker, so even if you don’t need magnification now, you will. [Makzumi] didn’t want to shell out $400 or more for a good microscope so he hacked one from some cheap binoculars from the toy section on Amazon.

A lot of magnifiers aren’t really good for soldering because the distance between the work and the lens isn’t very large. The hacked ‘scope has about 4 inches of working distance, which is plenty of room to stick some solder and a hot iron under there. The resulting magnification is about 12 or 15X and he claims that the cell phone pictures he’s included aren’t as good as really looking through the eyepieces yourself.

Continue reading “Cheap Stereo Microscope Helps With SMD”

Control The Suck With This Manual Vacuum Pick-And-Place Tool

The tapes that surface-mount devices come in may be optimized for automated pick and place, but woe betide those who try to dig components out manually. No matter what size package, the well on the tape seems to be just a wee bit too small to allow tweezers to grip it, so you end up picking the thing up edgewise or worse, pinching too tight and launching the tiny thing into The Void. We hope you ordered extra.

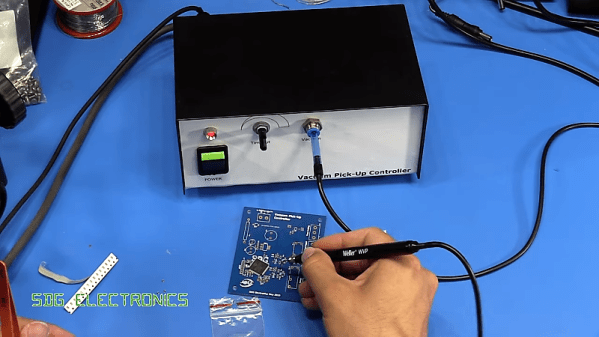
Such circumstances are why vacuum handlers were invented, but useful as they are for picking and placing SMDs, they aren’t perfect. [Steve Gardener]’s sub-optimal experience with such tools led him to build this custom vacuum pick-and-place tool. It’s based on an off-the-shelf Weller unit, of which only the handpiece remains. A bigger, more powerful vacuum pump is joined in a custom enclosure by a PCB with a PIC18F13K22 microcontroller, a power supply, a solenoid to control the vacuum, and a relay to switch the pump. A footswitch starts the pump and closes the vacuum vent; letting off the pedal opens the vent to drop the part, while the pump keeps running for a variable time. This lets him rapidly work through a series of parts without having to build vacuum back up between picks. The video below shows the build and the tool in action.

We love the idea of this tool, and the polished look is pretty slick too. If manual pick-and-place isn’t for you, though, maybe converting a 3D-printer into an automated PnP is something to check out.

Continue reading “Control The Suck With This Manual Vacuum Pick-And-Place Tool”

Hunting Replicants With The 2019 LayerOne Badge

Blade Runner showed us a dystopian megatropolis vision of Los Angeles in the far-off future. What was a distant dream for the 1982 theater-goes (2019) is now our everyday. We know Los Angeles is not perpetually overcast, flying cars are not cruising those skies, and replicants are not hiding among the population. Or… are they?

The LayerOne conference takes place in greater Los Angeles and this year it adopted a Blade Runner theme in honor of that landmark film. My favorite part of the theme was the conference badge modeled after a Voight-Kampff machine. These were used in the film to distinguish replicants from humans, and that’s exactly what this badge does too. In the movies, replicants are tested by asking questions and monitoring their eyes for a reaction — this badge has an optional eye-recognition camera to deliver this effect. Let’s take a look!

Continue reading “Hunting Replicants With The 2019 LayerOne Badge”

Resistance Is Futile, You Want This LED Cube

We’re suckers for a good desk toy here at Hackaday, so this 2019 Hackaday Prize entry from [Jack Flynn] certainly caught our eye. The idea is that by using professionally manufactured dual layer PCBs and only surface mount components, you can create a cube that has an LED matrix on each face and all of the electronics hidden within. We’re not entirely sure if there’s any practical application for such a device, but we know we’d certainly like to have one blinking madly away on our shelf regardless.

Before having any of the PCBs manufactured, [Jack] is putting a considerable amount of thought into the design so he doesn’t end up painting himself info a corner (which is of course eight times as bad when you’re building a cube). By importing the PCB files into OnShape, he’s able to “assemble” a virtual representation of the final product to better understand how everything will fit together. He wants to limit the amount of times the cube will need to be pulled apart, so everything from how it will sit in its 3D printed cradle to the placement of breakaway tabs that ensure the internal power switch is accessible are being carefully planned out.

The current design puts the “brains” on the bottom board, with every other panel holding a daisy-chained MAX7219 to drive its own individual 64 LED matrix. Initially the dimensions of the ATmega328p powered cube will be 42 x 42 x 42 mm, with a total of 384 LEDs. Ultimately, [Jack] hopes the modular nature of the design could allow the size of the cube to be increased, or perhaps even take on a different shape entirely.

Generally the LED cubes we see are of the more wiry variety, so it’s particularly interesting when they take on solid forms like this one. Given the nearly universal popularity of blinking LED gadgets, we think this particular project is well positioned to make the leap from one-off hack to a commercial product.

Continue reading “Resistance Is Futile, You Want This LED Cube”