Review: Sequre SQ-D60 Temperature Controlled Soldering Iron

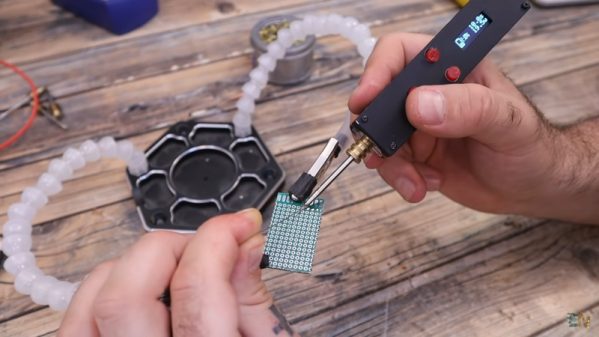
Over the past few years a new class of soldering iron has arisen: a temperature controlled iron no longer tied to a bulky mains-powered base station, but using low-voltage DC power and with all electronics concealed in a svelte handle. First came the Miniware TS100, and then  many more, with slightly different feature sets and at varying price points. We’ve reviewed a few of them over the years, and today we have the most recent contender in the Sequre SQ-D60. It follows the formula closely, but costs only £20 (about $26). This price puts it in an attractive budget category, and its USB-C power option makes it forward-looking over models with barrel jacks. Description over, it’s time to plug it in and put it through its paces.

What’s In The Box?

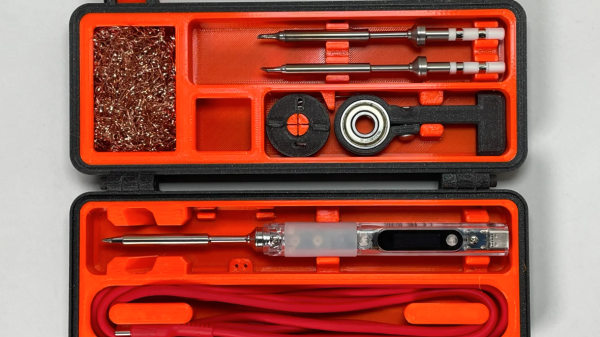
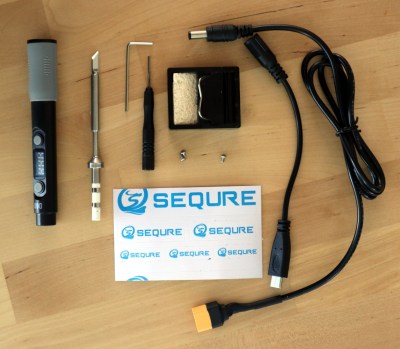
That's a lot of extra bits for a budget iron!
That’s a lot of extra bits for a budget iron!

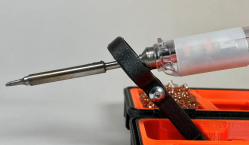
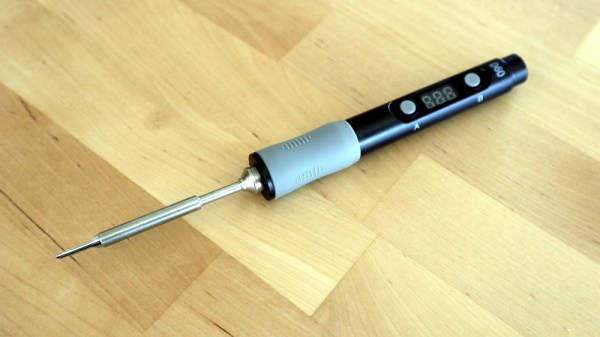
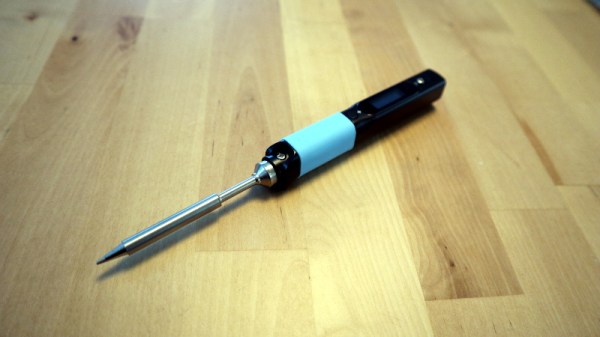
In the box, aside from the handle containing the electronics, were a surprisingly comprehensive array of parts and accessories. The handle itself is similarly-sized to its competitors, being only slightly longer than that of Pine64’s Pinecil. The tip supplied was unexpectedly a slanted chisel, so I may have managed to order incorrectly, though since it shares the same tip design as both the TS100 and the Pinecil I have plenty of alternative tips should I need one. Otherwise there was a little bag of hex screws along with a key and a driver for them, a little stand with a sponge, a set of Sequre stickers, a USB-C to barrel jack cable, and a barrel jack-to-XT60 connector for use with LiPo battery packs. These last two cables are a particularly useful addition.

At first sight the tip doesn’t seem to have any means of being fixed into its socket, but a closer inspection reveals that there is a hex screw hiding underneath a silicone finger sleeve that holds it securely when tightened. The handle has a simple enough interface, with just two buttons and a 3-digit, 7-segment display. Powering it up from a 45 W USB-PD power supply, and it heats up to 300 °C in around ten seconds after pressing one of the buttons. My usual soldering temperature is 360 °C, and it has an interface involving long presses of one of the buttons before they become up and down buttons to select the temperature. In prolonged use the handle doesn’t become noticeably warm, and aside from a slight new-electronics-getting-hot smell there was no immediate concern that it might release magic smoke. Continue reading “Review: Sequre SQ-D60 Temperature Controlled Soldering Iron”

Review: Pine64 Pinecil Soldering Iron

There was a time when decent quality soldering irons were substantial affairs, soldering stations with a chunky base unit containing the electronics and a lightweight handheld iron for the work. That has changed with the arrival of a new breed of microprocessor controlled lightweight handheld irons. There’s a new kid on the block from a company we associate more with open-source phones, laptops, and single board computers, Pine64 have produced the Pinecil. It’s a lightweight handheld iron with some innovative features at an attractive price, but does it raise the bar sufficiently to take on the competition?

I put the Pinecil through its paces, and and although the device is fully open source, give it a teardown for good measure. Spoiler: it’s my new favorite.
Continue reading “Review: Pine64 Pinecil Soldering Iron”

Building An Affordable Press For Heat Set Inserts

If you’re building mechanical assemblies with 3D printed parts, you’ll quickly realize that driving machine screws into thermoplastic isn’t exactly an ideal solution. It can work in a pinch, but you can easily strip the threads if you crank down too hard. The plastic holes can also get worn down from repeated use, which is a problem if you’re working on something that needs to be taken apart and reassembled frequently. In those situations, using brass heat set inserts gives the fasteners something stronger to bite into.

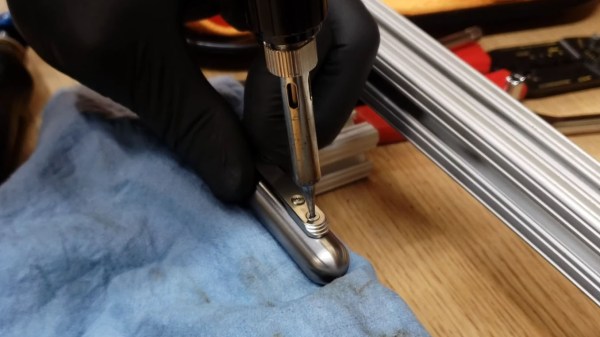
You can install these inserts by hand, but if you plan on doing a lot of them, a dedicated press station like the one [Chris Chimienti] recently put together will save you a lot of aggravation in the long run. In the video after the break he walks viewers through the design and use of the device, which itself relies on a number of 3D printed parts using the very same inserts it’s designed to install.

The spring-loaded arm can slide up and down the extrusion to adjust for height.

To build this tool you’ll need a piece of aluminum extrusion, some smooth rod, a couple springs, and an assortment of fasteners. Nothing that wouldn’t likely be in the parts bin of anyone who’s been tinkering with 3D printers for awhile, though even if you had to buy everything, the Bill of Materials will hardly break the bank. For the base you can use a piece of scrap wood, though [Chris] has opted to make it a storage compartment where he can store the inserts themselves. We really like this approach, but obviously you’ll need to have access to woodworking tools in that case.

Clearly shopping on the top shelf, [Chris] purchased a kit that actually came with a Weller soldering iron and the appropriate tips for the various sized inserts. If you’re like us and just buy the inserts that come in a plastic baggie, you may need to adapt the arm to fit your iron of choice. That said, the idea of having a dedicated iron that you can leave mounted in the press makes a lot of sense to us if you can swing it.

[Joshua Vasquez] wrote up a phenomenal guide to getting started with heat set inserts last year that’s an absolute must-read for anyone interested in the concept. Whether you build a dedicated press or just push them in freehand, his tips and tricks will help insure you get the best result possible.

Continue reading “Building An Affordable Press For Heat Set Inserts”

Simultaneous Soldering Station

Soldering irons are a personal tool. Some folks need them on the cool side, and some like it hot. Getting it right takes some practice and experience, but when you find a tip and temp that works, you stick with it. [Riccardo Pittini] landed somewhere in the middle with his open-source soldering station, Soldering RT1. When you start it up, it asks what temperature you want, and it heats up. Easy-peasy. When you are ready to get fancy, you can plug in a second iron, run off a car battery, record preset temperatures, limit your duty-cycle, and open a serial connection.

The controller has an Arduino bootloader on a 32u4 processor, so it looks like a ProMicro to your computer. The system works with the RT series of Weller tips, which have a comprehensive lineup. [Riccardo] also recreated SMD tweezers, and you can find everything at his Tindie store.

Soldering has a way of bringing out opinions from novices to masters. If we could interview our younger selves, we’d have a few nuggets of wisdom for those know-it-alls. If ergonomics are your priority, check out TS100 3D-printed cases, which is an excellent iron, in our opinion.

Pine Made Phones, Laptops, And Now… Soldering Irons?

The TS100 smart soldering iron may have some new competition. Pine — the people best known for Linux-based phones and laptops — though the world needed another smart soldering iron so they announced the Pinecil — Sort of a knock off of the TS100. It looks like a TS100 and uses the same tips. But it does have some important differences.

It used to be a soldering iron was a pretty simple affair. Plug in one end; don’t touch the other end. But, eventually, things got more complicated and you wanted some way to make it hotter or cooler. Then you wanted the exact temperature with a PID controller. However, until recently, you didn’t care how much processing power your soldering iron had. The TS100 changed that. The smart and portable iron was a game-changer and people not only used it for soldering, but also wrote software to make it do other things. One difference is that the device has a RISC-V CPU. Reportedly, it also has better ergonomics and a USB C connector that allows for UART, I2C, SPI, and USB connections. It also has a very friendly price tag of $24.99.

Continue reading “Pine Made Phones, Laptops, And Now… Soldering Irons?”

Dremel Workstation’s New Job: Applying Threaded Inserts With Cheap Soldering Iron

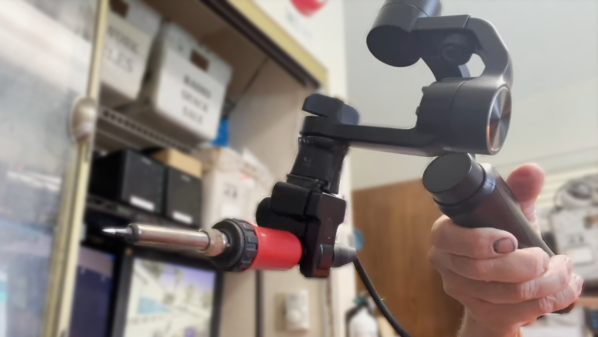
Dremel has been helping people fit square pegs into round holes for years, and [concretedog] saw that the Dremel 220 Workstation — a piece of hardware similar to a drill press — could be convinced to hold a cheap soldering iron just as easily as it holds a rotary tool. A soldering iron makes an effective thermal insert tool, and the job of heating and pressing the threaded metal rings into plastic is made much easier when it can be done similar to operating a drill press. With a few modifications and a 3D-printed adapter, the thermal insert rig was born.

Whenever one is working around a design that already exists, it pays to be flexible and adjust to the unexpected. The Dremel 220 has a holder intended to clamp a rotary tool, and the original plan was to simply design and print an adapter so a soldering iron could sit in place of the rotary tool. That plan changed upon realizing that the entire rotary tool holder disconnected from the tool’s frame with a single bolt. It made much more sense to make the soldering iron replace the rotary tool holder, instead.

The resulting modified soldering iron is mounted via standoffs to a 3D-printed adapter with a copper foil heat shield. [concretedog] admits it’s not ideal from a heat management perspective, but it makes a fine prototype that seems to work well for light duty. The next step would be a metal version.

If you’re intrigued by threaded heat-set inserts, you can learn all about how to use them from Joshua Vasquez’s guide to the handy things. And should you prefer to make your own DIY press from 3D printed parts and off-the-shelf hardware, we have that covered as well.

Why Does Solder Smoke Always Find Your Face?

For some of us the smell of rosin soldering flux vaporizing from the tip of an iron as a project takes shape is as evocative as the scent of a rose on a summer’s day. We’ve certainly breathed enough of it over the years, as it invariably goes from the piece of work directly into the face of the person doing the soldering. This is something that has evidently troubled [AlphaPhoenix], who has gone to extravagant lengths to research the problem using planar laser illumination and a home-made (and possibly hazardous) smoke generator.

He starts with a variety of hypotheses with everything from a human-heat-driven air vortex to the Coandă effect, but draws a blank with each one as he models them using cardboard cut-outs and boxes as well as himself. Finally he has the light bulb moment and discovers that the key to the mystery lies in his arms coming across the bench to hold both iron and solder. They close off an area of lower-pressure dead space which draws the air current containing the smoke towards it, and straight into his face.  It’s something that can be combated with a small fan or perhaps a fume extractor, as despite some video trickery we have yet to master soldering iron telekinesis.

Continue reading “Why Does Solder Smoke Always Find Your Face?”