PCB Hotplate Has Integrated Heating Element Traces

Normally when we talk about PCBs and hotplates, we’re talking about reflowing solder. In this build from [Arnov Sharma], though, the PCB itself is the hotplate!

The idea was to create a compact hotplate for easily reflowing small PCBs. To achieve that, [Arnov] designed a board with a thick coil trace that acts as a heating element. The full coil trace has a resistance of 1.9 ohms, and passing electricity through it generates plenty of heat. Running off a 12 volt supply, the mini hotplate is capable of reaching a maximum temperature of 214°C. Higher voltages can push that figure higher.

The board is intended to self-regulate, with an ATtiny13 onboard and a thermistor to measure temperature. However, in the initial design, this feature didn’t quite work properly. Version 2 is intended to include a better temperature sensor and a OLED screen for displaying the current temperature to the user.

We’ve seen other tiny hotplate builds before, too. They’re great for smaller projects and for hacking on the go! Video after the break.

Continue reading “PCB Hotplate Has Integrated Heating Element Traces”

Whip Up Some Homemade Artisanal Flux

You don’t think much about the power company until you flip the lights on and they don’t come on. The same can be said of soldering flux. You don’t think much about it, usually, until you try soldering without it. Flux has a cleaning action on metal surfaces that allows for a proper solder joint. The problem is, do you have any idea what’s in the flux you are using? We don’t either. [Catsndogs] has a recipe to make your own flux and then you’ll know.

At the heart of rosin flux is basically tree sap. If you live near pine trees, you can source it naturally. If not, you can find it at music instrument stores. Stringed instruments use rosin, so it is readily available. If you do source it yourself, [Catsndogs] reports that it doesn’t matter if it is old or clean.  You do want to pick out as much tree bark and dead ants as you can, though. You essentially dissolve it in alcohol (at least 80% isopropyl or ethanol). Then filter it through filter paper or a coffee filter.

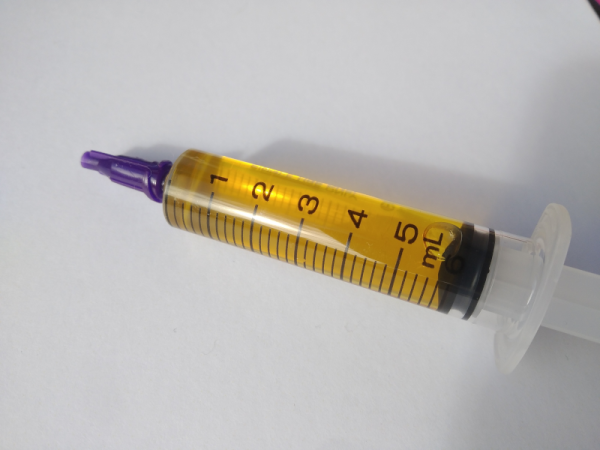
You can adjust the viscosity by allowing the alcohol to evaporate to make the mixture thicker or by adding more alcohol to make it thinner. Thicker flux is good for tacking down SMD parts. As you might expect, this isn’t “no clean” flux. Also, the flux is very flammable, so be careful.

This isn’t the first time we’ve heard of this recipe. Or even the second time. But it is a good reminder that you can make your own free of whatever wacky chemicals are in the commercial preparations.

New controller PCB shown below the original one. The new PCB has an ESP module with an antenna, a lot of support circuitry, and all the same connectors that the original board does.

Controller For 946C Hotplate Adds Reflow Profile Upload Over BLE

Reflow hotplates are a wonderful tool for PCB assembly if you can keep your designs single-sided. The 946C hotplate in particular has been on hackers’ radar for a while – a 200x200mm working surface hotplate available for under $100 is a decent investment. As with other reflow tools, it was a matter of time until someone made a replacement controller for it. This one, you’ll want to keep in mind – it’s a replacement controller project by [Arnaud Durand] and [Elias Rodriguez Martin], called Reflow946.

Keeping to best practices, the board is a drop-in replacement for the stock controller – swap cables over and go. The host processor is an ESP32, and it lets you can program reflow profiles in using BLE, with a Python application to help. The whole design is open-source and on GitHub, of course – keeping with best 3D printing traditions, you can already order the parts and PCBs, and then assemble them using the hotplate you’re about to upgrade. As far as aftermarket controllers go, here’s no doubt this board gives you way more control in reflow and lets you compensate for any possible subpar calibration while at it. Continue reading “Controller For 946C Hotplate Adds Reflow Profile Upload Over BLE”

ESP32 Adds Bluetooth To An IPod Nano

The iPod Nano was one of Apple’s masterworks, but it’s really tied down by its dependence on wired headphones. At least, that’s what [Tucker Osman] must have thought, as he spent an unreasonable amount of time designing a Bluetooth mod for the 3rd gen Nano. And it’s a thing of beauty — temperamental, brutally difficult to build, and fragile in use, but still beautiful. And while some purists try to keep their signal analog, [Tucker]’s coup d’etat is to intercept the iPod’s audio signal before the DAC chip, keeping the entire signal path digital to the Bluetooth speaker. Oh, and he also managed to make the volume and track skip buttons work, back across the wireless void.

Continue reading “ESP32 Adds Bluetooth To An IPod Nano”

A Nitrogen Soldering Iron Review

If you’ve ever welded, you know that some welders blow a shield gas over the work for different reasons. For example, you often use a gas to displace oxygen from the area and avoid oxidation. You can also solder using a nitrogen shield. This allows higher temperatures and a reduction of flux required in the solder. Wave soldering often uses nitrogen, and JBC offers a soldering iron that can employ nitrogen shield gas. [SDG Electronics] puts that iron through its paces in the video below.

As you might expect, this isn’t a $50 soldering iron. The price for the iron is just under $1,000 and that doesn’t include the power supply or the nitrogen source. The nitrogen generator that converts compressed air into nitrogen is particularly expensive so [SDG] just used a cylinder of gas.

Continue reading “A Nitrogen Soldering Iron Review”

NASA Hardware Techniques: Soldering Space Electronics Like It’s 1958

[PeriscopeFilms] on YouTube has many old TV adverts and US government reels archived on their channel, with some really interesting subjects to dive in to. This first one we’re highlighting here is a 1958 film about NASA Soldering Techniques (Video, embedded below), which has some fascinating details about how things were done during the Space Race, and presumably, continue to be done. The overall message about cleanliness couldn’t really be any clearer if they tried — it’s so critical it looks like those chaps in the film spend far more time brushing and cleaning than actually wielding those super clean soldering irons.

Of particular note are some of the details of wire stripping and jointing with components, such as the use of a hot-wire device to remove the insulation from wire, rather than use the kind of stripper we have lying around that cuts into the insulation and slightly distorts the wire in the process. That just won’t do. If they did have to use a cutting-type stripper, it must be precisely the right size for job, and calibrated daily.

The road to the Moon is paved with calibrated wire strippers.

When soldering a pre-tinned wire to a leaded component, a clamp is required to prevent movement of the wire, as is a thermal shunt on the component lead to protect the delicate component from excess heat. They even specify how much to wrap a wire around a terminal to be soldered, never bending the wire more than 180 degrees.

The bottom line in all this is, is that the work must be as perfect as is possible, as there is very little chance of sending someone up to fix a dodgy soldering job, once the assembly is hurtling around the planet. They call it too much of a science to be called an art and too much art to be called a science, and we can sure appreciate that.

As you would expect (and it’s not exactly a big secret) NASA has some very exacting standards for assembly of all hardware, like this great workmanship standard, which is well worth studying. Soldering is an important subject for many of us, we’ve covered the subject of solder metallurgy, as well as looking at how ancient hardware hackers soldered without the benefit of much modern knowledge.

Continue reading “NASA Hardware Techniques: Soldering Space Electronics Like It’s 1958”

Fix Every Broken Via To Return This Game To Life

We all know the havoc that water in the wrong place can do to a piece of electronics, and thus we’ve probably all had devices damaged beyond repair. Should [Solderking] have thrown away the water-damaged PCB from a Nintendo Pokemon Ruby cartridge? Of course he should, but when faced with a board on which all vias had succumbed to corrosion he took the less obvious path and repaired them.

Aside from some very fine soldering in the video below the break there’s little unexpected. He removes the parts and tries a spot of reworking, but the reassembled board doesn’t boot. So he removes them again and this time sands it back to copper. There follows a repair of every single vial on the board, sticking fine wires through the holes into a sponge and soldering the top, before turning it over and fixing the forest of wires on the other side. Fixing the ROM results in a rather challenging fitment involving the chip being mounted at an angle and extra wires going to its pads, which demonstrates the value in this story. It’s not one of monetary value but of persevering with some epic rework to achieve a PCB which eventually boots. Of course a replacement board would make more sense. But that’s not the point, is it?

Continue reading “Fix Every Broken Via To Return This Game To Life”