The 128 Button, 6 Axis, 17 Slider, 4 POV Hat Switch Joystick Controller

stick

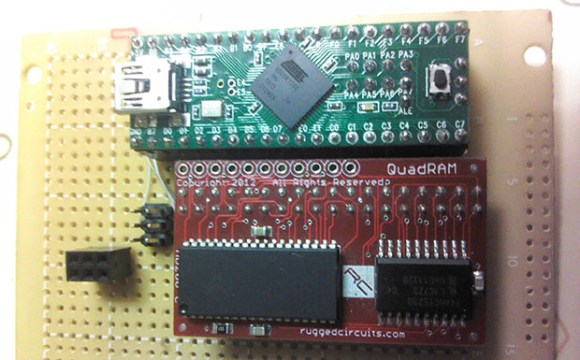
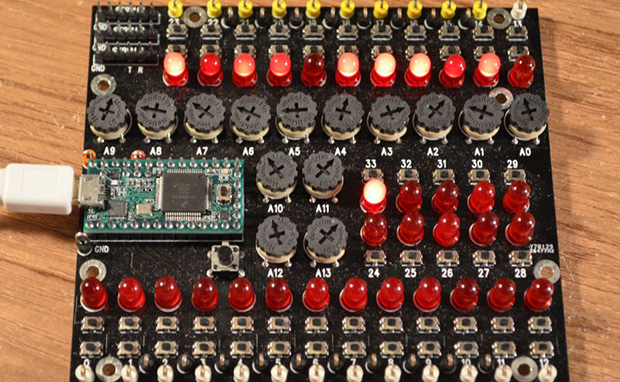
[Paul Stoffregen], creator of the Teensy series of dev boards, previously implemented a six-axis joystick for Teensyduino, the Arduino library for the Teensy. He had originally tried 8 axes, but a few problems cropped up, deadlines approached, and he left it as is. A few recent projects gave him some insight into how to implement a joystick with more than six axes as a USB HID device, so he started looking at how to read an improbable amount of pots and buttons for a USB joystick.

So far, the biggest problem is figuring out what software can actually use an HID joystick with this many controls. The answer to that question is none. The Linux-based jstest-gtk is able to read 6+17 pots, the four hat switches, but only 64 of the 128 buttons. A user on the Teensy forums, [Pointy], has been working on his own joystick test app that works on Linux Windows, but testing the joystick on Windows is an exercise in futility for reasons no one can figure out.

As for why anyone would want a six-axis, 17-slider, 128-button joystick, think about this: with this much control, it would be relatively simple to build the MIDI controller to end all MIDI controllers, or a cockpit simulator for everything from a C172, 737, to a Kerbal interplanetary cruiser. That’s an impressive amount of control, and all from a $20 Teensy dev board.

Further testing of this Teensy joystick is desperately needed, so if you’re able to help out drop a note in the forum thread.

A USB Connected Box-o-Encoders

picoscope-encoder

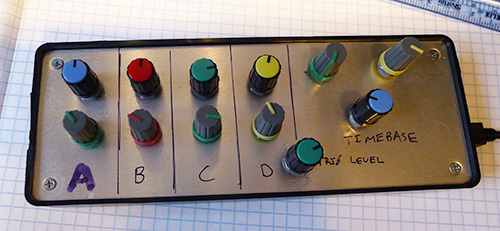
[Colin] loves his PicoScope, a USB based “headless” oscilloscope. While using it he found himself longing for a classic oscilloscope interface. Mouse clicks just weren’t a replacement for grabbing a dial and twisting it. To correct the situation he created his USB-Connected Box-o-Encoders. The box maps as a USB keyboard, so it will work with almost any program.

[Colin] started by finding encoders. There are plenty of choices – splined or flatted shaft, detents or no detents, panel, PCB, or chassis mount. He settled on an encoder from Bourns Inc. which uses an 18 spline shaft. His encoder also includes a push button switch for selection. With encoders down, knobs were next. [Colin] chose two distinct styles. The two knob styles aren’t just decorative. The user can tell which row of knobs they are on by touch alone. Electronics were made simple with the use of a Teensy++ 2.0. [Colin] used a ATUSBKey device running Teensy software, but says the Teensy would have been a much better choice in terms of size and simplicity.

Once everything was wired into the box, [Colin] found his encoders would “spin” when the knobs were turned. They are actually designed to be PCB mounted, and then screwed into a control panel. Attempts to tighten down the panel mounting nut resulted in a broken encoder. Rather than redesign with purely panel mounted encoders, [Colin] used a dab of epoxy to hold the encoder body in place.

Continue reading “A USB Connected Box-o-Encoders”

Satisfying Way To ‘Build’ Projects

build button 01_27

When you’re writing code for your next big creation, chances are that you build/debug the project 100’s of times a day. Sure, the keyboard hotkey gets the job done, but is it really that satisfying? [Victor] sends in this quick project on turning an Emergency Stop Push button into a ‘Build’ button.

From the looks of it, this project uses a Teensy 2.0, which sports an ATMEGA32U4. Since this part features a USB controller, it is a piece of cake to get it to mimic a keyboard. The circuit is also very simple; the pushbutton contacts are wired from ground to a digital input. On detection of a ‘press’, the Teensy will send out the keyboard combination to build your project: Ctrl-B, F7, etc… If you prefer working within the Arduino IDE, this could upload sketches as well (Ctrl-U).

Adding a little fun to ‘building’ your projects does come at a cost though. Besides forfeiting a Teensy, you also have to give up a precious USB port. [Victor] does mention Bluetooth, but that could break your budget for this sort of project. A possible alternative to the Teensy could be to implement Virtual USB on a low-cost standalone Arduino.

Continue reading “Satisfying Way To ‘Build’ Projects”

Meet The Teensy 3.1

[Paul Stoffregen] just released an updated version of his Teensy 3.0, meet the oddly named Teensy 3.1. For our readers that don’t recall, the Teensy 3.0 is a 32 bit ARM Cortex-M4 based development platform supported by the Arduino IDE (using the Teensyduino add-on). The newest version has the same size, shape & pinout, is compatible with code written for the Teensy 3.0 and provides several new features as well.

The Flash has doubled, the RAM has quadrupled (from 16K to 64K) allowing much more advanced applications. The Cortex-M4 core frequency is 72MHz (48MHz on the Teensy 3.0) and the digital inputs are 5V volts compatible. Pins 3 and 4 gained CAN bus functions. The new microcontroller used even has a 12 bits Digital to Analog Converter (DAC) so you could create a simple signal generator like the one shown in the picture above. Programming is done through the USB port, which can later behave as host or slave once your application is launched. Finally, the price tag ($19.80) is in our opinion very reasonable.

Embedded below is an interview with its creator [Paul Stroffregen].

Continue reading “Meet The Teensy 3.1”

GameBoy Color Costume

game boy costume

Okay, okay. We know it’s November now, but when [John] sent this project in, we just had to share it. He made a fully functional Gameboy Color costume!

The costume makes use of a Raspberry Pi (located on his back), running RetroPie, which is an open source project dedicated to creating a universal console emulator.  To create the controllers he used two Teensy microcontrollers in his gloves, setup to emulate two USB keyboards on the Pi. Since he’s using Teensy 3.0, it supports capacitive touch sensing, so all he had to do was wire pieces of aluminum to the input pins to create touch-sensitive metal buttons on the gloves. He then slapped a cheap 10″ LCD from Adafruit onto his chest, stuffed a few 12V LiPo batteries in his pockets, and was ready to be the hit of any party he went to.

The costume was a great success, although a pesky pair of Mario and Luigi kept holding his hands all night… Stick around after the break to see a demonstration video!

Continue reading “GameBoy Color Costume”

The Greenest Wall-Powered Clock

clock

Some of the most inefficient appliances in the home are AC mains-powered clocks. You can’t exactly turn them off and they use a whole lot of energy considering how often they’re looked at. [t3andy] came up with a great low power AC Mains clock that is only on 3% of the time. As a neat bonus, it also looks really, really cool.

[t3andy] is using a Teensy 3 as the brains of this clock, and the serial interface on the board provides a relatively easy means of setting the time without having to use buttons or tact switches. The clock face consists of 13 neopixels, with two red pixels showing the hour and a single green pixel showing the minutes. The time is measured with a DS3232 I2C real time clock with a battery backup.

The design is remarkably efficient since the LEDs are off 97% of the time, only being lit at the top of the minute. There are provisions for IR control and a PIR sensor to display the time whenever it’s needed, but that would obviously mean a hit to the energy efficiency.

A 23 Feet Tall Pyramid With 0.31 Mile Of LED Strips

This year the Disorient Camp at Burning Man built a 7m tall pyramid with over half a kilometer of LED strips. For this special occasion several artists had developed patterns for this massive LED display, animating the parties happening every night in front of this build.

To handle the dusty environment, a Toughbook was running the pyramid’s main code, which was rendering the animation frames to 24-bit bitmaps and sending them over UDP to the network. For each face of the pyramid, a $45 BeagleBone Black running a dedicated program was slicing the images into the individual panels. Finally, each panel composed of eight WS281x LED strips was driven by a Teensy 3.0 microcontroller, receiving the piece to display by USB from the BeagleBone. To power the pyramid, 5V 40A power supplies were used for the tall panels, 5V 30A power supplies for the smaller ones.

Unsurprisingly, many of the power supplies failed due to the heat and dust.  The adhesive holding the LED strips also failed, and some screw terminals rattled loose from the 25KW sound system, requiring constant maintenance. Nevertheless, the sixteen thousand LEDs sure made quite an impression.

If anyone attending Burning Man managed to capture video of this thing in action we’d love to see it. Leave a link in the comments.