Simple Sprite Routines Ease Handheld Gaming DIY

Making your own handheld games is made much easier with [David Johnson-Davies’] simple sprite routines for the Adafruit PyBadge and PyGamer boards. Sprites can be thought of as small, fixed-size graphical objects that are drawn, erased, moved, and checked for collision with other screen elements.

xorSprite() plots an 8×8 sprite, moveSprite() moves a given sprite by one pixel without any flicker, and hitSprite() checks a sprite for collision with any screen elements in a given color. That is all it takes to implement a simple game, and [David] makes them easy to use, even providing a demo program in the form of the rolling ball maze shown here.

These routines work out-of-the-box with the PyBadge and PyGamer, but should be easy to adapt to any TFT display based on the ST7735 controller. The PyGamer is the board shown here, but you can see the PyBadge as it was used to create an MQTT-enabled conference badge.

If you really want to take a trip down the rabbit hole of sprite-based gaming graphics, you simply can’t miss hearing about the system [Sprite_TM] built into the FPGA Game Boy badge.

Five Channel Monitor Keeps Boat Batteries Shipshape

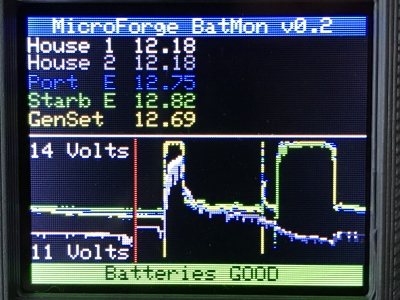
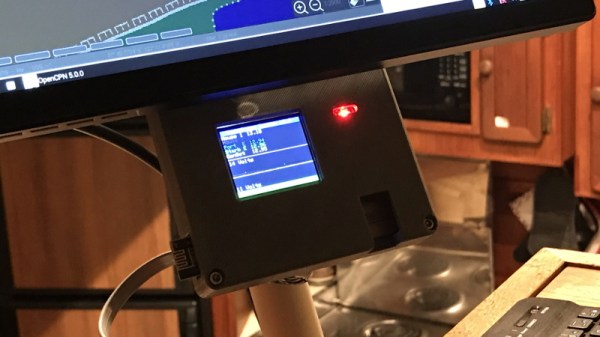
While those of us stuck sailing desks might not be able to truly appreciate the problem, [Timo Birnschein] was tired of finding that some of the batteries aboard his boat had gone flat. He wanted some way to check the voltage on all of the the batteries in the system simultaneously and display the information in a central location, and not liking anything on the commercial market he decided to build it himself.

Even for those who don’t hear the call of the sea, this is a potentially useful project. Any system that has multiple batteries could benefit from a central monitor that can show you voltages at a glance, but [Timo] is actually going one better than that. With the addition of a nRF24 module, the battery monitor will also be able to wireless transmit the status of the batteries to…something. He actually hasn’t implemented that feature yet, but some way of getting the data into the computer so it can be graphed over time seems like a natural application.

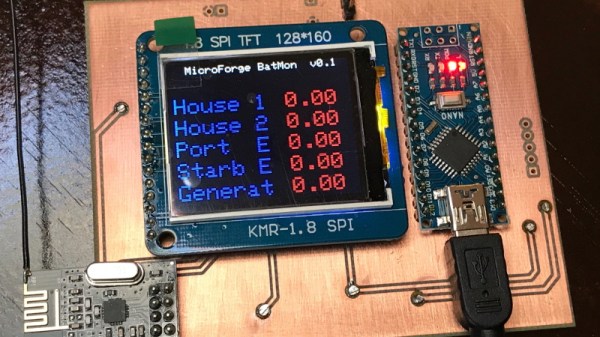
The bill of materials is pretty short on this one. Beyond the aforementioned nRF24 module, the current version of the monitor features an Arduino Nano clone, a 128×160 SPI TFT display, and a handful of passives.

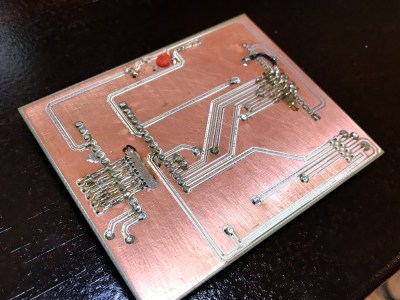
Knowing that a perfboard wouldn’t last long on the high seas, [Timo] even routed his own PCB for this project. We suspect there’s some kind of watertight enclosure in this board’s future, but it looks like things are still in the early phases. It will be interesting to follow along with this one and see how it eventually gets integrated in to the boat’s electrical system.

If you’re looking for a way to keep an eye on the voltages aboard your land ship, this battery monitor disguised as an automotive relay is still the high-water mark in our book.

Jigsaw puzzle with timer

Your Puzzle’s Done When The Electronics Says So

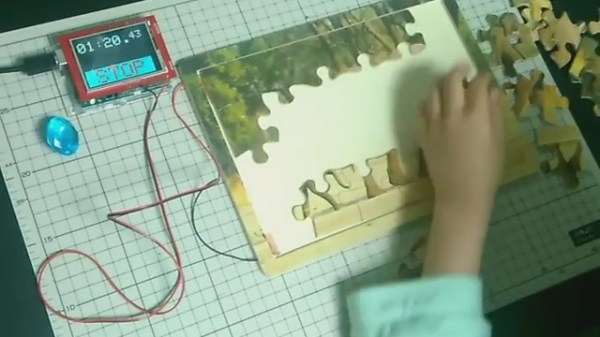
We can race against the clock when assembling jigsaw puzzles online but what about competing against each other in the real world? [HomeMadeGarbage] came up with the simplest of solutions with his jigsaw puzzle timer that stops only when the puzzle’s completely assembled.

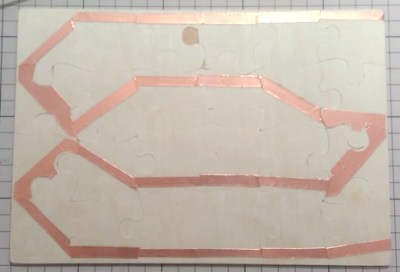
Copper strip on back of puzzle

His simple solution was to attach copper foil tape to the back of the pieces, with overlap. He did this in a serpentine pattern to ensure that all pieces had a strip of the tape. The puzzle he used comes with a special container to assemble it in. At two corners of that container, he put two more pieces of copper foil, to which he soldered wires. Those two act as a switch. Only when the puzzle is completed will those two pieces be connected through the serpentine strip on the back of the puzzle.

Next, he needed a timer. The two wires from the puzzle container go to an Arduino UNO which uses an ILI9325 touch panel TFT display for both the start, stop, and reset buttons, and to show the time elapsed. Press the touch screen when it says START and begin assembling the puzzle. When the last piece is inserted, the serpentine strip of copper tape completes the circuit and only then does the Arduino program stop the timer. As you can see from the video below, the result makes doing the puzzle lots of fun.

Continue reading “Your Puzzle’s Done When The Electronics Says So”

ESP32 Display Is Worth A Thousand Words

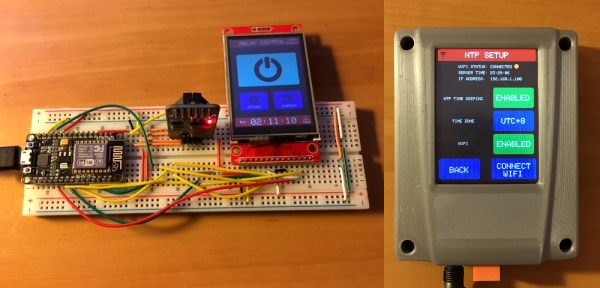
The ESP32 is the successor to the wildly popular ESP8266. There seems to be no end to what the chips can do. However, despite all the wireless communication capabilities, the module doesn’t have a display. [G6EJD] wanted to connect an ILI9341 TFT display and he put the code and information on GitHub. You can also see a video of his work, below.

Since the display uses a serial interface, there isn’t much wiring required. The Adafruit GFX library does the heavy lifting, utilizing the SPI library for the actual communications. The first demo shown on the hardware can pull weather data decoded. If you want more details on the display’s operation, check out [G6EJD’s] YouTube channel and you’ll find other videos that go into more detail.

We’ve seen these displays married to an ESP8266 with an integrated PCB, too. There’s a choice of libraries, and perhaps we’ll see a similar range of choice for the ESP32.

Continue reading “ESP32 Display Is Worth A Thousand Words”

Everyone Loves Faster ESP8266 TFT Libs

Reader [Jasper] writes in with glowing praise for the TFT_eSPI library for the ESP8266 and the various cheap 480×320 TFT displays (ILI9341, ILI9163, ST7735, S6D02A1, etc.) that support SPI mode. It’s a drop-in replacement for the Adafruit GFX and driver libraries, so you don’t need to rework your code to take advantage of it. If you’re looking to drive an LCD screen with an ESP8266 and Arduino, check this out for sure.

As a testbed, [Jasper] ported his Tick Tock Timer project over to the new library. He got a sevenfold increase in draw speed, going from 500 ms to 76 ms. That’s the difference between a refresh that’s visibly slow, and one that looks like it happens instantly. Sweet.

Improving software infrastructure isn’t one of the sexiest or most visible hacks, but it can touch the lives of many hackers. How many projects have we featured with an ESP8266 and a screen? Thanks, [Bodmer] for the good work, and [Jasper] for bringing it to our attention.

Students Set Sights On DIY Eye Exams

What if you could give yourself a standard eye exam at home? That’s the idea behind [Joel, Margot, and Yuchen]’s final project for [Bruce Land]’s ECE 4760—simulating the standard Snellen eye chart that tests visual acuity from an actual or simulated distance of 20 feet.

This test is a bit different, though. Letters are presented one by one on a TFT display, and the user must identify each letter by speaking into a microphone. As long as the user guesses correctly, the system shows smaller and smaller letters until the size equivalent to the 20/20 line of the Snellen chart is reached.

Since the project relies on speech recognition, the group had to consider things like background noise and the differences in human voices. They use a bandpass filter to screen out frequencies that fall outside the human vocal range. In order to determine the letter spoken, the PIC32 collects the first 256 and last 256 samples, stores them in two arrays, and performs FFT on the first set. The second set of samples undergoe Mel transformation, which helps the PIC assess the sample logarithmically. Finally, the system determines whether it should show a new letter at the same size, a new letter at a smaller size, or end the exam.

While this is not meant to replace eye exams done by certified professionals, it is an interesting project that is true to the principles of the Snellen eye chart. The only thing that might make this better is an e-ink display to make the letters crisp. We’d like to see Snellen’s tumbling E chart implemented as well for children who don’t yet know the alphabet, although that would probably require a vastly different input method. Be sure to check out the demonstration video after the break.

Don’t know who [Bruce Land] is? Of course he’s an esteemed Senior Lecturer at Cornell University. But he’s also extremely active on Hackaday.io, has many great embedded engineering lectures you can watch free-of-charge, and every year we look forward to seeing the projects — like this one — dreamed and realized by his students. Do you have final projects of your own to show off? Don’t be shy about sending in a tip!

Continue reading “Students Set Sights On DIY Eye Exams”

Optimizing AVR LCD Libraries

A while ago, [Paul Stoffregen], the creator of the Teensy family of microcontrollers dug into the most popular Arduino library for driving TFT LCDs. The Teensy isn’t an Arduino – it’s much faster – but [Paul]’s library does everything more efficiently.

Even when using a standard Arduino, there are still speed and efficiency gains to be made when driving a TFT. [Xark] recently released his re-mix of the Adafruit GFX library and LCD drivers. It’s several times faster than the Adafruit library, so just in case you haven’t moved on the Teensy platform yet, this is the way to use one of these repurposed cell phone displays.

After reading about [Paul]’s experience with improving the TFT library for the Teensy, [Xark] grabbed an Arduino, an LCD, and an Open Workbench Logic Sniffer to see where the inefficiencies in the Adafruit library were. These displays are driven via SPI, where the clock signal goes low for every byte shifted out over the data line. With the Adafruit library, there was a lot of wasted time in between each clock signal, and with the right code the performance could be improved dramatically.

The writeup on how [Xark] improved the code for these displays is fantastic, and the results are impressive; he can fill a screen with pixels at about 13FPS, making games that don’t redraw too much of the screen at any one time a real possibility.