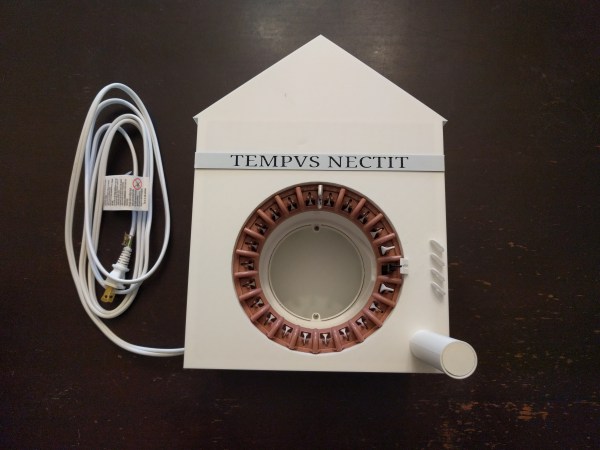
A white, house-shaped clock with the words "TEMPUS NECTIT" written in faux Roman script in black on a strip of silver at the base of the "roof." a white power cord extends from the left of the enclosure, and the center of the clock is a 22 pin knitting machine wheel with one pin covered in silver metalic. A white plastic peg extends from the bottom right of the enclosure to hold the feedstock yarn.

Tempus Nectit, A DIY Knitting Clock With Instructions

We’re no strangers to unusual clocks here at Hackaday, and some of our favorites make time a little more tangible like [Kyle Rankin]’s knitting clock.

Inspired by our coverage of [Siren Elise Wilhelmsen]’s knitting clock, [Rankin] decided to build one of his own. Since details on the build from the original artist were sparse, he had to reverse engineer how the device worked. He identified that a knitting clock is essentially a knitting machine with a stepper motor replacing the hand crank.

Using a Raspberry Pi with an Adafruit motor hat connected to a stepper motor and a 3D printed motor adapter, [Rankin] was able to drive the knitting machine to do a complete round of knitting every twelve hours. By marking one of the knitting pegs as an hour hand, the clock works as a traditional clock in addition to its year-long knitting task. [Rankin] says he still has some fine tuning to work on, but that he’s happy to have had the chance to combine so many of his interests into a single project.

If you’re looking for more knitting hacks, check out this knitted keyboard instrument or a knitted circuit board.

Continue reading “Tempus Nectit, A DIY Knitting Clock With Instructions”

A white clock with a house profile sits on a variegated grey background. A yellow skein of yarn sits on the top left side of the clock feeding into a circular loom that takes up the bulk of the center. A yellow scarf extends out the back of the clock and out of frame below the image.

Knitting Clock Makes You A Scarf For Next Year

Time got a little wibbly wobbly during these pandemic years. Perhaps we would’ve had a more tangible connection to it if [Siren Elise Wilhelmsen]’s knitting clock had been in our living rooms.

Over the course of a year, [Wilhelmsen]’s clock can stitch a two meter scarf by performing a stitch every half hour. She says, “Time is an ever forward-moving force and I wanted to make a clock based on times true nature, more than the numbers we have attached to it.” Making the invisible visible isn’t always an easy feat, but seeing a clock grow a scarf is reminiscent of cartoon characters growing a beard to organically communicate the passage of time.

We’d love some more details about the knitting machine itself, but that seems like it wasn’t the focus of the project. A very small run of these along with a couple prototypes were built, with a knitting grandfather clock now occupying the lobby of The Thief hotel in Oslo.

If you’re looking for more knitting machines, checkout this Knitting Machine Rebuild or Knitting 3D Models Into Stuffies.

Continue reading “Knitting Clock Makes You A Scarf For Next Year”

Network Time Protocol On The ESP32

Network Time Protocol (NTP) is one of the best ways to keep networked computers synchronized to the same time. It’s simple, lightweight, and not only allows computers to maintain a time standard together, but it also allows some computer manufacturers to save some money on hardware costs. The Raspberry Pi is perhaps the most well-known example of a low-cost computer without the extra expense of a real-time clock (RTC). While the Pi sets up NTP essentially automatically, other microcontrollers like the ESP32 don’t, but it is possible to configure them to use this time standard with some work.

For this project the MicroPython implementation for the ESP32 is required. MicroPython is a way of running Python code on microcontrollers or other embedded systems without all of the overhead that Python would normally require. Luckily enough, the NTP libraries are built right in so once MicroPython is running on the ESP32 it’s nearly as easy as calling the library. Of course you will have to make sure there is an internet connection, and then grab the time, sync it to the machine, and then set the timezone.

For a bonus exercise, the project’s creator [Bhavesh] suggests attempting to configure Daylight Savings Time, although this can be a surprisingly difficult problem to solve. In the meantime, there are a few other ways of installing a clock on a microcontroller like this one. An RTC module is an obvious choice, but you can also get incredibly accurate time by using a GPS module as well.

NTP Server Gets Time From Space

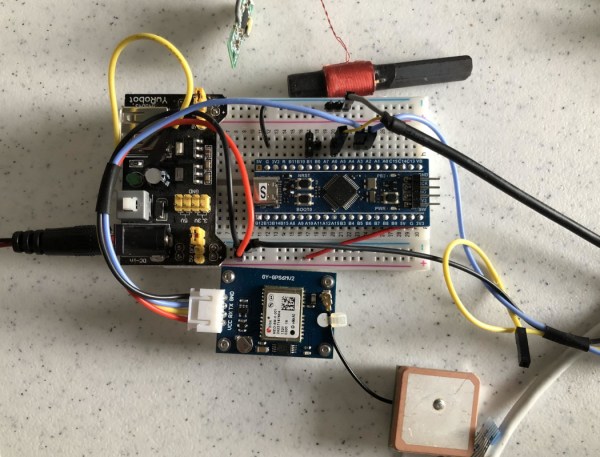
Cheap GPS units are readily available nowadays, which is great if you have something that needs to be very precisely located. Finding the position of things is one of many uses for GPS, though. There are plenty of ways to take advantage of some of the ancillary tools that the GPS uses to determine location. In this case it’s using the precise timekeeping abilities of the satellites to build a microsecond-accurate network time protocol (NTP) server.

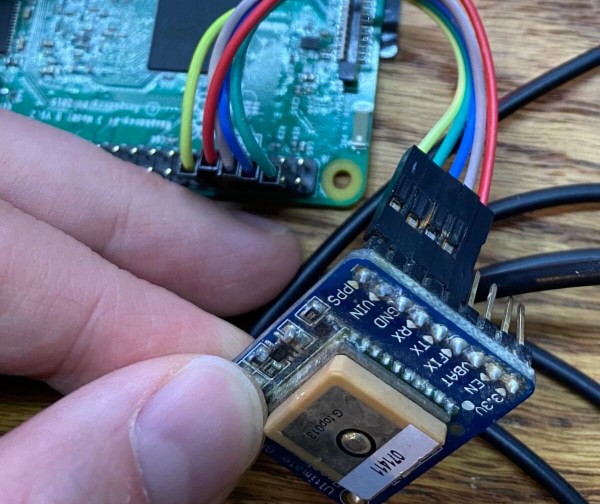
GPS works by triangulating position between a receiver and a number of satellites, but since the satellites are constantly moving an incredibly precise timing signal is needed in order to accurately determine location from all of these variables. This build simply teases out that time information from the satellite network and ignores the location data. There are only two parts to this build, a cheap GPS receiver and a Raspberry Pi, but [Austin] goes into great detail about how to set up the software side as well including installing PPS, GPSd, and then setting up the actual NTP server on the Pi.

While this is an excellent way to self-host your own NTP server if you don’t have Internet access (or just want to do it yourself), [Austin] does note that this is probably overkill on timekeeping as far as accuracy goes. On the other hand, the Raspberry Pi has no built-in real time clock of its own, so this might actually be a cost-competitive way of timekeeping even when compared to something more traditional like a DS3231 RTC module.

Continue reading “NTP Server Gets Time From Space”

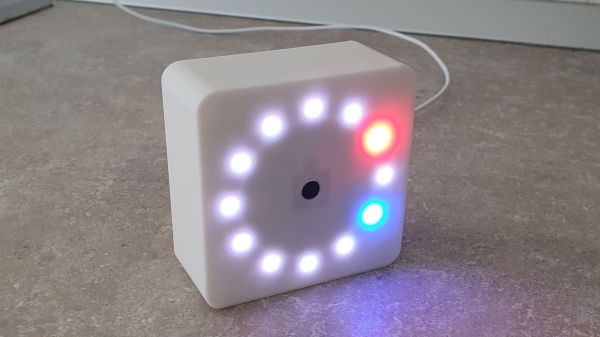
an image of maketime showing the current time

Unique Clock Doubles As A Development Board

Most clocks these days have ditched the round face and instead prefer to tell time through the medium of 7-segment displays. [mihai.cuciuc] is bringing the round face to digital clocks with his time-keeping piece, MakeTime.

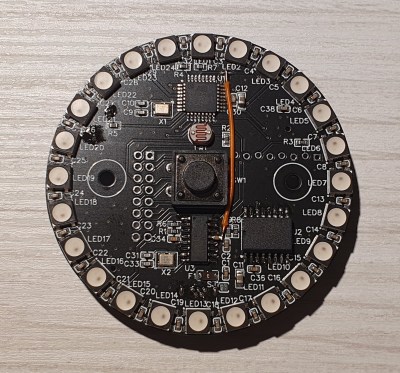
MakeTime's custom PCBMakeTime serves two purposes, the first and most obvious one is as a clock. Rather than displaying the time with digits, MakeTime harkens back to round dial clocks by illuminating RGB LEDs along its perimeter to show the position of the minute and hour “hands”. By using 24 LEDs, MakeTime achieves a timing granularity of 2.5 minutes.

The second purpose is as a development platform. [mihai.cuciuc] designed the clock with hacking in mind, opting to build it with components that many are already familiar with, such as a DS3231 RTC and WS2812 LEDs. To make the entire thing Arduino compatible, the microcontroller is an AtMega 328P, that can be connected to through the micro-USB port and CH340 USB-UART IC. If MakeTime outlives its time as a clock, all of the unused GPIO of the 328P are broken out to a single pin header, allowing it to be repurposed in other projects for years to come.

It seems like everyone is making their own unique timekeeping device these days. Check out the clock made out of ammeters we covered last week.

A Perfect Clock For Any Hacker’s Ohm

The vast majority of us are satisfied with a standard, base ten display for representing time. Fewer of us like to be a bit old-fashioned and use a dial with a couple of hands that indicate the time, modulo twelve. And an even smaller minority, with a true love for the esoteric, are a fan of binary readouts. Well, there’s a new time-telling game in town, and as far as we’re concerned it’s one of the best ones yet: resistor color codes.

The Ohm Clock is, as you may have guessed, a giant model of a resistor that uses its color bands to represent time.  Each of the four bands represents a digit in the standard HH:MM representation of time, and for anybody well-versed in resistor codes this is sure to be a breeze to read. The clock itself was designed by [John Bradnam]. It’s body is 3D printed, with RGB LEDs to brightly illuminate each segment. The whole thing is controlled by an old favorite – an ATtiny, supported by a Real Time Clock (RTC) chip for accurate timekeeping.

You can set the time in the traditional fashion using buttons, or — and here’s the brilliant part — you can use a resistor. Yup, that’s right. Connecting a 220 Ohm resistor across two terminals on the clock will set the time to 2:20. Genius.

When you come across an art as old as timekeeping, it’s easy to assume that everything’s already been done. We have sundials, hourglasses, analog clocks, digital watches, those cool clocks that use words instead of numbers, the list goes on. That’s why it’s so exciting to see a new (and fun!) idea like this one emerge.

This DIY Split-Flap Display Does Both Time And Weather

With little more than four economical stepper motors, a Raspberry Pi Zero, and a 3D printer, [Thomas Barlow] made himself an awfully slick Smart Flip Clock that can display not only the time, but also weather data as well. This is done by adding a few extra graphics to some of the split-flaps, so numbers can also be used to indicate temperature and weather conditions succinctly. Displaying the time has to do without a colon (so 5:18 displays as 518), but being able to show temperature and weather conditions more than makes up for it.

32 degrees and a mix of sun and cloud

According to the project’s GitHub repository, it looks as though each split-flap has thirteen unique positions. The first ten are for numerals 0 through 9, and the rest are either blank, or used to make up a few different weather icons with different combinations. A Python script runs on the Raspberry Pi and retrieves weather data from OpenWeather, and the GPIO header drives the display via four geared stepper motors and driver boards. The rest of the hardware is 3D printed, and [Thomas] helpfully provides CAD models in STEP format alongside the STL files.

The basic design of a split-flap display is really quite versatile, and enterprising hackers have been putting delightful new twists on them for years. There has been a split-flap display used as a kind of flip-book animation, and we’ve also had the pleasure of seeing an entire Tarot deck used for esoteric, automated readings.