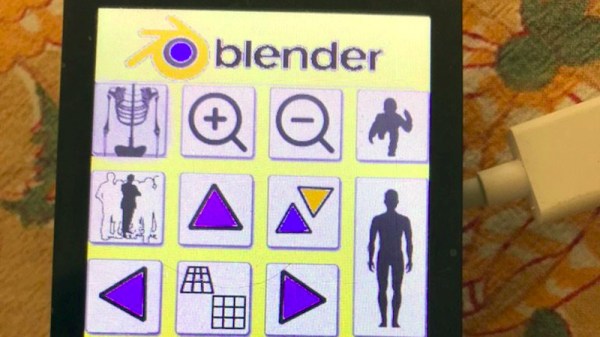
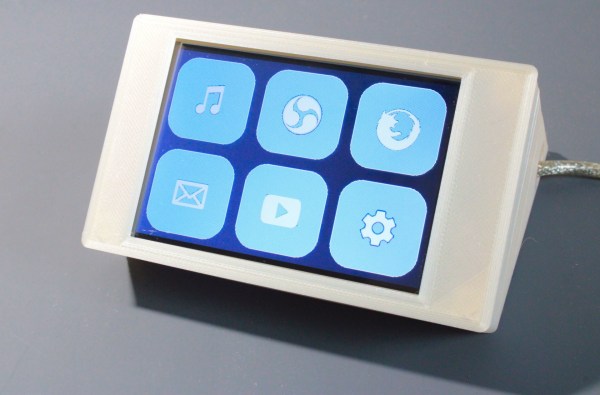
The need to provide custom controls for complex software packages has been satisfied in many ways, the most usual of which is to have a configurable keypad. It’s a challenge [Meir Michanie] has taken up in a slightly different way, by creating a custom touch-screen macro pad. Unlike the buttons, this allows entirely custom layouts with different shaped keys in any configuration.
At its heart is a versatile ESP32 touch screen development board of the type that can be found easily among the pages of your favorite online electronics mart. The Arduino IDE has been used to program the device, and configuration is as simple of providing it with a PNG of the desired layout, and a CSV file to define the buttons. The whole then connects via BLE where it’s presented to the host computer as a keyboard. The result is one of the coolest macro pads we’ve ever seen, with a limitless number of options.
With such a neat idea it’s perhaps no surprise among the numbers of macro pads that have made it to these pages there might be another take on the same idea.
One look at the default Winamp skin is sure to reawaken fond memories for a certain segment of the community. For those who experienced the MP3 revolution first hand, few audio players stick out in the mind like Winamp and its llama whipping reputation. No, the proprietary Windows-only media player isn’t the sort of thing you’d catch us recommending these days; but it was the 1990s, and things were very different.
For those who want to relive those heady peer-to-peer days, [Tim C] has posted a tutorial on how to turn Adafruit’s PyPortal into a touch screen MP3 player that faithfully recreates the classic Winamp look. As you can see in the video below it certainly nails the visuals, down to the slightly jerky scrolling of the green track info which we’re only now realizing was probably the developer’s attempt to mimic some kind of a physical display like a VFD.
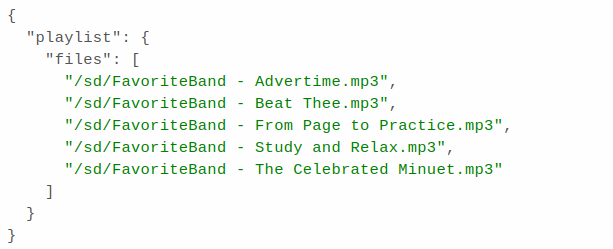
With minimal UI functionality, playlists must be created manually.
[Tim] has even included support for original Winamp themes, although as you might expect, some hoop-jumping is required. In this case, it’s a Python script that you have to run against an image of the original skin pulled from the Winamp Skin Museum. From there, you just need to edit a couple of lines of code to point the player at the right skin files. In other words, switching between skins is kind of a hassle, but you should at least be able to get your favorite flavor from back in the day up and running.
But before you get too excited, there’s a bit of a catch. For one thing, the Winamp UI isn’t actually functional. You can tap the top section of the screen to pause the playback, and tapping down in the lower playlist area lets you change songs, but all the individual buttons and that iconic visual equalizer are just for show. Managing your playlists also requires you to manually edit a JSON file, which even in the 1990s we would have thought was pretty wack, to use the parlance of the times.
Of course, things could easily be streamlined a bit with further revisions to the code, and since [Tim] has released it into the public domain under the Unlicense, anyone can help out. As it stands, it’s still a very slick media display that we certainly wouldn’t mind having on our desk.
Weather is one of those things that seems to be endlessly interesting to hackers. We may decry the notion that weather can be accurately predicted two days out, much less seven, but if there’s an extended forecast available, by gosh we’re gonna take a gander at it.
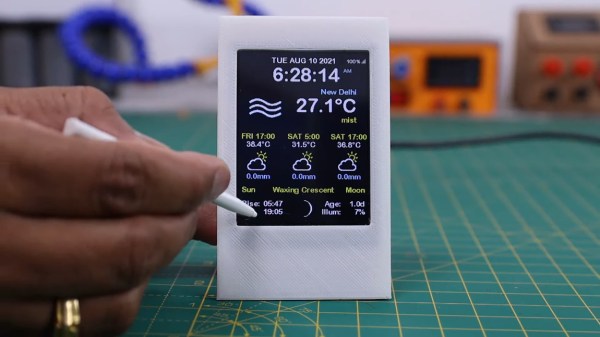
So why pick up your phone or open a browser tab every time you want to check the temperature? If you’re so into it, you should build a desktop weather widget. [opengreenenergy] has written a great guide to a tidy build of this classic and oh-so-useful project that covers everything from the soldering to obtaining an API key. Inside is an ESP8266 and a 2.8″ touch screen display that shows localized conditions via Open Weather Map. The main screen shows the time, date, current weather, 7-day forecast, and the moon phase for each day, and subsequent screens go into further detail. It’s informative without being busy.
We love the streamlined look of the snap-fit enclosure. This may be a fairly simple project, but the build as designed is challenging due to the space constraints inside. Check out the video after the break, which features the venerable Stickvise.
It probably won’t surprise you to find out that a 1989 BMW 325i doesn’t have much in the way of electronic gadgetry onboard. In fact, what passes for an in-dash “computer” in this vintage Beemer is just a digital clock with a rudimentary calendar function. Not content to waste his precious dashboard space any longer, [Ryan Henderson] used his time in quarantine to replace the clock module with a Raspberry Pi.
Nestled in a custom laser-cut housing is a touch screen LCD module that connects directly to the GPIO header of a Pi Zero. Combined with some Python code, this provides a very slick multipurpose interface for pretty much anything [Ryan] wants. Right now he’s got it hooked up to a GPS receiver so he can figure out things like speed and acceleration, but the only real limit on what this little drop-in upgrade can do is how much code you want to sit down and write.
[Ryan] says he’s also working on some code to better integrate the Pi into the vehicle’s systems by way of a Bluetooth OBD2 adapter. In the most basic application that would allow you to throw various bits of engine data up on the screen, but on more modern cars, you could potentially tap into the CAN bus and bend it to your will.
While the physical size and shape of this particular modification is clearly focused on this model and year of BMW, the general concepts could be applied to any car on the road. [Ryan] has recently started a GitHub repository for the project and hopes to connect with others who are interested in adding a little modern complexity convenience to their classic rides.
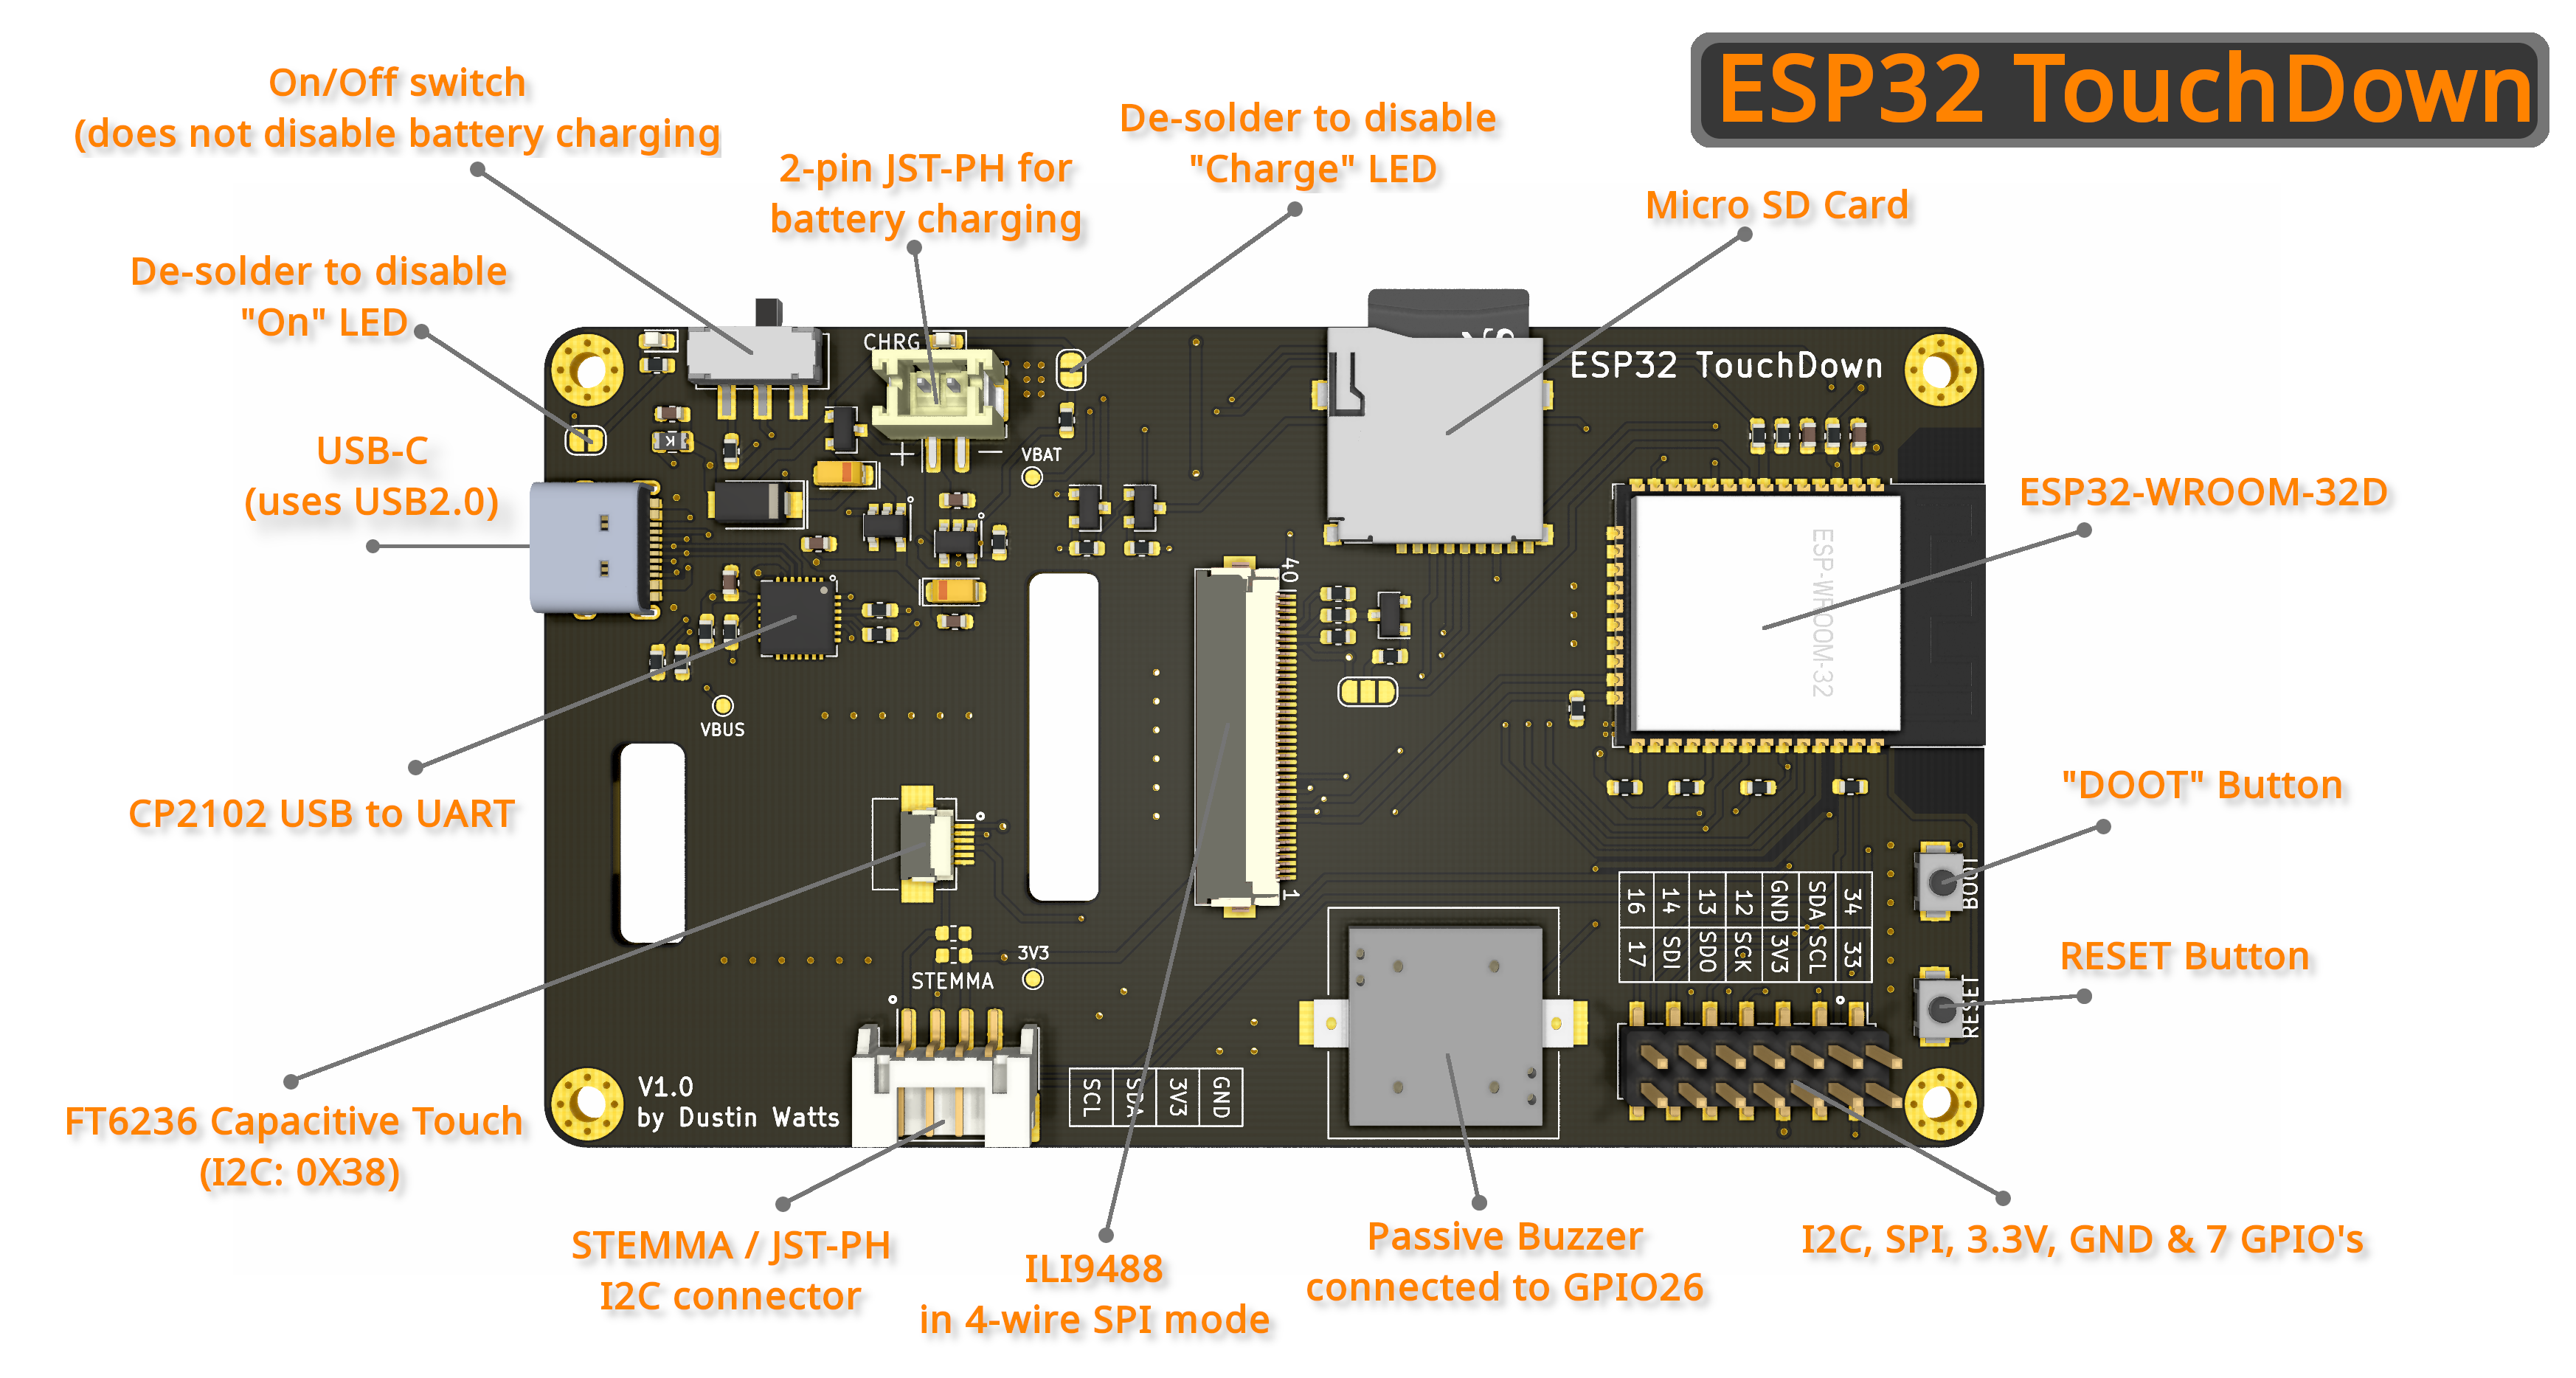
With many folks continuing to work from home for far longer than they ever thought, it’s no surprise that we’re seeing the rise of small DIY devices to make that video call or virtual presentation a little easier. [Dustin Watts] was interested in the functionality of the Elgato Stream Deck — a macro keyboard where each key is its own screen. But that kind of fancy hardware comes with a formidable price tag. So he built his own, and made it open source!
His first iteration — FreeTouchDeck — was built using commonly available modules but has since evolved into the ESP32 Touchdown which does it all with a single PCB. It’s a highly-customizable touchscreen macro keyboard which provide easy access shortcuts and macros for quick actions. Need a quick mute button, want to switch camera views on OBS, or maybe you want smarter shortcut keys for your CAD of choice. This will can get you there.
There a few key differences from the first version (FreeTouchDeck). The ESP32 dev board was ditched for a tidy PCB the directly integrates the module. This one has a capacitive touch controller (FT6236) rather than a resistive one as the capacitive screens deliver a far nicer user experience. A built-in battery and charger circuit (which the FreeTouchDesk didn’t have) allows for the extra bit of flexibility to stream from anywhere (within wireless range of course). Multiple case designs are available in STL form that allows it to be placed on a wall or desk with ease.
Datasheets, gerbers, kicad files, BOMs, and example firmware is provided on GitHub. The software is easily configurable so it can be set up to do any sort of macro, key combination, or action. This isn’t just limited to emulating a Bluetooth keyboard as there are examples showing how to connect to Home Assistant. All in all, this is a wonderful example of continued iteration on a project.
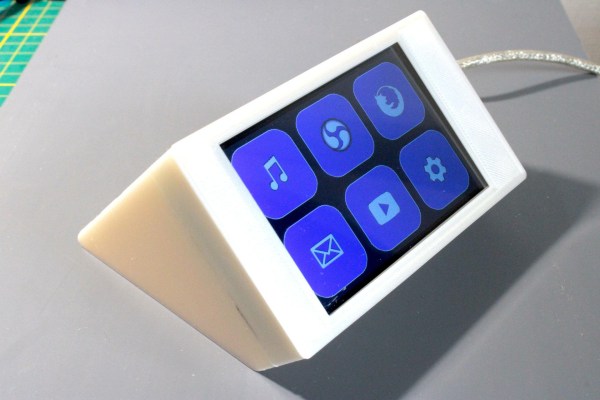
The idea of a reconfigurable macro keyboard is a concept that has been iterated on by many all the way from custom DIY keypads to the polarizing TouchBar on MacBooks. The continual rise of cheap powerful microcontrollers with Wi-Fi and 3D printers makes rolling your own macro keyboard easier every year. [Dustin Watts] has joined the proverbial club and built a beautiful macro pad called FreeTouchDeck.
We’ve seen macro keyboards that use rotary encoders to cycle through different mappings for the keys. FreeTouchDeck has taken the display approach and incorporates a touch screen to offer different buttons. [Dustin] was inspired by a similar project called FreeDeck, which offers six buttons each with a small screen. FreeTouchDeck is powered by an ESP32 and drives an ILI9488 touch screen with an XPT2046 touch controller. This means that FreeTouchDeck can offer six buttons with submenus and all sorts of bells and whistles. A connection to the computer is done by emulating a Bluetooth keyboard. By adding a configuration mode that starts a web server, FreeTouchDeck allows easy customization on the fly.
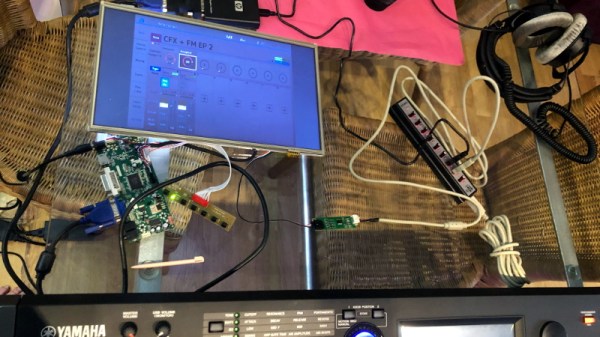
Like other owners of the high-end Yamaha MODX, [sn00zerman] wasn’t happy with the synthesizer’s integrated touch screen. It’s a bit small, and not at a very good angle for viewing. So he made it his mission to find some way of adding a larger external touch screen without making any permanent modifications to the expensive instrument.
This might seem like a tall order, but he wasn’t starting from zero. It was already known that you could plug an external display into it if you used a USB to DVI/HDMI adapter; but without the touch overlay it wasn’t a particularly useful trick. He pondered adding an external connector for the device’s built-in touch screen overlay, but that broke his no modifications rule. Considering how much one of these things cost, we can’t blame him for not wanting to put a hole in the side.
Sometimes you just have to dig out the right parts.
So he started to look for a software solution to get him the rest of the way. Luckily the MODX runs Linux, and Yamaha has made good on their GPL responsibilities and released the source code for anyone who’s interested. While poking around, he figured out that the device uses tslib to talk to the touch screen, which [sn00zerman] had worked with on previous projects. He realized that the solution might be as simple as finding a USB touch screen controller that’s compatible with the version of tslib running on the MODX.
In the end, a trip through his parts bin uncovered a stand-alone touch screen controller that he knew from experience would work with the library. Sure enough, when plugged into the MODX, the OS accepted it as an input device. With the addition of a USB hub, he was able to combine this with an existing display and finally have a more comfortable user-interface for his synthesizer.