An ESP8266 In Every Light Switch And Outlet

[Hristo Borisov] shows us his clever home automation project, a nicely packaged WiFi switchable wall socket. The ESP8266 has continuously proven itself to be a home automation panacea. Since the ESP8266 is practically a given at this point, the bragging rights have switched over to the skill with which the solution is implemented. By that metric, [Hristo]’s solution is pretty dang nice.

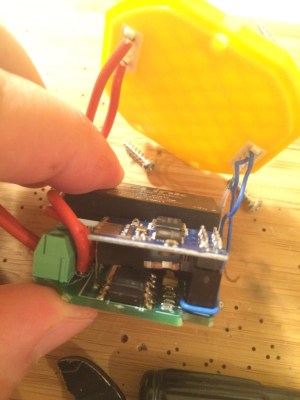
esp8266-smart-lightswitchIt’s all based around a simple board. An encapsulated power supply converts the 220V offered by the Bulgarian power authorities into two rails of 3.3V and 5V respectively. The 3.3V is used for an ESP8266 whose primary concern is the control of a triac and an RGB LED. The 5V is optional if the user decides to add a shield that needs it. That’s right, your light switches will now have their own shields that decide the complexity of the device.
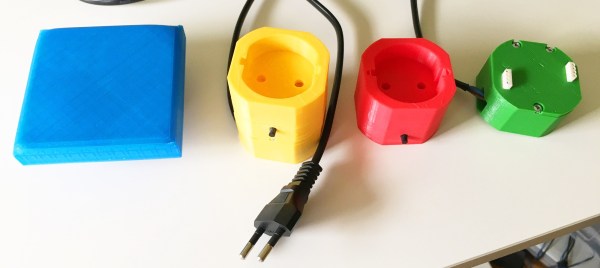
The core module seen to the right contains the actual board. All it needs is AC on one side and something to switch or control on the other The enclosure is not shown (only the lid with the shield connectors is seen) but can be printed in a form factor that includes a cord to plug into an outlet, or with a metal flange to attach to an electrical box in the wall. The modules that mate with the core are also nicely packaged in a 3D printed shield. For example, to convert a lamp to wireless control, you use a shield with a power socket on it. To convert a light switch, use the control module that has a box flange and then any number of custom switch and display shields can be hot swapped on it.

It’s all controllable from command line, webpage, and even an iOS app; all of it is available on his GitHub. We’d love to hear your take on safety, modularity, and overall system design. We think [Hristo] has built a better light switch!

Android-based Reflow Brings Solder Profiles To Your Lab

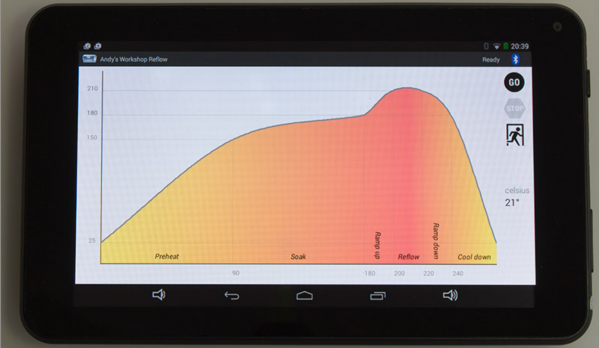
[Andy Brown] is a prolific hacker and ends up building a lot of hardware. About a year back, he built a reflow oven controller. The board he designed used a large number of surface mount parts. This made it seem like a chicken or egg first problem. So he designed a new, easy to build, Android based reflow controller. The new version uses just one, easy to solder surface mount part. By putting in a cheap bluetooth module on the controller, he was able to write an app which could control the oven using any bluetooth enabled Android phone or tablet.

The single PCB is divided into the high voltage, mains powered section separated from the low power control electronics with cutout slots to take care of creepage issues. A BTA312-600B triac is used to switch the oven (load) on and off. The triac is controlled by a MOC3020M optically isolated triac driver, which in turn is driven by a micro controller via a transistor. The beefy 12Amp T0220 package triac is expected to get hot when switching the 1300W load, and [Andy] works through the math to show how he arrived at the heat sink selection. To ensure safety, he uses an isolated, fully encased step down transformer to provide power to the low voltage, control section. One of his requirements was to detect the zero cross over of the mains waveform. Using this signal allows him to turn on the triac for specific angle which can be varied by the micro controller depending on how much current the load requires. The rectified, but unfiltered ac signal is fed to the base of a transistor, which switches every time its base-emitter voltage threshold is reached.

For temperature measurement, [Andy] was using a type-k thermocouple and a Maxim MAX31855 thermocouple to digital converter. This part caused him quite some grief due to a bad production batch, and he found that out via the eevblog forum – eventually sorted out by ordering a replacement. Bluetooth functions are handled by the popular, and cheap, HC-06 module, which allows easy, automatic pairing. He prototyped the code on an ATmega328P, and then transferred it to an ATmega8 after optimising and whittling it down to under 7.5kb using the gcc optimiser. In order to make the board stand-alone, he also added a header for a cheap, Nokia 5110 display and a rotary encoder selector with switch. This allows local control without requiring an Android device.

Gerbers (zip file) for the board are available from his blog, and the ATmega code and Android app from his Github repo. The BoM list on his blog makes it easy to order out all the parts. In the hour long video after the break, [Andy] walks you through solder tip selection, tips for soldering SMD parts, the whole assembly process for the board and a demo. He then wraps it up by connecting the board to his oven, and showing it in action. He still needs to polish his PID tuning and algorithm, so add in your tips in the comments below.

Continue reading “Android-based Reflow Brings Solder Profiles To Your Lab”

Simple Dremel TRIAC Hack Repair

Dremel Repair

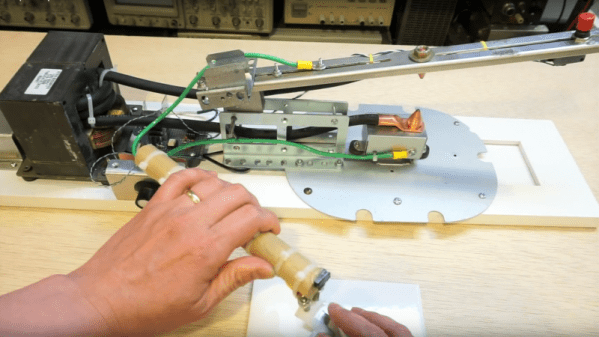
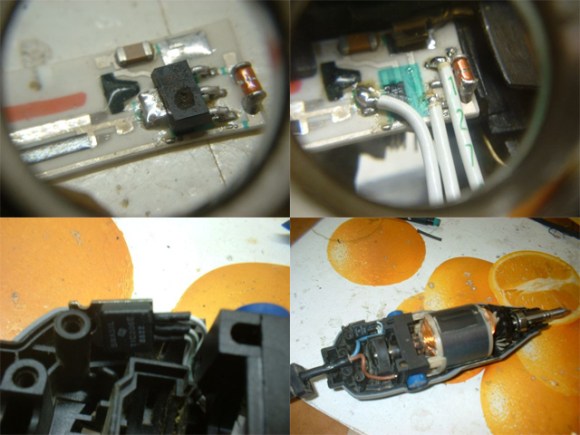
It’s a wonderful thing to see a clever hack repair instead of disposing of a product. The best repair approach is finding exact replacement components, but sometimes exact components can’t be sourced or cross-referenced. Other times the product isn’t worth the shipping cost for replacement parts or you just don’t have time to wait for parts. That’s when you need to really know how something works electronically so you can source suitable replacement components from your junk bin to complete the repair. This is exactly what [Daniel Jose Viana] did when his 110 volt Dremel tool popped its TRIAC after he plugged it into a 220 volt outlet.

[Daniel] knew how the TRIAC functioned in the circuit and also knew that a standard TRIAC of sufficient specifications could be used as a replacement even if it didn’t have the correct form factor to fit the PCB layout. For [Daniel’s] tool repair he had to think outside the box enough to realize he could use some jumper wires and snuggle a larger TIC206E TRIAC that wasn’t meant for the device but still applicable into the housing where there was enough free space. A little shrink-wrap and all was good again. Sure the fix was simple, but let’s not trivialize the knowledge he needed for this repair.

And if you’re wondering if it worked, he notes that he’s been using this tool for three years since the repair. We thank [Daniel] for sharing this tip and allowing us to add this to our tool belt of Dremel repair tricks.

Making A Solid-state Relay With I2C Interface

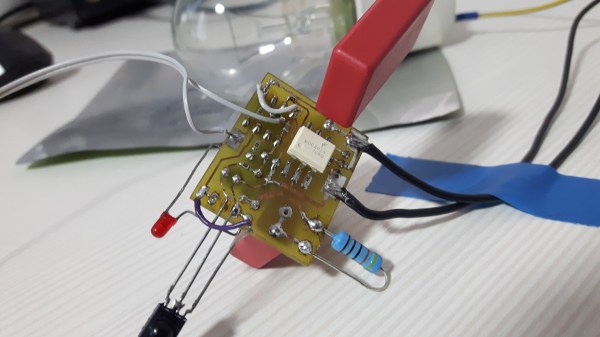
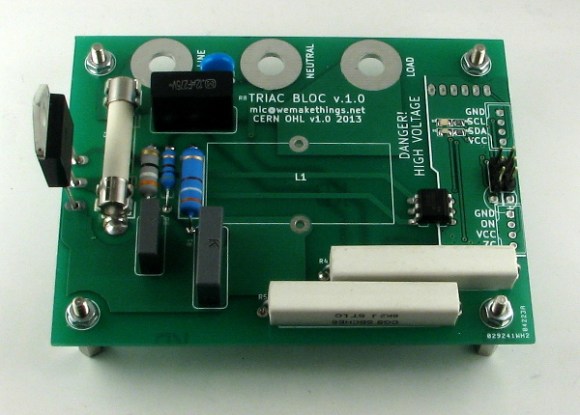
As [Mic] often got requests to make high-power switching boards, he recently finally gave in and designed the one shown above based around a solid-state relay. Some of our readers that already play with mains power know that switching should normally occur when the voltage crosses zero volts. The ‘TRIAC BLOC’ is able to do so, which also allows mains frequency measurement. [Mic] then tuned to the internal oscillator of his ATtiny microcontroller with this 50Hz by adjusting its OSCCAL register value, so the switching command can be sent at the ideal moment. Zero crossing detection is implemented by feeding the mains into an AC optocoupler. [Mic] discovered that the optocoupler diodes are not identical, so he had to adjust his firmware to account for the time differences.

All the resources are available on github, we would be interested to hear your detailed analysis of the circuit implemented with the passives R3/C1/L1/R8/C3.

Precise Temperature Control Of A Coffee Urn

coffee-urn-temperature-controller

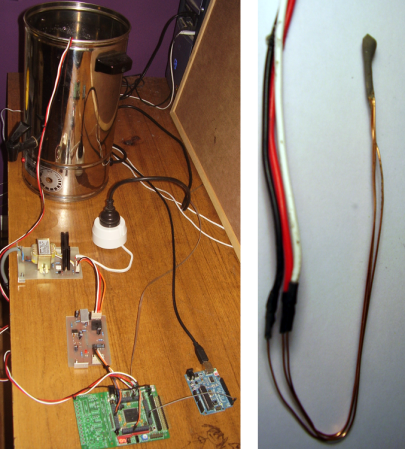
Hackaday Alum [Nick Schulze] decided to help out a friend who needed a controller to hold water at a precise temperature. Coffee guzzling hackers of the world should rejoice, as [Nick] targeted a coffee urn as the vessel for the project. What he came up with was a couple of custom boards and a roll-your-own temperature probe which does a fantastic job of regulating the temperature of the liquid.

Needing to switch the mains going to the heating element he immediately thought of an AC chopper circuit based on a Triac. What didn’t come to mind immediately was the need to detect the zero crossing. In the image above you can see nearest the urn his high voltage board. Below that is the zero crossing detector circuit. For feedback he created his own temperature probe using a TC1047 temperature sensor. After soldering on a filtering cap and the leads he dipped it in JB Weld to make it water tight. If you’re using this for coffee may we recommend seeking out a food safe probe.

After successful testing he added a user interface and buttoned it up in the enclosure seen in the video below.

Continue reading “Precise Temperature Control Of A Coffee Urn”

Add A Shutoff Timer To Your Bathroom Fan

Adding this board (translated) to your bathroom fan will turn it into a smart device. It’s designed to automatically shut off the fan after it’s had some time to clear humidity from the room. It replaces the wall switch which normally controls these fans by converting the fan connection to always be connected to mains.  The board draws constant power to keep the ATtiny13 running via a half-wave rectification circuit. A single LED that rises from the center of the PCB lights up to signal that the fan is in operation, but it is also used as a light sensor, similar to the LED communications hack from a couple of days ago. When the lights go on in the bathroom the microcontroller will turn on the exhaust fan via a Triac. It will remain on until the light level in the bathroom drops.

There’s an interesting timing algorithm that delays the fan startup, and varies the amount of time it will stay on in the dark depending on how long the bathroom lights were on. This way, a longer shower (which will build up more humidity) will cause the fan to remain on for the base of five minutes, plus one minute longer for every two minutes the bathroom was in use. Pretty smart, and quite useful if your bathroom sees high traffic from several family members.

Christmas Light Controller

We get a lot of tips about Christmas light controllers but rarely do they contain the kind of juicy detail that [Vince Cappellano] included with his setup. His video explaining the controller he built is embedded after the break and it’s not to be missed.

We think there’s a lot of good design invovled in this porject. First off, he’s got eight physical channels, each with optisolation and a triac for 256 levels of power control. But he was able to double the control to sixteen virtual channels if you’re using LED lighting. That’s because on those strings half of the LEDs are reverse biased compared to the rest. By adding sensing circuitry to the incoming AC, he can switch the triacs to only send positive or negative voltage through the LED strands, which produces the additional virtual channels. And did we mention that he did all this using wire wrapping and point-to-point soldering?

Continue reading “Christmas Light Controller”