Oddball Mercury Vapor Rectifier Is A Tube Geek’s Delight

Even if you aren’t a tube aficionado, you can’t help but be mesmerized by the blue glow inside a mercury vapor rectifier when it operates. It looks less like early 20th century tech and more like something that belongs on a Star Trek set. [Uniservo] acquired an 866 rectifier that was interesting due to the markings, which he explains in detail in the video below. Most people though will probably want to skip to closer to its end to see that distinctive blue glow. The exact hue depends on the mercury vapor pressure and usually contains a fair amount of ultraviolet light.

These tubes have an interesting history dating back to 1901, the year [Peter Cooper Hewitt] developed a mercury vapor light which was much more efficient than conventional bulbs. They had two main problems, they required some special process to get the mercury inside to vaporize when you turned them on, but worse still, the light was blue-green which isn’t really appropriate for home and office lighting. In 1902 though, [Hewitt] realized the tube would act as a rectifier. Electrons could readily flow out of the mercury vapor that was the cathode, while the carbon anodes didn’t give up electrons as readily. This was important because up until then, there wasn’t an easy way to convert AC to DC. The usual method was to use an AC motor coupled to a DC generator or a similar mechanical arrangement known as a rotary converter.

In later decades the mercury vapor lamp would wind up with a phosphor coating that converted the ultraviolet light to cool white light and became the fluorescent bulb, so while the rectifier mostly gave way to more efficient methods, [Hewitt’s] bulb has been in use for many years.

Continue reading “Oddball Mercury Vapor Rectifier Is A Tube Geek’s Delight”

Adventures In Gas Filled Tube Arrays

Vacuum tubes are awesome, and Nixies are even better. Numitrons are the new hotness, but there’s one type of tube out there that’s better than all the rest. It’s the ИГГ1-64/64M. This is a panel of tubes in a 64 by 64 grid, some with just green dots, some with green and orange, and even a red, green, blue 64 by 64 pixel matrix. They’re either phosphors or gas-filled tubes, but this is the king of all tube-based displays. Not even the RGB CRTs in a Jumbotron can match the absurdity of this tube array.

[Muth] got his hands on a few of these panels, and finally he’s displaying images on them. It’s an amazing project that involved finding the documentation, translating it, driving the tubes with 360 Volts, and figuring out a way to drive 128 inputs from just a few microcontroller pins.

First, the power supply. These panels require about 360 Volts to light up. This is significantly higher than what would usually be found in a Nixie clock or other normal tube-based display. That’s no problem, because a careful reading of the datasheet revealed a circuit that brings a normal-ish 180 Volt Nixie power supply up to the proper voltage. To drive these pixels, [Muth] settled on a rather large PIC18F microcontroller with eight tri-state buffers. The microcontroller takes data over a serial port and scans through the entire framebuffer. All in all, there are eight driver boards, 736 components, and 160 wires connecting everything together. It’s a lot of work, but now [Muth] has a 64×64 display that’s green and orange.

You can check out a ‘pixel dust’ demo of this display in action below.

Continue reading “Adventures In Gas Filled Tube Arrays”

Addition On The Strangest Vacuum Tube

[Uniservo] made a video of a tube he’s been trying to acquire for a long time: a Rogers 6047 additron. Never heard of an additron? We hadn’t either. But it was a full binary adder in a single vacuum tube made in Canada around 1950. You can see the video below.

The unique tubes were made for the University of Toronto Electronic Computer (UTEC). A normal tube-based computer would require several tubes to perform an addition, but the additron was a single tube that used beam switching to perform the addition in a single package. [Uniservo] points out how the tube could have revolutionized tube computing, but before it could really appear in real designs, transistors — and later, integrated circuits — would take over.

Continue reading “Addition On The Strangest Vacuum Tube”

Slimline Nixie Clocks

Everyone needs to build a Nixie clock at some point. It’s a fantastic learning opportunity; not only do you get to play around with high voltages and tooobs, but there’s also the joy of sourcing obsolete components and figuring out the mechanical side of electronic design as well. [wouterdevinck] recently took up the challenge of building a Nixie clock. Instead of building a clock with a huge base, garish RGB LEDs, and other unnecessary accouterments, [wouter] is building a minimalist clock. It’s slimline, and a work of art.

The circuit for this Nixie clock is more or less what you would expect for a neon display project designed in the last few years. The microcontroller is an ATMega328, with a Maxim DS3231 real time clock providing the time. The tubes are standard Russian IN-14 Nixies with two IN-3 neon bulbs for the colons. The drivers are two HV5622 high voltage shift registers, and the power supply is a standard, off-the-shelf DC to DC module that converts 5 V from a USB connector into the 170 V DC the tubes require.

The trick here is the design. The electronics for this clock were designed to fit in a thin base crafted out of sheets of bamboo plywood. The base is a stackup of three 3.2mm thick sheets of plywood and a single 1.6 mm piece that is machined on a small desktop CNC.

Discounting the wristwatch, this is one of the thinnest Nixie clocks we’ve ever seen and looks absolutely fantastic. You can check out the video of the clock in action below, or peruse the circuit design and code for the clock here.

Continue reading “Slimline Nixie Clocks”

Classic IBM TR-2 Flip-Flop Reproduction

As useful as computers are, most of them have all the design charm of a rubber doorstop. Oh, for the heady early days of computing, when vacuum tubes ruled, hardware was assembled by hand, and engineers always wore a tie.

Looking to recreate an elegant bit of computing hardware from that more civilized age, [updatebjarni] built a reproduction of a 1948 IBM TR-2 flip-flop module — 1,250 of which once formed the memory of the IBM Model 604 Calculating Punch. Admittedly more of a high-speed adding machine than a computer, the 604 is still an important piece of computing history, and [updatebjarni]’s scrap-bin reproduction of the field-replaceable module served as part of a computer history exhibit.

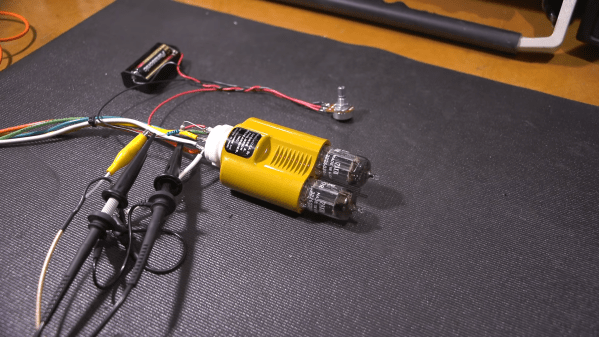
With a single 6J6 double triode tube nestled inside a bent aluminum frame, the goal was to reproduce the appearance of the original TR-2 module, and so the passive components wired up point-to-point style below the tube socket were chosen for their vintage look. That’s not to say the flip-flop won’t function. Although [updatebjarni] hasn’t tested it, he’s built other functional flip-flops from vintage components before, so this one should work too. Only 1,249 left to build and he’ll have enough for a working 604.

If you like this kind of build, you should probably check out some of our Vintage Computer Festival coverage. VCF East in April was a huge success, and VCF West is coming up in August in Mountain View. Hackaday will be well represented there, so stop by.

[via r/geekporn]

Restoring A Japanese Oscilloscope

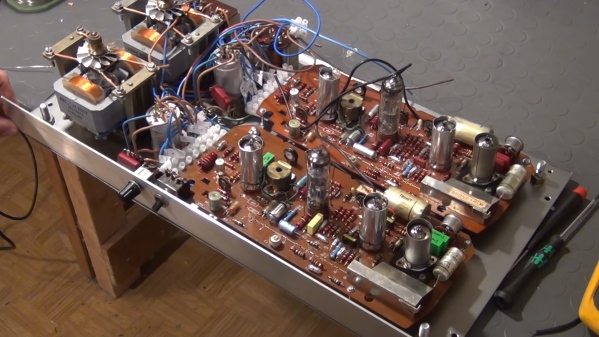
Oscilloscopes have come a long way. Today’s scope is more likely to look like a tablet than an old tube-based instrument. Still, there’s something about looking into a glowing green tube, especially if you’ve done the work to resurrect that old hollow state device. [NFM] picked up a Kikusui OP-31C–a vintage Japanese scope at a second-hand store. He made a video of his restoration efforts that you can see below.

The scope actually powered up and worked the first time. Of course, unlike a modern scope, the OP-31C has to warm up before it will show up. However, the pots needed cleaning and as a precaution, he replaced the old oil and electrolytic capacitors.

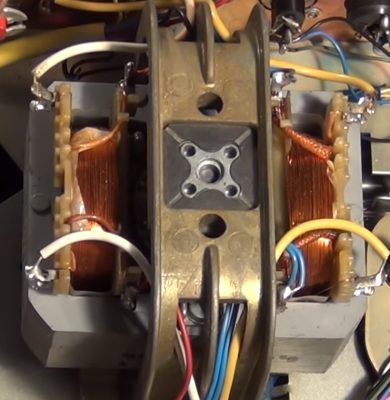
The big transformer and the coarse-looking single sided circuit board certainly will bring back memories if you are old enough. [NFM] had a schematic of the scope and takes you on a tour of the innards, although his schematic had some subtle differences from the actual unit, possibly due to some repair work.

He was going to rebuild one of the large electrolytic “can” capacitors to keep the outer shell with newer (and smaller) modern capacitors. However, he found a very similar modern capacitor and used that, instead.

We think it would have been more fun if the scope didn’t work. However, it was still a great tear down of the old tube-based device. This is a bigger device than the last old scope tear down we looked at. Not that we haven’t seen smaller ones (although, the link in the post has moved).

Continue reading “Restoring A Japanese Oscilloscope”

High Vacuum With Mercury And Glassware

If you want to build your own vacuum tubes, whether amplifying, Nixie or cathode-ray, you’re going to need a vacuum. It’s in the name, after all. For a few thousand bucks, you can probably pick up a used turbo-molecular pump. But how did they make high vacuums back in the day? How did Edison evacuate his light bulbs?

Strangely enough, you could do worse than turn to YouTube for the answer: [Cody] demonstrates building a Sprengel vacuum pump (video embedded below). As tipster [BrightBlueJim] wrote us, this project has everything: high vacuum, home-made torch glassware, and large quantities of toxic heavy metals. (Somehow [Jim] missed out on the high-voltage from the static electricity generated by sliding mercury down glass tubes for days on end.)

Continue reading “High Vacuum With Mercury And Glassware”