Perhaps August Dvorak Is More Your Type

One of the strangest things about human nature is our tendency toward inertia. We take so much uncontrollable change in stride, but when our man-made constructs stop making sense, we’re suddenly stuck in our ways — for instance, the way we measure things in the US, or define daytime throughout the year. Inertia seems to be the only explanation for continuing to do things the old way, even when new and scientifically superior ways come along. But this isn’t about the metric system — it’s about something much more personal. If you use a keyboard with any degree of regularity, this affects you physically.

Many, many people are content to live their entire lives typing on QWERTY keyboards. They never give a thought to the unfortunate layout choices of common letters, nor do they pick up even a whisper of the heated debates about the effectiveness of QWERTY vs. other layouts. We would bet that most of our readers have at least heard of the Dvorak layout, and assume that a decent percentage of you have converted to it.

Hardly anyone in the history of typewriting has cared so much about subverting QWERTY as August Dvorak. Once he began to study the the QWERTY layout and all its associated problems, he devoted the rest of his life to the plight of the typist. Although the Dvorak keyboard layout never gained widespread adoption, plenty of people swear by it, and it continues to inspire more finger-friendly layouts to this day.

Continue reading “Perhaps August Dvorak Is More Your Type”

Can You Help 3D Print A Selectric Ball?

The IBM Selectric changed typewriters as we knew them. Their distinctive ball element replaced the clunky row of typebars and made most people faster typists. When [Steve Malikoff] thought about 3D printing a type ball — colloquially known as a golf ball — it seemed like a great idea.

The problem? It just doesn’t work very well. According to [Steve], it is likely because of the low resolution of the printer. However, it isn’t clear the latitudes of the characters are correct. and there are a few other issues. It is possible that a resin printer would do better and there’s a call for someone out there to try it and report back. We are guessing a finer nozzle and very low layer height might help on an FDM printer.

Judging from the images, it looks like some of the balls do pretty well, but don’t get a full strike at the tilt angle. So it could be something else. However, it does sound like cleaning up the print so it fits is a major problem.

The Selectric was notable for several reasons — you can see an ad for the machine in the video below. The type ball meant you couldn’t jam keys. Since you didn’t have to unjam keys and you had the ribbon in a cartridge, you would have to work really hard to get ink on your fingers, even if you used the cloth ribbon instead of the arguably better carbon film ribbon. The Selectric II could even use a special tape to lift the carbon ribbon off the paper for correcting mistakes. No white-out liquid or fussing with little strips of correction paper. The fact that the ball moves means you don’t have to clear space on the side of the machine for the platen to travel back and forth.

Can you help? If you have a Selectric I or II and a high-quality printer, this would be a fun project to try and report back your results to [Steve]. If you are familiar with the later issue typeballs, you might not have seen the wire clip that [Steve] uses to hold the ball in place. However, you can see them in the video ad below. More modern balls use a plastic lever that acts as a handle so even with cloth ribbons you have less chance of getting ink on your hands.

Although there were Selectrics meant to interface with a computer, you can refit any of them to do it with some work. The Selectric also has a role in one of the great techno spy stories of all time: The GUNMAN project.

Continue reading “Can You Help 3D Print A Selectric Ball?”

A Thermal Typewriter For Burning Thoughts

There’s a certain charm to old technologies that have been supplanted by newer versions. And we’re not just talking about aesthetic nostalgia this time. With older versions of current technology, you are still connected to the underlying process, and that’s a nice feeling.

Part of the typewriter’s charm is in its instant permanence. These days, its so easy to backspace, delete, and otherwise banish thoughts to the void without giving them a fair trial, though it’s nice not to have to pound the keys to make an impression. At the typewriter, your words are immediately committed to paper, for better or worse. You can usually see them pretty well, although maybe not on the current line, and that is good for letting the words flow without judgment.

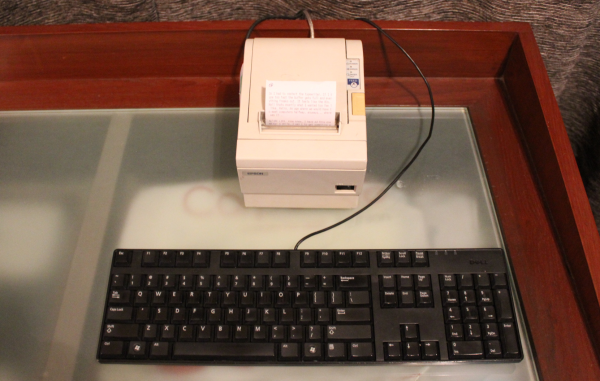
[Murtaza Tunio] recently used a thermal POS printer in an art project, but it had since grown cold with disuse. Why not turn it into a typewriter? All it took was a Raspberry Pi, a USB keyboard, and an existing Python library for communicating with these parallel printers. Typing is a bit challenging for a few reasons. For one thing, [Murtaza] has to type five lines before the words become visible. The enter key doesn’t come across for some reason, so a different one had to be assigned. On the upside, [Murtaza] can trigger the paper cutter with a keystroke.

Not too hot on thermal printers? You might find this e-ink typewriter refreshing.

Upgrade Board Turns Typewriter Into A Teletype

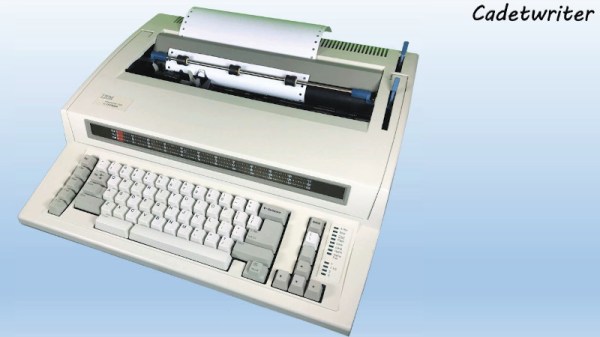
It may come as little surprise to find that Hackaday does not often play host to typewriter projects. While these iconic machines have their own particular charm, they generally don’t allow for much in the way of hardware modification. But then the IBM Wheelwriter 1000 isn’t exactly a traditional typewriter, which made its recent conversion to a fully functional computer terminal possible.

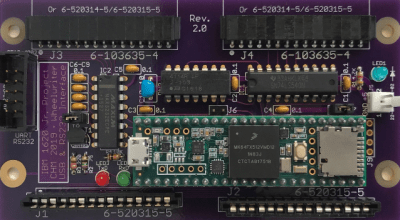
A product of the Computer History Museum’s [IBM 1620 Jr. Team], this modification takes the form of a serial interface board that can be built at home and installed into the Wheelwriter. The board allows the vintage electronic typewriter to speak RS-232 and USB, so it can be connected to whatever vintage (or not so vintage) computer you can imagine. The documentation for the project gives a rough cost of $150, though that does assume you’ve already got a Wheelwriter 1000 kicking around.

The GitHub repository includes everything you need to create your own board, and there’s even a highly detailed installation guide that goes over the case modifications necessary to get the new hardware installed. It also explains that you’ll want to get a new keycap set for your Wheelwriter if you perform this modification, as the original board doesn’t have all of the ASCII characters.

So why adapt an old electric typewriter to function as a teletype? As explained by the [IBM 1620 Jr. Team], there are projects out there looking to recreate authentic 1960s-era computing experiences that need a (relatively) affordable paper terminal. The originals are too rare to use in modern recreations, but with their adapter board, these slightly less archaic input devices can be used in their place.

Once you’ve built your new teletype, or in the somewhat unlikely event you already have one at the ready, we’ve seen a couple of projects that you might be interested in to put it to use.

Texting With A Teletype

How do you get the kids interested in old technology? By connecting it to a phone, obviously. Those kids and their phones. When [Marek] got his hands on an old-school teletype, he hooked it up to a GSM network, with all the bells and whistles including a 40mA current loop running at an impressive 50 baud.

The teletype in question here is a vintage T100 teletype manufactured in Czechoslovakia sometime in the ’70s. This was a gift to [Marek]’s workplace, the museum of Urban Engineering in Cracow, and this project is effectively an experiment to investigate the possibility of running this teletype as an interactive exhibit rather than an artefact from the age of current loops and phone systems.

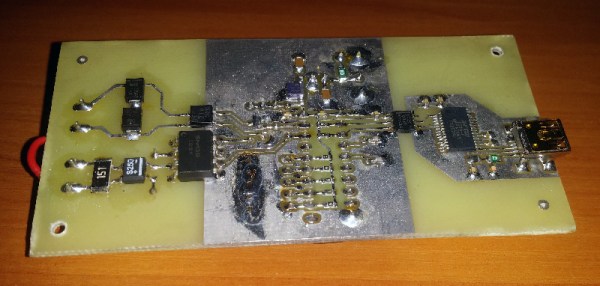
The current loop is, or was, the standard way of connecting a teletype to anything, so all [Marek] had to do was construct a box that translated the signals from a GSM modem to this current loop. For the prototype, the microcontroller in question is an old AT89C2051 (as that’s what was sitting in the parts drawer). This was moved over to a PIC32 microcontroller and a SIM800 GSM module. This is housed in a two-part enclosure, with the GSM interfaced housed in one half, with the current loop generator consisting of a simple DC power supply housed int the other half.

This interface is capable of receiving and sending messages from the keyboard to a GSM network, so it is theoretically possible you could text your friends using an old-school teletype. This functionality hasn’t been implemented yet, but it is just about the coolest thing you could possibly imagine. You can check out a video of the teletype in action below. Continue reading “Texting With A Teletype”

E-ink Typewriter Is Refreshingly Slow

It’s pretty hard to use the internet to complete a task without being frequently distracted. For better or worse, there are rabbit holes at every turn and whilst exploring them can be a delight, sometimes you just need to focus on a task at hand. The solution could be in the form of distraction-blocking software, razor-sharp willpower, or a beautifully crafted modern “typewriter”. The constraint and restriction of a traditional typewriter appealed to [NinjaTrappeur], but the inability to correct typos and share content online was a dealbreaker. A hybrid was the answer, with a mechanical keyboard commanding an E-ink display driven by a Raspberry Pi.

The main point of interest in this build is the E-ink screen. Though it’s easy to acquire theses displays in small sizes, obtaining a screen greater than four inches proved to be a challenge. Once acquired, driving the screen over SPI was easy, but the refresh rate was horrific. The display takes three seconds to redraw, and whilst [NinjaTrappeur] was hoping to implement a faster “partial refresh”, he was unable to read the appropriate values from the onboard flash to enable manual control of the drawing stages. Needless to say, [NinjaTrappeur] asks if people have had success driving these displays at a more usable rate, and would love to hear from you if so.

Some auxiliary hacks come in the form of terminal emulator adaptation, porting the E-ink screen library from C++ to C, and capturing the keyboard input. A handmade wooden case finishes it off.

If it’s old-school typewriters that float your boat, we’ve got you covered: this solenoid-actuated typewriter printer eventually became a musical instrument, and this daisy wheel machine produces ASCII art from a live camera.

[Via Boing Boing]

Make Some Noise With The Typewriter Keyboard

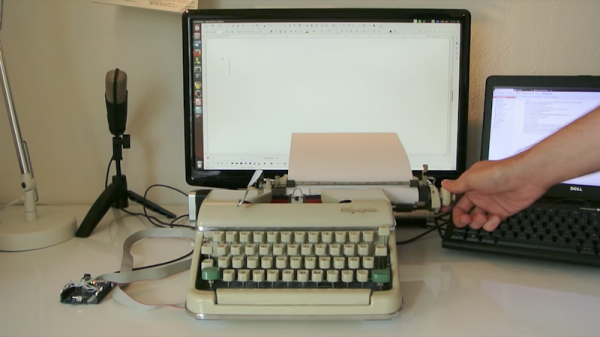
Are you an angry programmer? Do you get the frequent urge to smash the return key or space bar after finishing every single line of code? Well then [Konstantin Schauwecker]’s typewriter keyboard is just the thing for you. In his project, [Konstantin] hacked a German Olympia Monica typewriter into a USB keyboard.

The project uses no less than 50 photo interrupters mounted on a custom PCB that mounts directly under the typewriter itself. The circuit board is so designed that the hammer arms take a position in obstructing the opto-interrupters. Every time a key is pressed, the corresponding device sends a signal to an Arduino.

In order to enable the wiring of 50 signals to an Arduino Leonardo, multiplexers and decoders are employed. CD4515, 4×16 line decoders work to activate the optical signals and the CD4067, 16×4 multiplexers are used to return the scans. This forms the traditional scanning keyboard matrix and the whole thing is managed in the Arduino code (available as a zip file).

This project can be a great starting point for anyone who wants to hack their grandpa’s old typewriter or make one in order to annoy the guy sitting next to them. Check out the video below for a demo and teardown and if you prefer Raspberry Pis then check out this mechanical typewriter hack.