Simple Fluorometer Makes Nucleic Acid Detection Cheap And Easy

Back in the bad old days, dealing with DNA and RNA in a lab setting was often fraught with peril. Detection technologies were limited to radioisotopes and hideous chemicals like ethidium bromide, a cherry-red solution that was a fast track to cancer if accidentally ingested. It took time, patience, and plenty of training to use them, and even then, mistakes were commonplace.

Luckily, things have progressed a lot since then, and fluorescence detection of nucleic acids has become much more common. The trouble is that the instruments needed to quantify these signals are priced out of the range of those who could benefit most from them. That’s why [Will Anderson] et al. came up with DIYNAFLUOR, an open-source nucleic acid fluorometer that can be built on a budget. The chemical principles behind fluorometry are simple — certain fluorescent dyes have the property of emitting much more light when they are bound to DNA or RNA than when they’re unbound, and that light can be measured easily. DIYNAFLUOR uses 3D-printed parts to hold a sample tube in an optical chamber that has a UV LED for excitation of the sample and a TLS2591 digital light sensor to read the emitted light. Optical bandpass filters clean up the excitation and emission spectra, and an Arduino runs the show.

The DIYNAFLUOR team put a lot of effort into making sure their instrument can get into as many hands as possible. First is the low BOM cost of around $40, which alone will open a lot of opportunities. They’ve also concentrated on making assembly as easy as possible, with a solder-optional design and printed parts that assemble with simple fasteners. The obvious target demographic for DIYNAFLUOR is STEM students, but the group also wants to see this used in austere settings such as field research and environmental monitoring. There’s a preprint available that shows results with commercial fluorescence nucleic acid detection kits, as well as detailing homebrew reagents that can be made in even modestly equipped labs.

Spotted At Supercon: Glowtape Wearable Display

We’re big fans of unusual timepieces here at Hackaday, so it didn’t take long before somebody called our attention to the gloriously luminescent watch that [Henner Zeller] was wearing at this year’s Supercon.

He calls it the Glowtape, and it uses a dense array of UV LEDs and a long strip of glow-in-the-dark material to display the time and date, as well as images and long strings of text written out horizontally to create an impromptu banner. It looked phenomenal in person, with the energized areas on the tape glowing brightly during the evening festivities in the alleyway.

Continue reading “Spotted At Supercon: Glowtape Wearable Display”

UV Photography Box Is Great For Shooting Fancy Rocks

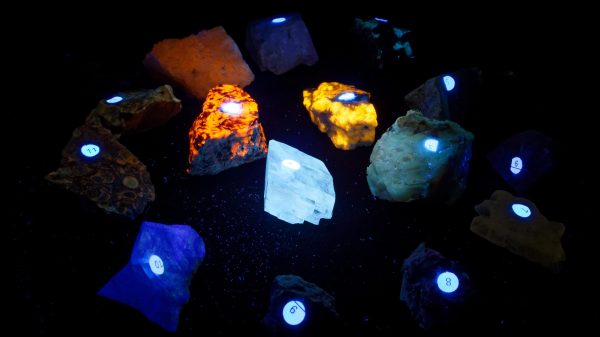
If you want to shoot photographs of various fluorescent UV-related phenomena, it’s hard to do so when ambient light is crowding out your subject. For this work, you’ll want a dedicated UV photography box, and [NotLikeALeafOnTheWind] has a design that might just work for you.

The build is set up for both UVA and UVC photography. Due to the danger posed by the latter, and even the former in some cases, the builder recommends never using the box with a direct-view camera. If it must be done, the eyepiece should be covered to avoid any exposure to harmful light. The key rule? Never look directly into a UV source.

Light sources that can be used include UV LEDs, lamps, and tubes. The box is sealed to keep out external light. It then features a turntable that can be manipulated from outside the box, allowing samples inside to be rotated as necessary. Using a camera with a macro or wide-angled lens is recommended for the work.

The photographs taken inside the box are stunning. They remind us of childhood museum trips, where we marvelled at the magic of the fluorescent rock displays. We’ve featured some other great fluorescence projects before, too. If you’re cooking up your own great scientific builds in the lab, we’d love to see those too. Hit us up on the tipsline!

DrLCD Is Here To Give Your MSLA Printer A Checkup

Over the last couple years, we’ve seen an absolute explosion of masked stereolithography (MSLA) 3D printers that use an LCD screen to selectively block UV light coming from a powerful LED array. Combined with a stepper motor that gradually lifts the build plate away from the screen, this arrangement can be used to produce high-resolution 3D prints out of photosensitive resins. The machines are cheap, relatively simple, and the end results can be phenomenal.

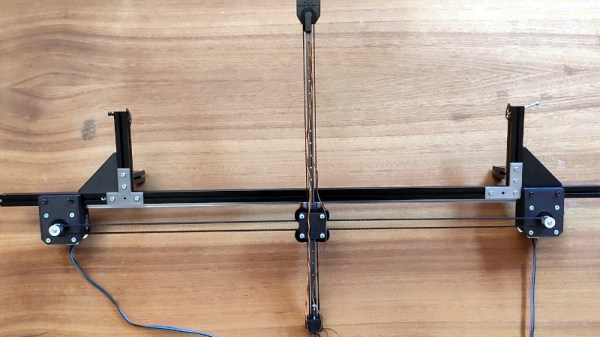
But they aren’t foolproof. As [Jan Mrázek] explains, these printers are only as good as their optical setup — if they don’t have a consistent UV light source, or the masking LCD isn’t working properly, the final printed part will suffer. In an effort to better understand how these factors impact print quality, he designed the DrLCD: a TSL2561 luminosity sensor mounted to a robotic arm with associated software to map out the printer’s light source.

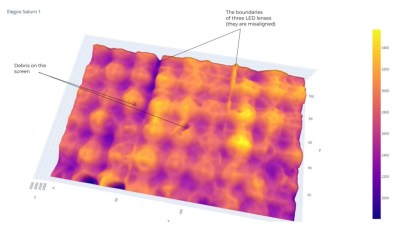
The individual LED assemblies are clearly visible.

The results when running DrLCD against a few different types of printers is fascinating. [Jan] was clearly able to make out the type of lenses used, and in one case, was even able to detect that a darker spot in the scan was due to a bit of resin having leaked into the light source and clouded up the optics.

But DrLCD can do more than just tell you where you’ve got a dark spot. Using the data collected from the scan, it’s possible to create a “compensation map” that can be combined with the sliced model you wish to print. As the slicer assumes an idealistic light source, this map can help by adding additional masking where bright spots in the display have been detected.

[Jan] goes on to compare the dimensional accuracy of printed parts before and after the compensation map has been applied to the model, and was able to identify a small but distinctive improvement. Not everyone is going to be concerned about the 157 µm deviation observed without the backlight compensation, but we certainly aren’t going to complain about 3D printers getting even more dimensionally accurate.

A couple years back we covered a similar technique that used a DSLR to capture high-resolution images of the bed. While arguably much easier to pull off, we can’t help but fall in love with the glorious overengineering that went into the DrLCD system, and we can’t wait until it starts making house calls.

Add-On Lets FDM 3D Printer Wash And Cure Resin Parts

The dramatic price reductions we’ve seen on resin 3D printers over the last couple of years have been very exciting, as it means more people are finally getting access to this impressive technology. But what newcomers might not realize is that the cost of the printer itself is only part of your initial investment. Resin printed parts need to be washed and cured before they’re ready to be put into service, and unless you want to do it all by hand, that means buying a second machine to do the post-printing treatment.

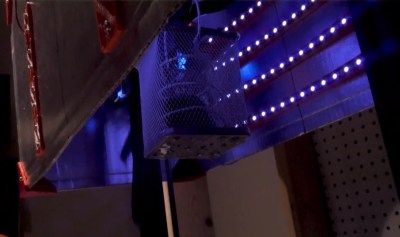
Not sure he wanted to spend the money on a dedicated machine just yet, [Chris Chimienti] decided to take an unusual approach and modify one of his filament-based 3D printers to handle wash and cure duty. His clever enclosure slips over the considerable Z-axis of a Anet ET5X printer, and includes banks of UV LEDs and fans to circulate the air and speed up the drying process.

Looking up into the curing chamber.

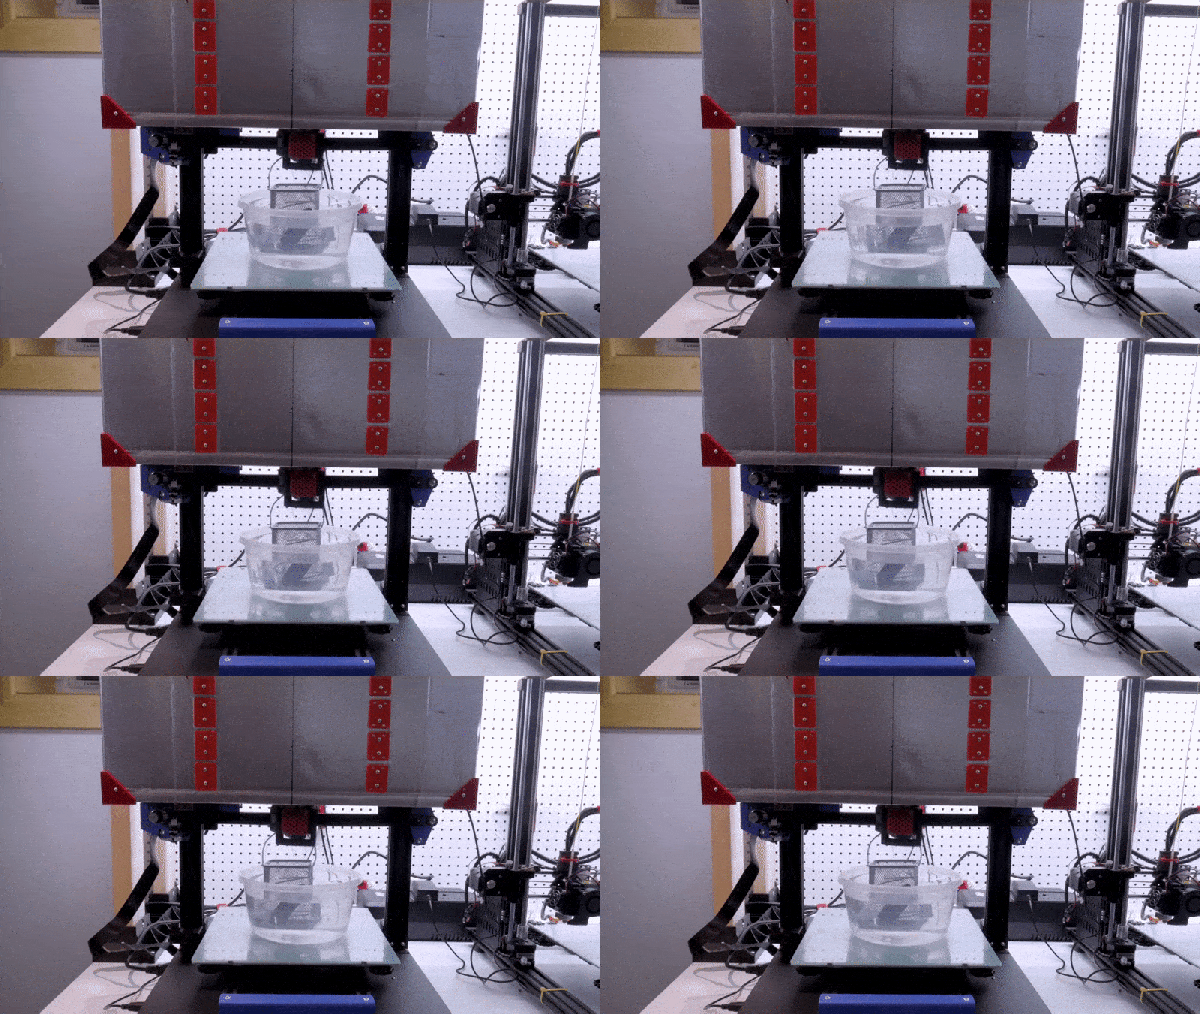
The curing part is easy enough to understand, but how does it do the washing? You simply put a container of 70% isopropyl alcohol (IPA) on the printer’s bed, and place the part to be washed into a basket that hangs from the printer’s extruder. Custom Python software is used to generate G-code that commands the printer to dip the part in the alcohol and swish it back and forth to give it a good rinse.

Once the specified time has elapsed, the printer raises the part up into the enclosure and kicks on the LEDs to begin the next phase of the process. The whole system is automated through an OctoPrint plugin, and while the relatively low speed of the printer’s movement means the “washing” cycle might not be quite as energetic as we’d like, it’s definitely a very slick solution.

[Chris] provides an extensive overview of the project in the latest video on his YouTube channel, Embrace Racing. In it he explains that the concept could certainly be adapted for use on printers other than the Anet ET5X, but that it’s considerable build volume makes it an ideal candidate for conversion. Of course it’s also possible to use the foam board enclosure by itself as a curing chamber, though you’ll still need to wash the part in IPA ahead of time.

This is perhaps one of the most unusual wash and cure systems we’ve seen here at Hackaday, but we appreciate the fact that [Chris] based the whole thing on the idea that you’ve probably got a FDM printer sitting nearby that otherwise goes unused when you’re working with resin. If that’s not the case for you, putting together a more traditional UV curing chamber is an easy enough project.

Continue reading “Add-On Lets FDM 3D Printer Wash And Cure Resin Parts”

Modified Microwave Cures Resin Parts With Style

Once you make the leap to resin-based 3D printing, you’ll quickly find that putting parts out in the sun to cure isn’t always a viable solution. The best way to get consistent results is with a dedicated curing chamber that not only rotates the parts so they’re evenly exposed to the light, but allows you to dial in a specific curing time. A beeper that goes off when the part is done would be handy as well. Wait, this is starting to sound kind of familiar…

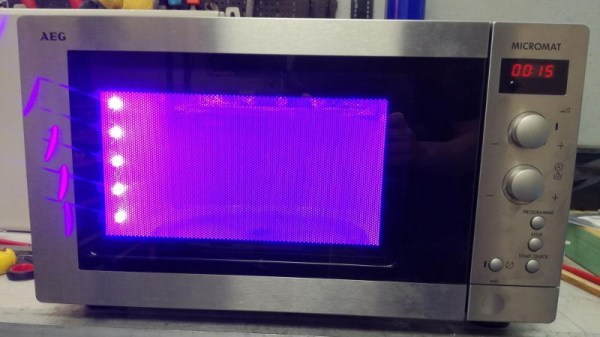
As you might expect, [Stynus] isn’t the first person to notice the similarities between an ideal UV curing machine and the lowly microwave oven. But his conversion is certainly one of the slickest we’ve ever seen. The final product doesn’t look like a hacked microwave so much as a purpose-built curing machine, thanks in large part to the fact that all of the original controls are still functional.

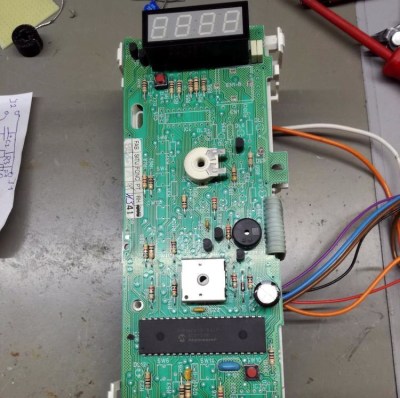
The big break there came when [Stynus] noticed that the control panel was powered by a one-time programmable PIC16C65B microcontroller. Swapping that out for the pin-compatible PIC16F877A opened up the possibility of writing custom firmware to interface with all the microwave’s original hardware, he just needed to reverse engineer how it was all wired up. It took some time to figure out how the limited pins on the microcontroller ran the LED display and read the buttons and switches at the same time, but we’d say the final result is more than worth the work.

With full control over the microwave’s hardware, all [Stynus] had to do was strip out all the scary high voltage bits (which were no longer functional to begin with) and install an array of UV LEDs. Now he can just toss a part on the plate, spin the dial to the desired curing time, and press a button. In the video below, you can see he’s even repurposed some of the buttons on the control panel to let him do things like set a new default “cook” time to EEPROM.

Compared to the more traditional fused deposition modeling (FDM) 3D printers, resin printing requires a lot of additional post-processing and equipment. You don’t necessarily have to gut your microwave just to cure your prints, but you’d be wise to fully consider your workflow will look like before pulling the trigger on that shiny new printer.

Continue reading “Modified Microwave Cures Resin Parts With Style”

Helmet Decal Charger Keeps Them Ready To Glow

When firefighters are battling a blaze, it’s difficult for them to find each other in the smoky darkness. To help stand out they wear glow-in-the-dark decals on their helmets, but since they spend so much of their down time stowed away in a dark locker, they don’t always have a chance to charge up.

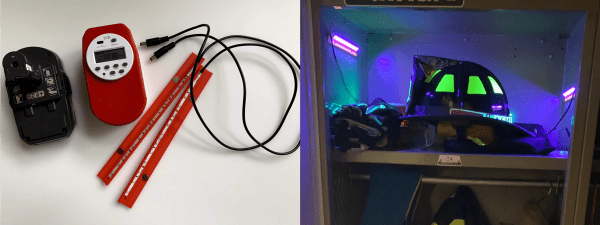
[Bin Sun]’s firefighter friend inspired them to build a portable charging system that can stuff those helmet decals full of photons in a matter of minutes. Although phosphorescent materials will charge in any light, they charge the fastest with ultraviolet light. This uses a pair of UV LED strips controlled by an off-the-shelf programmable timer, and powered with an 18-volt drill battery stepped down to 12 V. The timer makes it easy for [Bin Sun]’s friend to schedule charge times around their shifts, so the battery lasts as long as possible while keeping the decals ready to glow.

We love that [Bin Sun] seems to have thought of everything. The light strips are nestled into 3D-printed holders that also house small magnets. This makes it easy to position the lights on either side of the locker so both the front and back decals soak up the light.

Phosphorescent materials are great as a reusable display medium, especially when they’re designed to look like Nixie tubes.