Persistence Of Phosphorescence Clock Displays YouTube Stats Too

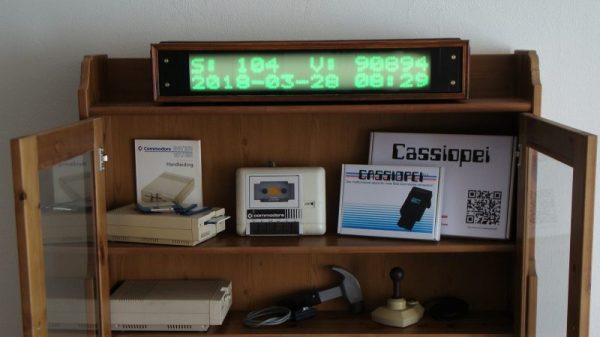
Looking for an eye-catching and unique way to display the time and date? Want the flexibility to add other critical information, like the number of YouTube subs you’ve got? Care to be able to read it from half a block away, at least at night? Then this scrolling glow-in-the-dark dot-matrix display could be right up your alley.

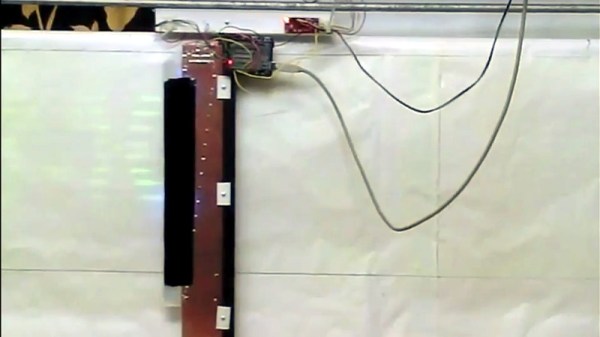
Building on his previous Morse code transcriber using a similar display, [Jan Derogee] took the concept and went big. The idea is to cover a PVC pipe with phosphorescent tape and rotate it past a row of 100 UV LEDs. The LEDs are turned on as the glow-in-the-dark surface passes over them, charging up a row of spots. The display is built up to two rows of 16 characters by the time it rotates into view, and the effect seems to last for quite a while. An ESP8266 takes care of driving the display and fetching NTP time and YouTube stats.

We’ve seen “persistence of phosphorescence” clocks before, but not as good looking and legible as this one. We like the approach, and we can’t help but think of other uses for glow-in-the-dark displays.

Continue reading “Persistence Of Phosphorescence Clock Displays YouTube Stats Too”

Arduino Clock Jots Down The Time, In UV

We’re big fans of the impractical around here at Hackaday. Sure there’s a certain appeal to coming up with the most efficient method to accomplish your goal, the method that does exactly what it needs to do without any superfluous elements. But it’s just not as much fun. If at least one person doesn’t ask “But why?”, then you probably left something on the table, design wise.

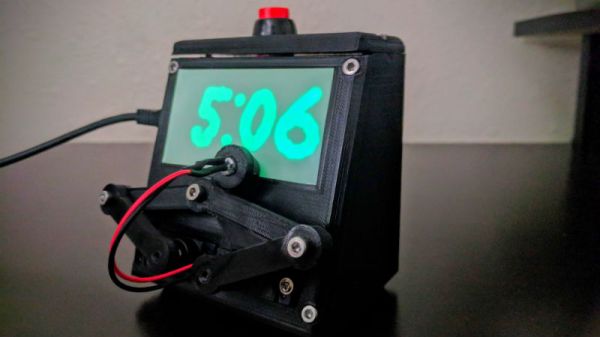
So when we saw this delightfully complex clock designed by [Tucker Shannon], we instantly fell in love. Powered by an Arduino, the clock uses an articulated arm with a UV LED to write out the current time on a piece of glow-in-the-dark material. The time doesn’t stay up for long depending on the lighting in the room, but at least it only takes a second or two to write out once you press the button.

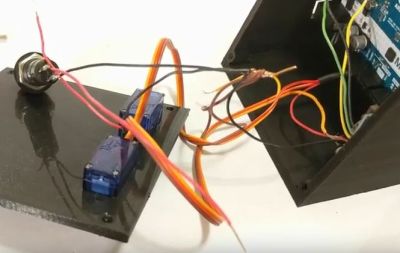
Things are pretty straightforward inside the 3D printed case. There’s an Arduino coupled with an RTC module to keep the time, which is connected to the two standard hobby servos mounted in the front panel. A UV LED and simple push button round out the rest of the Bill of Materials. The source code is provided, so you won’t have to figure out the kinematics involved in getting the two servos to play nicely together if you want to try this one at home.

We’ve seen many clocks powered by Arduinos over the years, occasionally they even have hands. But few can boast their own robotic arm.

Continue reading “Arduino Clock Jots Down The Time, In UV”

Improvising An EPROM Eraser

Back in the old days, when we were still twiddling bits with magnetized needles, changing the data on an EPROM wasn’t as simple as shoving it in a programmer. These memory chips were erased with UV light shining through a quartz window onto a silicon die. At the time, there were neat little blacklights in a box sold to erase these chips. There’s little need for these chip erasers now, so how do you erase and program a chip these days? Build your own chip eraser using components that would have blown minds back in the 70s.

[Charles] got his hands on an old 2764 EPROM for a project, but this chip had a problem — there was still data on it. Fortunately, old electronics are highly resistant to abuse, so he pulled out the obvious equipment to erase this chip, a 300 watt tanning lamp. This almost burnt down the house, and after a second round of erasing of six hours under the lamp, there were still unerased bits.

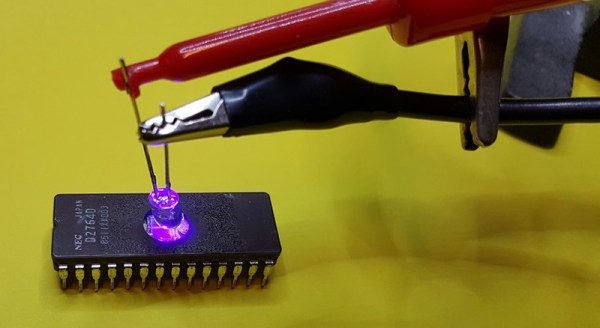
Our ability to generate UV light has improved dramatically over the last fifty years, and [Charles] remembered he had an assortment of LEDs, including a few tiny 5mW UV LEDs. Can five milliwatts do what three hundred watts couldn’t? Yes; the LED had the right frequency to flip a bit, and erasing an EPROM is a function of intensity and time. All you really need to do is shine a LED onto a chip for a few hours.

With this vintage chip erased, [Charles] slapped together an EPROM programmer — with a programming voltage of 21V — out of an ATMega and a bench power supply. It eventually worked, allowing [Charles]’ project, a vintage liquid crystal display, to have the right data using vintage-correct parts.

A UV Lightbox For Curing Prints

With resin printers slowly making their way to hackerspaces and garages the world over, there is a growing need for a place to cure these UV resin prints. No, they don’t come out of the machine fully cured, they come out fully solid. And no, we’re not just leaving them in the sun, because that’s not how we do things around here.

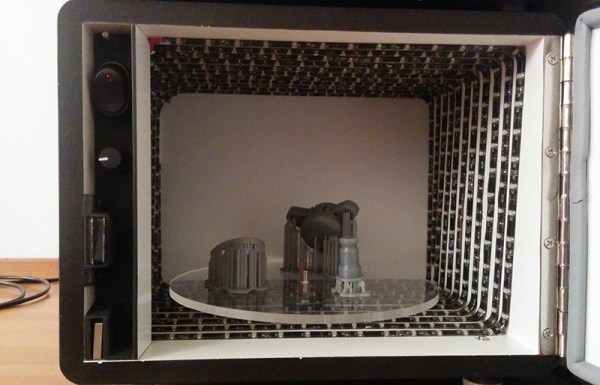
[Christopher] whipped up a post-cure lightbox meant to sit underneath his Form 1 printer. It’s made of 1/2″ MDF, with adjustable feet (something the Form 1 lacks), a safety switch to keep the lights off when the door is open, and a motor to rotate the parts around the enclosure.

The light source for this lightbox is 10 meters of ultraviolet LED strips. The LEDs shine somewhere between 395-405nm, the same wavelength as the laser diode found in the Form 1 printer. Other than a bit of wiring for the LEDs, the only complicated part of the build was the motor; [Christopher] bought a 2rpm motor but was sent a 36rpm motor. The vendor was out of 2rpm motors, so a PWM controller was added.

It’s a beautiful build that shows off [Christopher]’s ability to work with MDF. It also looks great sitting underneath his printer, and all his parts are rock solid now.

DIY UV Lamp Is The Cure For Nails And More

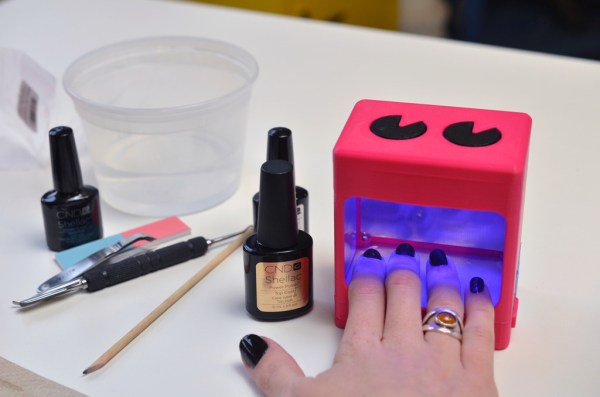
We must admit to wondering how Adafruit’s [Becky Stern] gets anything done with those fingernails of hers. They’re always long and beautifully painted without any chips, dings, or dents. As it turns out, she uses UV gel nail polish. It’s much more durable than standard air-dry polishes, but it requires UV light to cure. [Becky] bought a lamp to use at home, but it’s very bulky and must be plugged into the wall. She knew there was a better way and devised her DIY UV mini manicure lamp.

She really thought of everything. The open source 3D-printed enclosure includes a small compartment in the top for cuticle sticks, emery boards, and tweezers. The Li-poly battery is rechargeable over USB in conjunction with Adafruit’s PowerBoost 500c. The lamp itself is made from 30 UV LEDs and 100Ω resistors. [Becky] lined the inside of hers with silver sticky paper to help distribute the UV light evenly.

You know, this can also be used to erase EPROMs or to cure small DLP 3D prints. Do you have another use for it? Tell us in the comments. Introductory and partially hyperlapsed video after the break.

Continue reading “DIY UV Lamp Is The Cure For Nails And More”

I Am The Midnight Message Board What Messages At Midnight

Photoluminescent stars on your bedroom wall or ceiling are pretty cool, though the stationary shapes can become boring. [Adi] felt this way, too. While doodling with a bright white light on some glow in the dark vinyl, it occurred to him that this could make for an interesting display. He set about making GLO, the midnight message board and RSS display.

[Adi]’s light writer uses 12 UV LEDs on a linear axis powered by a stepper motor to write RSS headlines, Twitter trends, or custom text on his wall. He finds the slow fade of the text very soothing to fall asleep by, and it’s easy to see why. The LED array imprints a section of a character consisting of a 6×5 bit pattern. The 12 LEDs are split into two groups, so it can write two lines at 45-50 characters each. [Adi] designed his own pixel font for this project, and advises that only upper case letter forms be used.

[Adi]’s write-up is quite admirable and comprehensive. In the circuit build section, he advises that the LEDs must be very close to the vinyl for optimum results, but that they should protrude farther than the shift registers so the chips don’t rub the vinyl. Of course you could opt for more intense light sources, like laser. See it in action after the break.

Continue reading “I Am The Midnight Message Board What Messages At Midnight”

Do Not Look Into 12 Watt UV Lamp With Remaining Eye

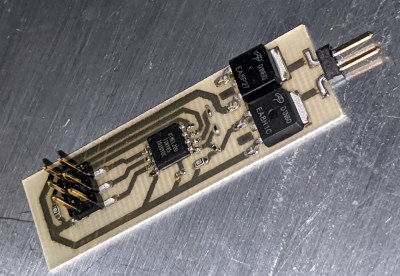
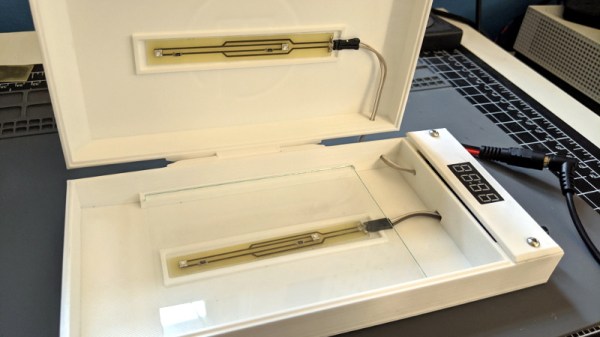
We’ve seen a couple of UV lamp builds for exposing photosensitive PCBs and erasing EPROMs, but [John] over at pcboard.ca decided if it’s worth doing, it’s worth overdoing. They designed a UV exposure board using twelve 1 Watt UV LEDs, an impressive amount ultraviolet light that you probably shouldn’t look at for too long.

We’ve seen UV exposure boxes before, usually made with a bunch of 5mm UV LEDs soldered to a piece of protoboard. These projects do their job, but the exposure time is on the order of minutes. The PCboard.ca UV lamp can expose a PCB in just 20 seconds.

The build began with four pieces of aluminum bar, 1 inch wide and 1/8″ thick. The 12 star LEDs were glued down to this bar with thermal adhesive and serve their purpose as a rather large heat sink.

[John] performed a little test to determine how long it would take this monstrous UV source to expose a PCB. By copying a PCB mask four times and placing it over an unexposed board, [John] made a PCB with exposure times of 60, 45, 30, and 15 seconds. After developing and etching, all but the 15-second exposure was fully etched, an amazing result that will probably lead to some very, very rapid prototyping.

All the more impressive is the fact that only four 1-watt LED drivers were used for this build. That’s right, this UV lamp is actually operating at about a quarter of its maximum rating, or about 285mA per LED. We’d hate to see this thing operate at full power, protective eyewear or not.