Less Than Production, More Than One-Offs

We build things we think are cool. Sometimes, other people agree with us and they want a copy of what we’ve built. If you’re lucky enough to have an enviable product but you’re not ready for full-scale manufacturing, you may be looking at a low-volume production run. [Eric Strebel] walks us through one such instance where he makes some custom color swatches for a show. Video after the break.

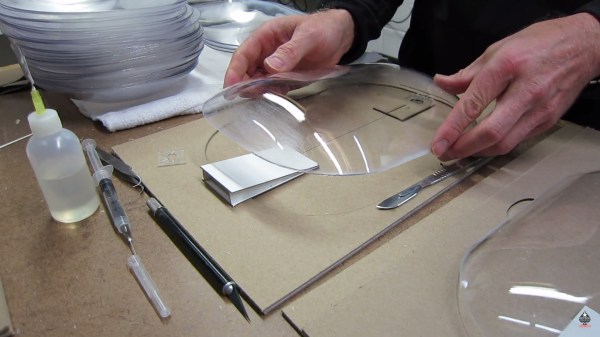
[Eric Strebel] is an industrial designer so he plays to his strengths by designing the swatch shape, jig, tool, and hangers. He hires out the painting, laser cutting, and CNC machining. This may seem like a simple statement but some of us have a hard time paying other people for things we’re capable of learning. In some cases, we just have to pay the professionals to do it correctly and keep our focus.

The mentality of small runs in this video is perfect for people who sell on Tindie or want to make more than a handful of consistently nice parts. Our own [Lewin Day] recently talked about his experience with a run of 200 mixers called gMix.

Continue reading “Less Than Production, More Than One-Offs”

Hacker Straightens Own Teeth

So you say your wonky smile has you feeling a bit self-conscious? And that your parents didn’t sock away a king’s ransom for orthodontia? Well, if you have access to some fairly common fab-lab tools, and you have the guts to experiment on yourself, why not try hacking your smile with DIY braces?

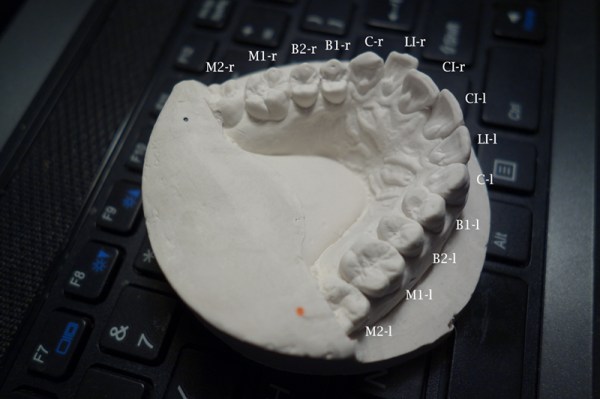
First of all: just – don’t. Really. But if you’re curious about how [Amos Dudley] open-sourced his face, this is one to sink your teeth into. A little research showed [Amos] how conventional “invisible” braces work: a 3D model is made of your mouth, each tooth is isolated in the model, and a route from the current position to the desired position is plotted. Clear plastic trays that exert forces on the teeth are then 3D printed, and after a few months of nudging teeth around, you’ve got a new smile. [Amos] replicated this hideously expensive process by creating a cast of his teeth, laser scanning it, manipulating the teeth in 3D modeling software, and 3D printing a series of intermediate choppers. The prints were used to vacuum mold clear plastic trays, and with a little Dremel action they were ready to wear. After 16 weeks of night and day wear, the results are pretty amazing – a nicely aligned smile, and whiter teeth to boot, since the braces make great whitening trays.

Considering how badly this could have turned out, we’ve got to hand it to [Amos] for having the guts to try this. And maybe he’s onto something – after all, we’ve advocated for preemptive 3D scanning of our bodies recently, and what [Amos] did with this hack is a step beyond that.

[LupusMechanicus], thanks for the tip!

DIY Vacuum Former

DIY Vacuum Former On The Cheap

Vacuum Forming is a process used to mold plastic into a desired shape. A thin sheet of plastic is heated to a soft state and then air pressure is used to press the plastic down around or into a mold. Vacuum forming can be used to make a variety of items, anything from product packaging to bath tubs.

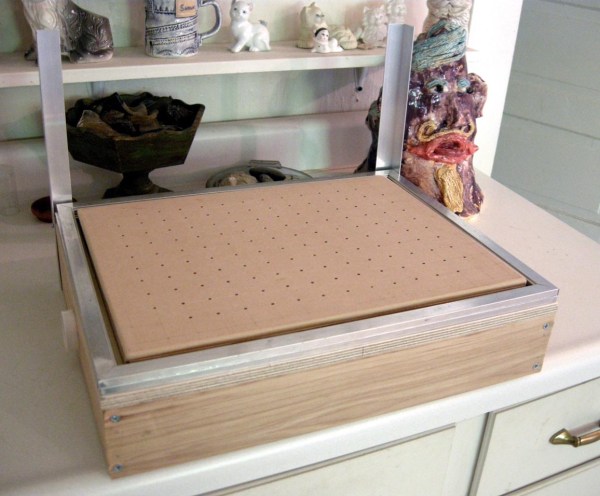
That being said, a vacuum former is probably one of those things that would be nice to have around but may not get a lot of use. Therefore, spending any significant amount of money on one would result in a low-value situation. For some folks, building one from scratch may be the way to go. [Amalgamized] built his own low-cost vacuum former and did a great job documenting the build.

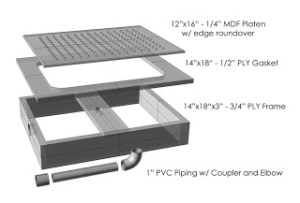
VacuumDiagramFlattenedSmallThere is a two-pronged attack to keep the costs down on this project. First, the frame is made from readily available materials that you probably have kicking around in your wood scrap bin. The sides of the frame are 3/4″ plywood and the hole-filled top is made from 1/4″ MDF. A piece of PVC pipe connects the chamber below the top piece of MDF to a shopvac. The shopvac pulls the air down through the top’s holes; think reverse air hockey table.
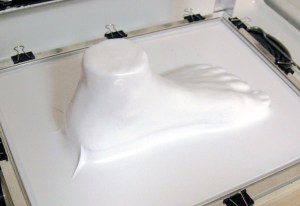
Attack prong #2 is that there is no dedicated heater. Binder clips secure the plastic sheets to an aluminum window frame which are then put in the oven for a few minutes between 250 and 300ºF. When the plastic starts to droop, it is quickly removed from the oven and placed over a mold. The shopvac creates a low pressure zone under the plastic and atmospheric pressure pushes the plastic down around the mold.

DIY Vacuum Former

Cast Acrylic And Wood LED Light

LED-ring-light

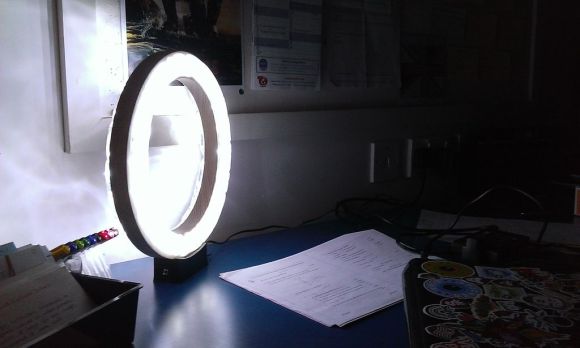
The design for this LED ring lamp started off as a cross-section sketch. [Alex Jalland] envisioned a core that holds the parts and hides the circuitry, with two halves of a clear doughnut diffusing the light and covering everything up.

For the core itself he headed over to the lathe and turned a piece out of ash. He tooled the profile into one side, flipped it around to form the other, and finally cut the center out to form a ring. This may sound like a lot of work, but it pales in comparison to what went into the diffusers.

He cast the parts out of polyurethane resin. This required a mold which he made from scratch. The process used many materials, including a vacuum forming machine, a latex slug, and plaster to keep the thin mold from deforming when filled with resin.

The lamp provides a lot of light. But with this much work put into the enclosure we’d suggest going the extra mile to make it an Equinox Clock clone.

Homemade Bocce Balls

homemade-bocce-balls

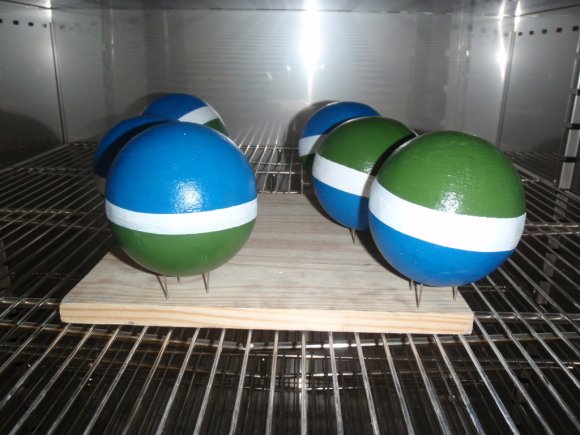
For those unfamiliar with it, Bocce Ball is an outdoor game played with a set of heavy grapefruit-sized balls. We’ve never really thought of making our own set, but as you can see above, it can be done. These are six Bocce balls produced at home by [Horvitz444].

It seems the commercially available balls have a cement or clay core covered in a layer of high-impact epoxy. [Horvitz444] was able to recreate this starting with some vacuum forming. He built his own former out of peg board and a shop vac. The plastic stock he used was a light panel from the home store. After heating it up in the oven he formed a mold using what looks like two halves of Bocce balls. The mold halves were melted together using a soldering iron. After pouring in the secret concoction of cement ingredients and letting them harden, he removed the orbs from the molds and ground down the seams until smooth. They were covered in epoxy and painted. Most of these details were gleaned from his comments in the Reddit thread.

vacuum_forming_consistent_results_every_time

How To Build A Vacuum Form Table That Gets It Right Every Time

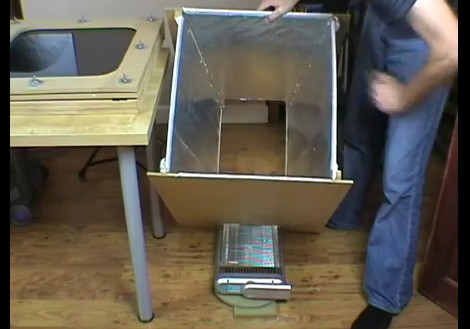
[James] builds all sorts of robots and superhero costume replicas at home, so he is always searching for a better way to get consistent results when using his vacuum table. A lot of people use their oven or exposed heating coils from electric frying pans to warm the plastic sheets, but [James] wasn’t really interested in going down that route. He cites that he would rather not heat plastic in the oven where he cooks his food, nor is he really keen on the idea of exposed heating elements.

Instead, he opted for a slightly pricier, though completely reasonable setup that produces consistent results every time. Most of the forming table was built using MDF sheeting, as you can see in the video below. His heating apparatus was the most expensive part of the rig, since it’s an off the shelf quartz-based room heater. He lays the heater on its back side, and directs the heat up through an MDF frame using aluminum foil as a reflector. The plastic sheeting mounted at the top heats evenly, and in no time, he has a perfectly vacuum formed prop that is ready to be painted.

Sure, it might cost a bit more than some other vacuum formers we’ve looked at before, but spending a bit more up front to get consistent results is well worth it if you ask us.

Continue reading “How To Build A Vacuum Form Table That Gets It Right Every Time”

Daft Punk Helmet Replica Finally Completed

[Harrison Krix] finished his Daft Punk Helmet replica and posted about it this week. We took a look at his work back in October but he’s come a long way to pull off a legendary build. Take three minutes after the break and see 17 months worth of work. So many skills were pulled together to make this happen; sculpting, mold making, painting, electronic design, mechanical design, and bad-ass-ery. Crammed in along with your noggin are a bag-full of LED boards but the Arduino that controls it all resides outside, in a project box tethered to the helmet. This is a masterpiece of socially-unwearable geek fashion.

Continue reading “Daft Punk Helmet Replica Finally Completed”