Vacuum Forming Key Cap Covers Doesn’t Quite Work Out

Retrocomputing is as much about physical preservation as it is about electronics and computer science. Plastic is an awful material when it comes to decade-long timescales, and the forces of sun, air and water are unrelenting on these materials. [Drygol] has long experimented with techniques to preserve and refresh keycaps, and decided to try some fun vacuum forming techniques for something new. It sadly didn’t go to plan, however.

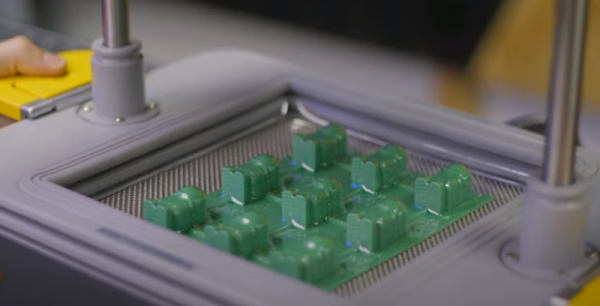
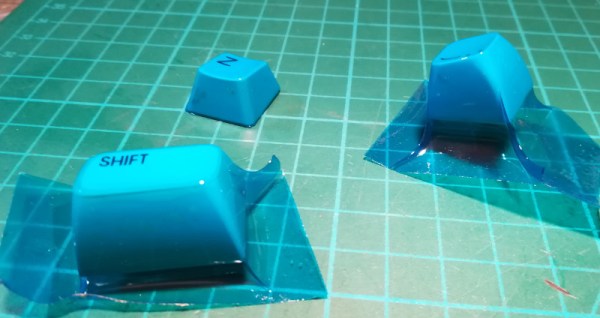
The basic idea was to use a vacuum-forming machine to coat keycaps in a thin layer of translucent plastic, for both aesthetic benefit and to preserve them from falling apart. Initial small-scale tests were promising, creating a key with a tight, form-fitting blue plastic wrap through which the original labels were still visible.

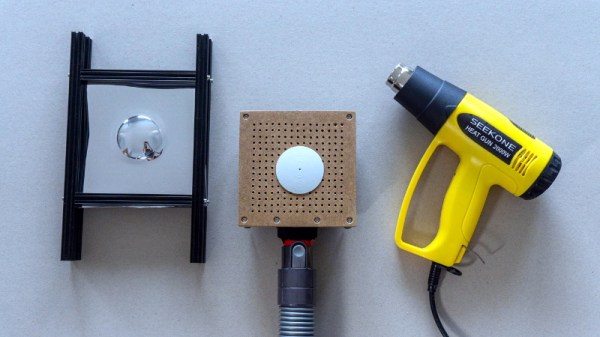
However, scaling up the process proved fraught. Uneven heating of the plastic film and a lack of rigidity in the carriage used to stretch it over the keycaps led to poor results. The final product showed many wrinkles and was distinctly unappealing.

[Drygol] isn’t giving up however, and plans to build a new vacuum table with greater performance. We can imagine this technique being an accessible way to colorize keycaps for a vintage cyberdeck or chiptune rig, without permanently modifying the keys. If you’ve got the inside knowledge on how to make this work, sound off in the comments.

We’ve seen [Drygol]’s work in this space before, too, like this extreme modded Amiga. If you’re executing your own retro repairs, be sure to drop us a line!

Watch This Scaly Gauntlet’s Hypnotizing, Rippling Waves

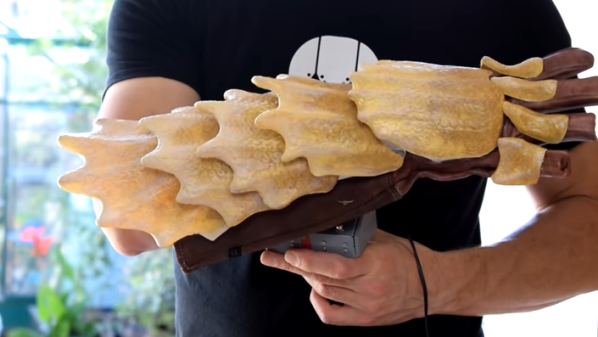
[Will Cogley]’s mechanized gauntlet concept sure has a hypnotizing look to it, and it uses only a single motor. Underneath the scales is a rod with several cams, each of which moves a lever up and down in a rippling wave as it rotates. Add a painted scale to each, and the result is mesmerizing. This is only a proof of concept prototype, and [Will] learned quite a few lessons when making it, but the end result is a real winner of a visual effect.

The gauntlet uses one motor, 3D printed hardware, and a mechanical linkage between the wrist and the rest of the forearm. Each of the scales is magnetically attached to the lever underneath, which provides some forgiveness for when one inevitably bumps into something. You can see the gauntlet without the scales in the video, embedded below the break, which should make clear how the prototype works.

The scales were created with the help of a Mayku desktop vacuum former by making lightweight copies of 3D printed scales. Interestingly, 3D printing each scale with full supports made for a useful mold; there was no need to remove supports from underneath the prints, because they are actually a benefit to the vacuum forming process. When vacuum forming, the presence of overhangs can lead to plastic wrapped around the master, trapping it, but the presence of the supports helps prevent this. 3D prints don’t hold up very well to the heat involved in vacuum forming, but they do well enough for a short run like this. Watch it in action and listen to [Will] explain the design in the video, embedded below.

Continue reading “Watch This Scaly Gauntlet’s Hypnotizing, Rippling Waves”

A Trove Of Cosplay Prop Making Tutorials And Blueprints

[CutTransformGlue] recently posted a build video for “Making Rey’s Star Wars Blaster“, embedded after the break. The construction uses layered MDF sheets to build up the blaster, and it’s a treat to see it taking shape, ending with an amazing paint job. It’s a good way to learn about the techniques used to bring such props to life and help you hone your skills. But digging deeper led us down an awesome rabbit hole.

[CutTransformGlue] got plans for Rey’s Blaster from the Punished Props Academy – a prop and costume making team from Seattle committed to “transforming passionate fans into confident, skillful makers”. These folks have built a wide variety of projects ranging from guns, weapons, costumes, props and more, and are obviously extremely skilled at what they do. But they aren’t keeping those skills to themselves and in a series of posts and videos they are sharing with us such varied skills as Foamsmithing (gotta love that coinage), Molding, Casting, Painting, 3D printing, Vacuum Forming and electronics. If you’d like more information about supplies, check out the Tools and Materials section. And if all of this has given you the itch to build a Skyrim Wuuthrad or a Halo4 Sniper Rifle, head over to the amazing Free Blueprints section for a treasure chest full of downloads.

Like we said earlier, if building such stuff is your thing, it’s a rabbit hole from which you’ll find it extremely difficult to extract yourself. Have fun.

Continue reading “A Trove Of Cosplay Prop Making Tutorials And Blueprints”

Hackaday Superconference: Estefannie’s Daft Punk Helmet

There’s no single formula for success, but if we’ve learned anything over the years of covering cons, contests, and hackathons, it’s that, just like in geology, pressure can create diamonds. Give yourself an impossible deadline with high stakes, and chances are good that something interesting will result. That’s what Estefannie from the YouTube channel “Estefannie Explains It All” did when Bay Area Maker Faire was rolling around last year, and she stopped by the 2018 Hackaday Superconference to talk about the interactive Daft Punk helmet that came out of it.

It’s a rapid-fire tour of Estefannie’s remarkably polished replica of the helmet worn by Guy-Manuel de Homem-Christo, one half of the French electronic music duo Daft Punk. Her quick talk, video of which is below, gives an overview of its features, but we miss the interesting backstory. For that, the second video serves as a kickoff to a whirlwind month of hacking that literally started from nothing.

You’ll Learn it Along the Way

Before deciding to make the helmet, Estefannie had zero experience in the usual tools of the trade. With only 28 days to complete everything, she had to: convert her living room into a workshop; learn how to 3D print; print 58 separate helmet parts, including a mold for thermoforming the visor; teach herself how to thermoform after building the tools to do so; assemble and finish all the parts; and finally, install the electronics that are the hallmark of Daft Punk’s headgear.
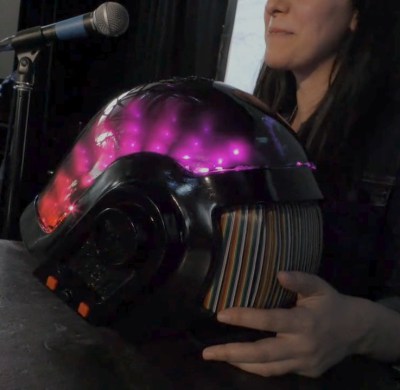
The three videos in her series are worth watching to see what she put herself through. Estefannie’s learning curve was considerable, and there were times when nothing seemed to work. The thermoforming was particularly troublesome — first too much heat, then not enough, then not enough vacuum (pretty common hurdles from other thermoforming projects we’ve seen). But the finished visor was nearly perfect, even if it took two attempts to tint.
We have to say that at first, some of her wounds seemed self-inflicted, especially seeing the amount of work she put into the helmet’s finish. But she wanted it to be perfect, and the extra care in filling, sanding, priming, and painting the printed parts really paid off in the end. It was down to the wire when BAMF rolled around, with last minute assembly left to the morning of the Faire in the hotel room, but that always seems to be the way with these kinds of projects.

In the end, the helmet came out great, and we’re glad the run-up to the Superconference wasn’t nearly as stressful for Estefannie — or so we assume. And now that she has all these great new skills and tools, we’re looking forward to her next build.

Continue reading “Hackaday Superconference: Estefannie’s Daft Punk Helmet”

Hacked Vacuum Chamber Won’t Suck A Hole In Your Budget

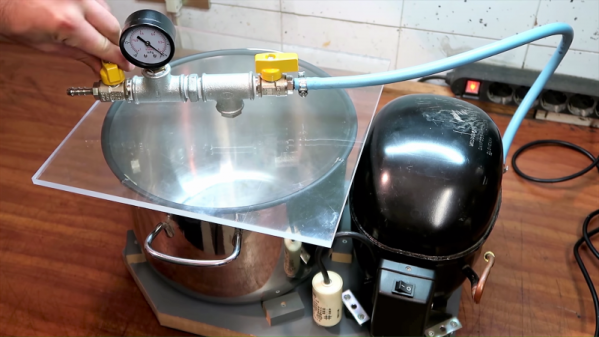
There’s nothing like a true hack, where something useful is concocted from bits of scrap and bargain store finds. Builds like these are much more than the sum of their parts, especially when they result in a useful tool, like this DIY vacuum chamber that’s good for all sorts of jobs.

Everything [Black Beard Projects] used to accomplish this build is readily available almost everywhere in the world, although we have to note that appliance recycling efforts and refrigerant recovery programs have made it somewhat harder to lay hands on things like the old fridge compressor used here. The big steel cooking pot is an easy thrift store find, though, and while [Black Beard] used high-quality stainless fittings and valves to plumb the chamber, pretty much any cheap fittings will do.

The one sketchy area of the build is the plexiglass sheet used for the chamber top, which seems a little on the thin side to us. You can see it flexing in the video below as vacuum is pulled; it survived, but we can see it failing catastrophically at some point. We stand ready to be reassured in the comments. Still, it’s a tidy build with a few nice details, like wiring a switch into the old start capacitor box and using car door edge protector as a gasket on the chamber.

Fridge compressor hacks are standard fare, of course, being used to make everything from air compressors to two-stroke engines. Sometimes they’re even used to keep things cool too.

Continue reading “Hacked Vacuum Chamber Won’t Suck A Hole In Your Budget”

Less Than Production, More Than One-Offs

We build things we think are cool. Sometimes, other people agree with us and they want a copy of what we’ve built. If you’re lucky enough to have an enviable product but you’re not ready for full-scale manufacturing, you may be looking at a low-volume production run. [Eric Strebel] walks us through one such instance where he makes some custom color swatches for a show. Video after the break.

[Eric Strebel] is an industrial designer so he plays to his strengths by designing the swatch shape, jig, tool, and hangers. He hires out the painting, laser cutting, and CNC machining. This may seem like a simple statement but some of us have a hard time paying other people for things we’re capable of learning. In some cases, we just have to pay the professionals to do it correctly and keep our focus.

The mentality of small runs in this video is perfect for people who sell on Tindie or want to make more than a handful of consistently nice parts. Our own [Lewin Day] recently talked about his experience with a run of 200 mixers called gMix.

Continue reading “Less Than Production, More Than One-Offs”

Hacker Straightens Own Teeth

So you say your wonky smile has you feeling a bit self-conscious? And that your parents didn’t sock away a king’s ransom for orthodontia? Well, if you have access to some fairly common fab-lab tools, and you have the guts to experiment on yourself, why not try hacking your smile with DIY braces?

First of all: just – don’t. Really. But if you’re curious about how [Amos Dudley] open-sourced his face, this is one to sink your teeth into. A little research showed [Amos] how conventional “invisible” braces work: a 3D model is made of your mouth, each tooth is isolated in the model, and a route from the current position to the desired position is plotted. Clear plastic trays that exert forces on the teeth are then 3D printed, and after a few months of nudging teeth around, you’ve got a new smile. [Amos] replicated this hideously expensive process by creating a cast of his teeth, laser scanning it, manipulating the teeth in 3D modeling software, and 3D printing a series of intermediate choppers. The prints were used to vacuum mold clear plastic trays, and with a little Dremel action they were ready to wear. After 16 weeks of night and day wear, the results are pretty amazing – a nicely aligned smile, and whiter teeth to boot, since the braces make great whitening trays.

Considering how badly this could have turned out, we’ve got to hand it to [Amos] for having the guts to try this. And maybe he’s onto something – after all, we’ve advocated for preemptive 3D scanning of our bodies recently, and what [Amos] did with this hack is a step beyond that.

[LupusMechanicus], thanks for the tip!