A Dual Monitor Setup For The C64, And Yes, It’s VGA Compatible

Few in the 1980s were too fussed about their home computer only supporting a single monitor; indeed, most were satisfied enough by the brand new capabilities on offer at the time. That said, it’s many decades hence, and we really do deserve more. Fear not, for [Ryan Brooks] is here to help with his VG64 VGA Card for the Commodore 64.

The card sits in the cartridge slot of the Commodore 64, and packs a Xilinx CPLD which is responsible for generating the video output signals. It’s hooked up to an SRAM chip which acts as a frame buffer for the video output. Programs can then be loaded on the Commodore 64 which write to the frame buffer, that can then be sent out to an attached VGA monitor hooked up to the cartridge.

It’s not the most useful cart at the moment, as it’s only capable of working with software designed specifically for the hardware. Additionally, it could prove difficult to shift enough data to it to do any kind of fast animation or updates. With that said, it’s an awesome example of just what can be achieved in terms of expanding the Commodore 64, and we’d love to see how far work in this space can go. We’ve seen similar work before, too, albeit with a somewhat smaller 16×2 character LCD. Video after the break.

Continue reading “A Dual Monitor Setup For The C64, And Yes, It’s VGA Compatible”

Arduboy On The Big Screen

We’re big fans of the Arduboy here at Hackaday, but we’ll admit its tiny screen isn’t exactly ideal for long gaming sessions. There are some DIY builds of the open source handheld that use a larger SPI OLED display, though you’re relatively limited on what kind of changes can be made to the hardware before the games start balking. But as [Nick Bild] shows with his Arduboy home console, hacking the core system library opens up a lot of interesting possibilities.

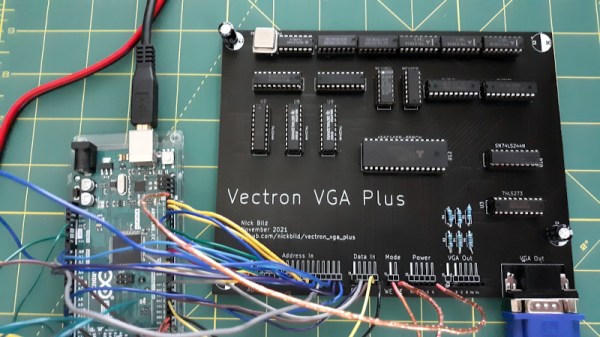
Games written for the Arduboy make use of a common library that handles all the low-level hardware stuff, which includes a display() function to push the graphical data out to an SPI-connected OLED display. What [Nick] has done is re-write that function to instead output to a custom VGA generator running on the TinyFPGA BX. He had to delete support for the Arduboy’s RGB LEDs because he needed the extra pins, but that shouldn’t cause much of a problem in terms of software support.

This does mean that games need to be recompiled against the modified library to work on his hardware, but as the vast majority of Arduboy software is open source anyway, that’s not much of a problem. We particularly like the Super Game Boy style borderĀ  you get around the display at no extra cost.

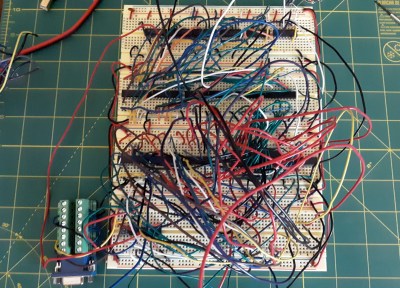
At this point the hardware looks less like a console and more like a breadboard filled with jumpers, so we’re interested in seeing this project taken to its logical conclusion. A custom PCB, enclosure, and possibly even support for using the original NES controllers would turn this into proper system worthy of any hacker’s game room. You could even put the games on custom cartridges if you wanted, though a flash chip that holds the system’s entire library would be quite a bit more convenient.

RAM Fiddling Turns VGA Converter Into Video Synth

If you’re interested in circuit bent video but not sure where to start, the excellent guide [LoFi Future] has come up with for modifying the cheap and readily available GBS-8100 VGA to composite converter would be a great first step. While we wouldn’t call it an easy modification, the circuit documentation and demonstration video below go a long way to making it as accessible as possible to new players.

Some soldering will be required…

While other video converters have all-in-one chipsets that are much harder to work with, [LoFi Future] explains that the separate EM636165TS DRAM chip on the GBS-8100 provides an ideal spot to tap in and wreak some technicolor havoc. By mapping out the pins and studying how the video output is corrupted by grounding them out or connecting them to each other, he’s been able to come up with fairly repeatable “recipes” for different effects.

In the most basic form, once you’ve soldered the pins of the DRAM chip up to the plug board interface, you’d technically be done. But [LoFi Future] takes it a step further and pairs the GBS-8100 with a separate composite to VGA converter. This provides some additional effects in the form of feedback loops and hue adjustment, but more practically, allows the device to handle composite on both the input and output. It’s a lot of hardware to cram into the enclosure, but thanks to little touches like the printed panel graphics, the final product does looks very professional.

Aside from the occasional modified NES Zapper, most of the circuit bent hardware we see is of the audio variety. But with projects like this one and the MIDI controlled SNES we covered last year as inspiration, we might see a balancing of the scales. Continue reading “RAM Fiddling Turns VGA Converter Into Video Synth”

Retro ISA Card Means Old, Slow Computers No Longer Need Old, Heavy Monitors

One thing about vintage computers is that they depend greatly on whether or not one can plug a compatible monitor into them. That’s what’s behind [Tube Time]’s Graphics Gremlin, a modern-design retro ISA video card that uses an FPGA to act just like a vintage MDA or CGA video card on the input end, but provides a VGA port for more modern display output options. (Actually, there is also an RGBI connector and a composite video out, but the VGA is probably the most broadly useful.)

Handy silkscreen labels make everything crystal clear. Click to enlarge.

Why bother making a new device to emulate an old ISA video card when actual vintage video cards are still plentiful? Because availability of the old cards isn’t the bottleneck. The trouble is that MDA or CGA monitors just aren’t as easy to come across as they once were, and irreplaceable vintage monitors that do still exist risk getting smashed during shipping. Luckily, VGA monitors (or at least converters that accept VGA input) are far more plentiful.

The board’s design files and assembly notes are all on the project’s GitHub repository along with plenty of thoughtful detail about both assembly and troubleshooting, and the Verilog code has its own document. The Graphics Gremlin is still under development, but you can also watch for the latest on [Tube Time]’s Twitter feed.

Thanks to [NoxiousPluK] for the tip!

Pi Pico Project Plays Pong Perfectly

Even as technology keeps progressing, we find ourselves coming back to the classics again and again. Pong is quite possibly the classic game, and the Raspberry Pi Pico is one of the latest microcontrollers. So [Nick Bild] combined them expertly in his Pico Pong project, which includes gesture controls and a custom VGA output.

Rolling your own VGA signal is no simple feat, and this project takes full advantage of the Pico’s features to pull it off. Display data is buffered in memory, while a Programmable I/O (PIO) program reads straight from the buffer via Direct Memory Access (DMA) and writes straight to the display. This allows for nanosecond-precision while leaving the CPU free to handle inputs and run the game. Even with the display work offloaded, the ARM processor had to be massively overclocked at 258 MHz, well over its 133 MHz specs, to make things run smoothly. And still [Nick] found himself limited to a 640×350 resolution and serendipitously-retro-accurate monochrome color scheme.

Gesture controls come from a pair of IR light beams hooked up to the GPIO. IR LEDs shine up toward reflectors, and the light bounces back down to detectors. Blocking one of the beams causes your paddle to move up or down, which looks pretty responsive in the video (embedded below).

We’ve seen [Nick] play Pong before, though at that time it was handheld and based on the venerable 6502. And just recently we wrote about the Raspberry Pi Pico powering another classic game: Snake.

Continue reading “Pi Pico Project Plays Pong Perfectly”

VGA Graphics Card In 74xx Logic

Feeling nostalgic we presume, [Glen Kleinschmidt] set out to build a 640x480x64 VGA controller card from discrete logic chips. If we ignore the 512Kx8 Cypress SRAM video memory, he succeeds, too — and on a very readable, single page A3 schematic. The goal is to interface some of his older 8-bit machines, like the TRS-80 Model 1 and the BBC Micro, but for now he’s running a demo using a 20+ year old PIC16F877 micro.

[Glen] provides all the schematics, Gerbers, and C source code on his website should you be inclined to reproduce one for yourself. He has three versions in the works, with various capabilities (there’s a table on his website). As an alternative, one could always use an FPGA or a custom-built chip such as the SSD1963 to generate video for these micros, but sometimes the urge to go retro is too great to resist. We get the feeling that for [Glen], this is a project unto itself, and being able to interface it to his 8-bit computers is just a convenient excuse.

This isn’t [Glen]’s first retro project, either. Check out his analog computer “bouncing ball” project we covered back in 2017. Have you struggled with the build vs. buy decision, and how do you decide?

Continue reading “VGA Graphics Card In 74xx Logic”

VGA Without The Hassle, From Your PlayStation One

The original Sony PlayStation was a nifty console for its day; that grey box may have only had a 33 MHz MIPS processor and 4 MB of RAM, but for the early to mid 1990s its games were some of the best to be had. From the days when it would have sat under a family TV with a composite video or RF connection, you might expect that the PlayStation would require some form of converter box to drive a higher quality monitor. As [Wesk] found out though, present on the PS1 mainboard are all the required H and V sync as well as RGB video signals to drive a VGA monitor at 15 kHz.

It’s a wallow in the past for anyone who spent the 1990s using their SMD soldering skills to install modchips in PS1s, but it’s pleasing to find that those sync lines aren’t only available from tricky-to-solder IC pins, instead they appear on handy pads. Along with RGB lines from the normal video output they’re brought out via lightweight co-ax to a VGA socket that sits in a 3D printed bracket in the space where a removed system link port would have been. A small trim of the internal shield is requited to clear the new socket, leaving the VGA port on the back of the reassembled console looking for all the world as though it was installed in the Sony factory. Given how simple this mod turned out to be and the sharpness of the resulting image, it’s surprising that this wasn’t tried back in the day. Perhaps we were all too busy playing Wipeout.

While you’re idly rekindling your interest in a PS1, should you buy one then perhaps you’ll need a modchip.

Thanks [John] for the tip.