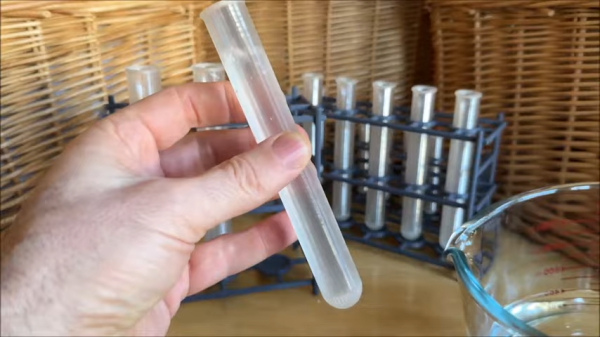
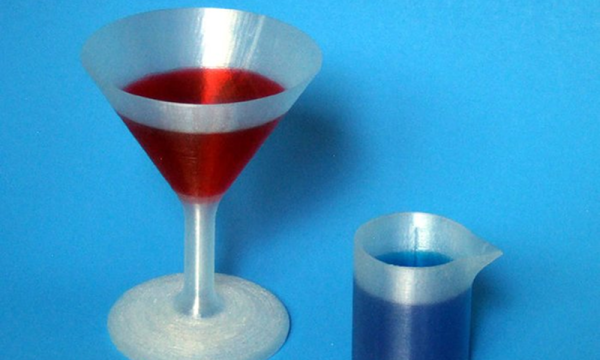
Along with layer lines, FDM printers are notorious for being neither air- nor water-tight due to the countless very small gaps between the layers. This is very unfortunate if you are trying to FDM print something that should keep water either inside or outside. Although a variety of potential solutions exist, it’s hard to easily compare them. Correspondingly [Half-Baked-Research] decided that the best approach here was to just try everything and pit them against each other.
These solutions include various coatings either in- or outside the part, as well as the foam solution that he tried previously joined by a number of community-suggested alternatives that should not get waterlogged. To properly test them, the water pressure at a depth of about 10 meters would be good enough, but rather than find a really deep swimming pool or try his luck at nearby bodies of water, compressed air was used to ramp up the pressure of a what is basically a big bucket of water.
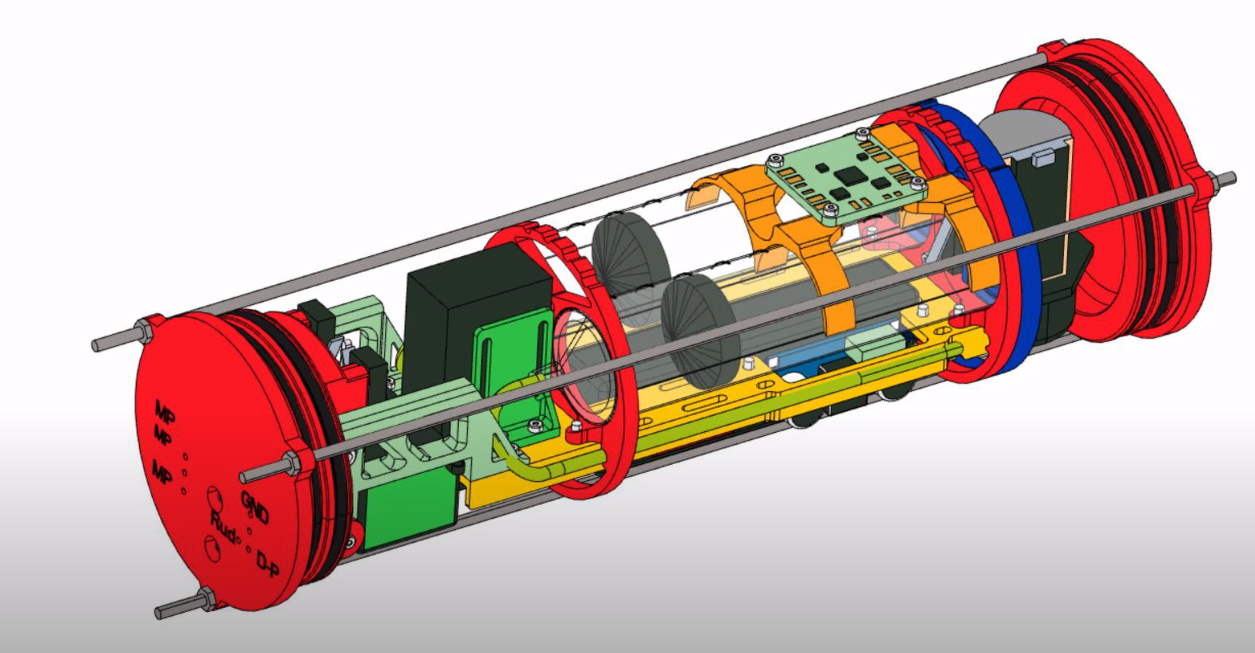
For the pressure chamber a Vevor vacuum chamber was modified to contain the 1 bar (103 kPa) of pressure, which was a fair bit of work and required a CNCed metal top plate. Among the printed and treated samples were also a couple of wild cards: a PETG cube with a TPU printed cover, a PU molded part and PETG with thicker walls.
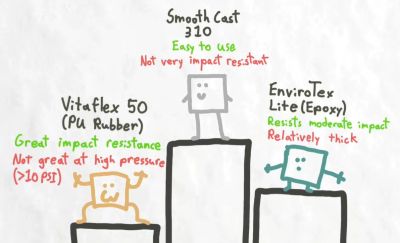
Along with the long soak, percussive testing was also performed to see how it’d affect the water intrusion resistance. After all that, there were three winners: internal epoxy coating and two types of internal PU coating, though epoxy held up the best after repeated abuse. PU rubber also got a thumbs-up if you don’t need as high a pressure resistance but are more concerned with resisting physical abuse.
Continue reading “Testing Various Ways To Waterproof FDM Printed Parts”
![[Ben] at workbench with 3D-printed sea scooter](https://hackaday.com/wp-content/uploads/2025/08/sea-scooter-1200.jpg?w=600&h=450)