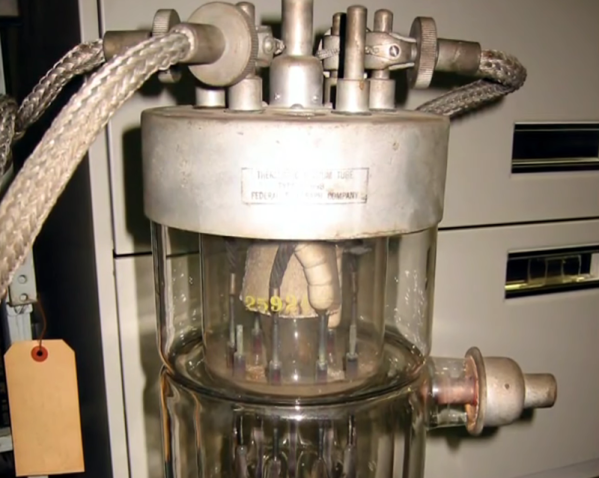
Crosley was a famous name in radio for more than one reason. The National VOA Museum of Broadcasting has a video telling [Powel Crosley Jr.’s] story, and the story behind the 500 kW WLW transmitter. WLW was an AM broadcast station often called the nation’s channel since its signal covered most of the United States. The first Crosley station was identified at 8CR, running 20 watts from [Crosley’s] living room. Quite a modest start! By 1922, he had moved to his family business location along with 500 watts of output. Over the years, WLW got more powerful until it was finally a 500 kW giant.
Day: January 13, 2024
Reverse Engineering Smart Meters, Now With More Fuming Nitric Acid
If you’re lucky, reverse engineering can be a messy business. Sure, there’s something to be said for attacking and characterizing an unknown system and leaving no trace of having been there, but there’s something viscerally satisfying about destroying something to understand it. Especially when homemade fuming nitric acid is involved.
The recipient of such physical and chemical rough love in the video below is a residential electric smart meter, a topic that seems to be endlessly fascinating to [Hash]; this is far from the first time we’ve seen him take a deep dive into these devices. His efforts are usually a little less destructive, though, and his write-ups tend to concentrate more on snooping into the radio signals these meters are using to talk back to the utility company.
This time around, [Hash] has decided to share some of his methods for getting at these secrets, including decapping the ICs inside. His method for making fuming nitric acid from stump remover and battery acid is pretty interesting; although the laboratory glassware needed to condense the FNA approaches the cost of just buying the stuff outright, it’s always nice to have the knowledge and the tools to make your own. Just make sure to be careful about it — the fumes are incredibly toxic. Also detailed is a 3D-printable micropositioner, used for examining and photographing acid-decapped ICs under the microscope, which we’d bet would be handy for plenty of other microscopy jobs.
In addition to the decapping stuff, and a little gratuitous destruction with nitric acid, [Hash] takes a look at the comparative anatomy of smart meters. The tamper-proofing features are particularly interesting; who knew these meters have what amounts to the same thing as a pinball machine’s tilt switch onboard?
Continue reading “Reverse Engineering Smart Meters, Now With More Fuming Nitric Acid”
Simulate Running A Small Hardware Business With Hardware Hustle
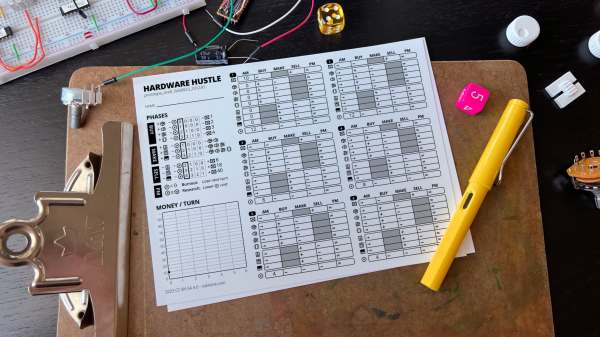
[Oskitone]’s Hardware Hustle is a printable roll-and-write tabletop game that can be played on a single sheet of paper. It simulates attempting to run a small hardware business sustainably. Buy parts, make products, and sell them without burning yourself out!
If you’re not familiar with roll-and-write games, it’s a genre in which players take turns by rolling dice and then choosing how to assign those values in a game space as they progress from turn to turn. In the case of Hardware Hustle, it’s primarily a resource management game in which a player will be purchasing parts, assembling widgets, selling those widgets, and improving processes all while managing both money and opportunity costs.
The inspiration for Hardware Hustle comes from [Oskitone]’s own experience designing, building, and selling things like open-sourced, hackable synth kits that are known for their thoughtful design and fantastic use of 3D printing.
The game is in open beta-testing mode, so if you’d like to give it a try, head over to the PDF download section of the GitHub repository. Don’t forget to share your thoughts with the feedback form after playing. (If you’re wondering why a printable tabletop game has source code on GitHub, it’s because the game’s printable sheets are generated by JavaScript, making adjustments and tweaks and version control easier.)
Tips For 3D Printing Watertight Test Tubes
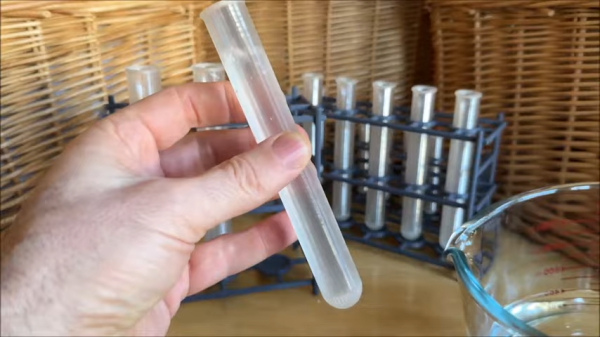
[DaveMakesStuff] uses 3D printed test tubes for plants and similar purposes, and he’s shared how to make them on a 3D printer, complete with different models each optimized for different nozzle sizes.
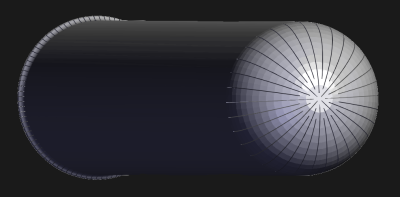
It’s not too hard to get clear-looking prints in spiral vase mode by using a transparent filament, but the real value in his design is that it comes out reliably watertight, with an extra-strong base and rim.
How is this accomplished when using spiral vase mode, which extrudes only a single wall perimeter? By using fancy geometry on the part, which makes the nozzle follow a high-density path that turns back onto itself multiple times, in concept a little like a switchback trail. The result is extra-dense areas on both the rim and the bottom of the tubes. This helps make them not only watertight, but far stronger than a single wall.
This technique is reminiscent of an earlier method we saw of enhancing the strength of vase mode prints by modeling thin slots into an object. After slicing, the model still consists of a single unbroken spiral extrusion. But in practice, the extruded plastic forms what resemble structural ribs. Why? Because those technically-adjacent extruded lines are so close to one another that they end up sticking together. Something similar is being done here by [DaveMakesStuff] to ensure that the bottom and top of the tubes are extra strong.
You can see a short video (embedded below) that showcases the tubes, as well as some modular 3D-printable racks that [DaveMakesStuff] also makes. And should you want some tips on getting better transparency from your 3D prints, the essentials boil down to printing with transparent filament, slightly hotter, and with a slightly higher extrusion rate.
Continue reading “Tips For 3D Printing Watertight Test Tubes”
Skip The Radio With This Software-Defined Ultrasound Data Link
We know what you’re thinking: with so many wireless modules available for just pennies, trying to create a physical data link using ultrasonic transducers like [Damian Bonicatto] did for a short-range, low-bitrate remote monitoring setup seems like a waste of time. And granted, there are a ton of simple RF protocols you can just throw at a job like this. Something like this could be done and dusted for a couple of bucks, right?
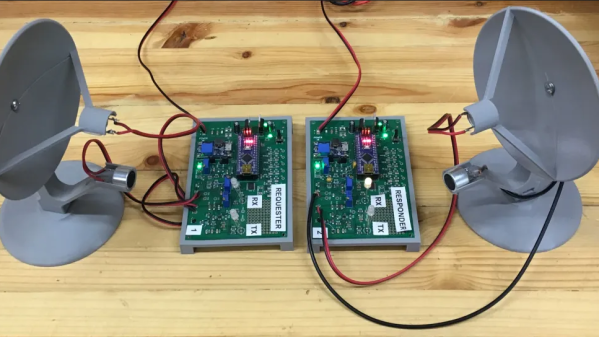
Luckily, [Damian] wanted something a little different for his wireless link to a small off-grid solar array, which is why he started playing with ultrasound in an SDR framework. The design for his “Software-Defined Ultrasonics” system, detailed in Part 1, has a pair of links, each with two ultrasonic transducers, one for receiving and one for transmitting. Both connect to audio amplifiers with bandpass filters; the received signal is digitized by the ADC built into an Arduino Nano, while the transmitted signal is converted to analog by an outboard DAC.
The transducers are affixed to 3D printed parabolic reflectors, which are aimed at each other over a path length of about 150′ (46 m). Part 2 of the series details the firmware needed to make all this work. A lot of the firmware design is dictated by the constraints introduced by using Arduinos and the 40-kHz ultrasonic carrier, meaning that the link can only do about 250 baud. That may sound slow, but it’s more than enough for [Damian]’s application.
Perhaps most importantly, this is one of those times where going slower helps you to go faster; pretty much everything about the firmware on this system applies to SDRs, so if you can grok one, the other should be a breeze. But if you still need a little help minding your Is and Qs, check out [Jenny]’s SDR primer.
It’s The Simple Things
I love minimal hacks. Limitations are sometimes the spark for our greatest creativity, and seeing someone do something truly marvelous with the simplest of technological ingredients never fails to put a smile on my face.
This week, it was the super-simple 1D Fireworks project by [Daniel Westhof]. Nothing more than an ESP8266 and a long RGB LED strip went into this effect on the hardware side, and indeed the code isn’t all that tricky either. But what it does is a very nice simulation of the physics that define the movement of a flare rocket and then all of the stars that explode out of it. And that makes it look so good.
Hackaday’s [Kristina Panos] is apparently also a fan of the single dimension, because she picked out some of my personal favorite uses of an LED strip, including Twang, to which we’ll admit we’re addicted, or any of the PONG versions.
But I’ve seen other games, including a button-mashing racer and various roller-coaster simulations. All with the same, essentially, two-part BOM. (OK, if you don’t count the buttons/accelerometer, or power supply.) Or this demo of sorting routines, or the Velocicoaster. And I think there’s more out there.
How much creativity can you pack into an LED strip? This sounds like we need to make a new contest…
OpenWRT To Mark 20 Years With Reference Hardware
The OpenWRT project is now two decades old. The project has come a long way since Linksys was forced to release the GNU-licensed code for the original WRT54G router from which the project takes its name. They’ve marked the occasion in an interesting manner: by proposing that the plethora of devices supported by the OS be joined by a fully upstream-supported reference hardware platform.
 Spec-wise it’s what you would expect for a hackable router platform in 2024. A MediaTek chipset can be found at its centre, but the hardware is not in this case the important bit. Here will be a platform that won’t have to rely on proprietary manufacturer BLOBs, and which will thus likely continue to have up-to-date kernel support long into the future. So many enticing SBCs fall in this regard, and many retain ossified kernel versions after their manufacturers tire of them as a result.
It appears that the future of this project will be subject to an OpenWRT community vote, and we sincerely hope that it will come to fruition. Meanwhile, we couldn’t resist a peek at the status of the router that started it all, by our reckoning the original WRT54G was last supported by the OS over a decade ago.

