Grabbing Better Images From A Newer Russian Satellite

The Soviet Union took the world by surprise when it sent its Sputnik satellite into low earth orbit way back in 1957. The event triggered a space race between the Soviets and the United States and ushered in technologies that would go on to touch the lives of every human on earth. Today, several nations have a space program. And one of the more useful things to put in orbit are weather satellites.

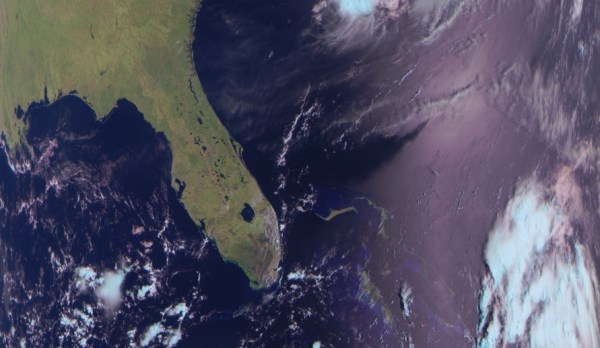
In 2014, the Russians launched their Meteor N M-2 weather satellite into a polar orbit. The part that were most interested in is the fact that it transmits images at 137.1 MHz using the standard LRPT protocol. However, the newer Meteor N M-2 transmits images at twelve times the resolution of US NOAA satellites. No typo there –  that’s twelve (12!) times. Have we got your attention now?

We shouldn’t have to tell you to jump on over to [phasenoise’s] blog which gives you everything you need to start grabbing some of these awesome images.

Now, before you get your jumper wires in a bunch – we are well aware that receiving satellite images is nothing new.

Thanks to [Roy Tremblay] for the tip!

A Minimalist Weather Clock With A Unique Display

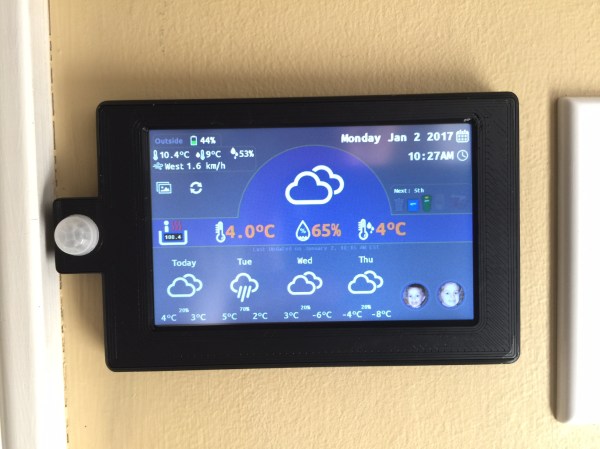
If you’re looking for a home hub to display weather, time, and important family information, the formula is pretty simple: build yet another “magic mirror” project. We’re not complaining — magic mirrors look great. But if all you need is time and weather, this elegant pixel display is something just a little bit different.

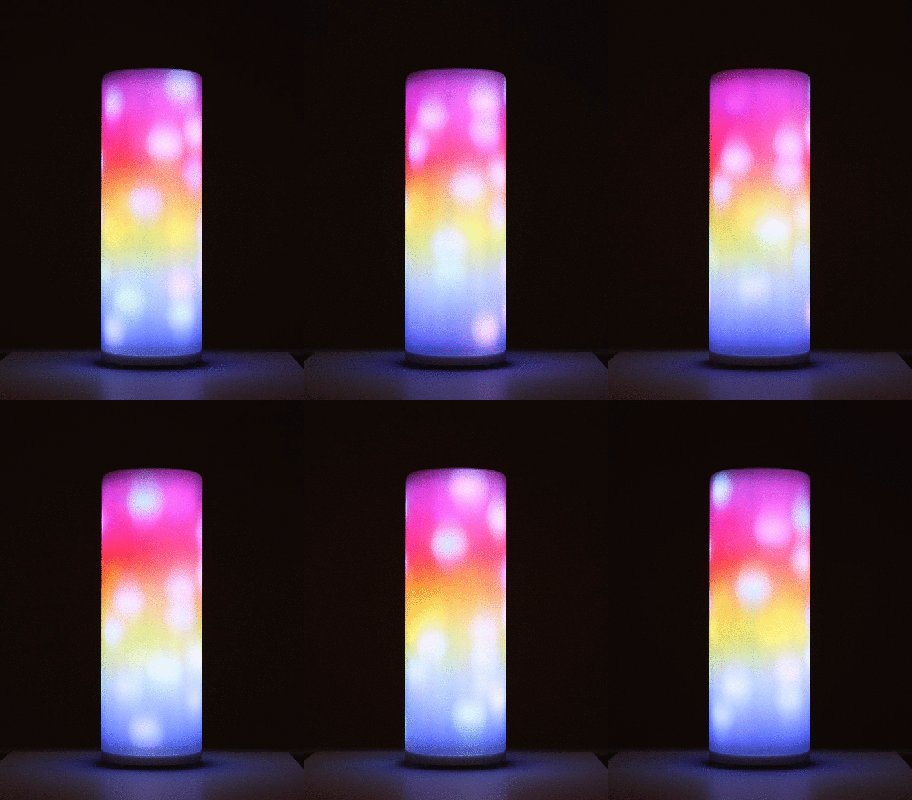
Among his many criteria for the perfect hack, [Dominic] lists usefulness, visual appeal, and low cost. We’ll agree that his minimalist weather clock hits all those marks, and with the careful selection of a 16 x 32-pixel RGB display module, [Dominic] ended up giving back to the community by developing an Arduino driver for it. He points out that strips of Neopixels could have been used for the display, but they’d have ended up costing more, so the LED matrix was a sensible choice. A 3D-printed separator grid and a paper diffuser provide the proper pixelated look, and some simple animated icons display the two-day weather forecast. We find the time and temperature numerals a little hard to read, but it’s not bad considering the limited resolution of the display. And the case is a nice bit of woodworking too. Not a bad result for only €43.

We’re intrigued by the P10 LED matrix module [Dominic] used for this one. It might be a good choice for a word clock and weather station, or with his driver, a display for just about anything.

Distributed Air Quality Monitoring Via Taxi Fleet

When [James] moved to Lima, Peru, he brought his jogging habit with him. His morning jaunts to the coast involve crossing a few busy streets that are often occupied by old, smoke-belching diesel trucks. [James] noticed that his throat would tickle a bit when he got back home. A recent study linking air pollution to dementia risk made him wonder how cities could monitor air quality on a street-by-street basis, rather than relying on a few scattered stations. Lima has a lot of taxis, so why wire them up with sensors and monitor the air quality in real-time?

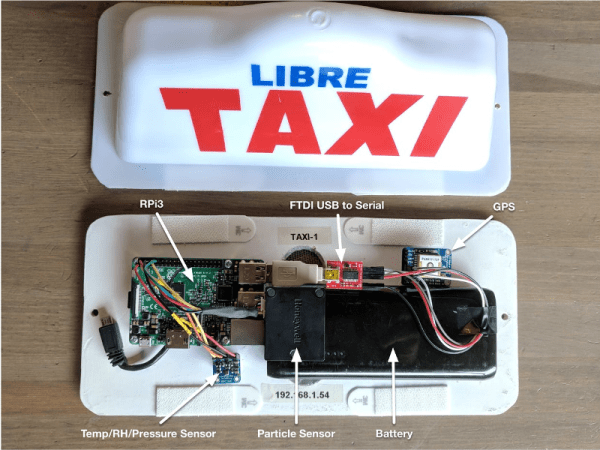
This taxi data logger’s chief purpose is collect airborne particulate counts and illustrate the pollution level with a Google Maps overlay. [James] used a light-scattering particle sensor and a Raspi 3 to send the data to the cloud via Android Things. Since the Pi only has one native UART, [James] used it for the particle sensor and connected the data-heavy GPS module through an FTDI serial adapter. There’s also a GPS to locate the cab and a temperature/humidity/pressure sensor to get a fuller environmental picture.

Take a ride past the break to go on the walk through, and stick around for the testing video if you want to drive around Lima for a bit. Interested in monitoring your own personal air quality? Here’s a DIY version that uses a dust sensor.

Continue reading “Distributed Air Quality Monitoring Via Taxi Fleet”

Weather Station Needs Almost No Batteries

While the ESP8266 has made its way into virtually every situation where a low-cost WiFi solution is needed, it’s not known as being a low-power solution due to the amount of energy it takes to run WiFi. [Alex] took this design constraint as more of a challenge though, and with the help of an ATtiny microcontroller was able to develop a weather station using an ESP8266 that only needs new batteries every 2-4 years.

While the ESP8266 module consumes a bit of power, the ATtiny excels in low-power mode. To take advantage of this, [Alex] designed the weather station using the ATtiny to gather data every two minutes, store the data in a buffer, and upload all of it in bursts every hour using the ESP8266. This means that the power-hungry WiFi chip can stay off most of the time, drastically limiting the power demands of the station. [Alex] mostly details the setup of the ATtiny and the ESP8266 on his project page, so this could be applied anywhere that low power and network connectivity are required.

As for the weather reporting capabilities, the station is equipped to measure temperature, light, and humidity. Presumably more could be added but this might increase the power demands for the weather station as a whole. Still, changing batteries once a year instead of once every two years might be a worthwhile trade-off for anyone else attempting such an ambitious project. Other additions to the weather station that we’ve seen before might include a low-power display, too.

I See Rain In Your Future

Who wouldn’t like to have a crystal ball? Unfortunately, our computers aren’t very good at predicting the future. However they do occasionally get the weather correct, so [Jenny Hanell] built a crystal ball to show the weather forecast. She calls it “Sphaera” and you can see a video of it in operation below.

The user interface is entertaining, and relies on 5 photoresistors. The Raspberry Pi inside detects when you cover one of them up, and interprets that as a command. A piece of plastic allows for projection inside the sphere from an LCD display. [Jenny] calls that a hologram although technically it isn’t a true hologram, of course.

Continue reading “I See Rain In Your Future”

DIY Barometer: It’s For Your Health!

[Taciuc Marius] and his colleague noticed that days with low atmospheric pressure plus caffeine in their system meant a spike in blood pressure. Considering how this might impact his cardiovascular health, he decided to make a relative pressure barometer out of a jar to help him decide whether he should really have another cup of coffee.

Aside from a 3D printer, you’ll need to assemble a small jar with a lid, some screws, lock washers, nuts, and a flexible membrane — a piece of a rubber glove or balloon will do nicely. [Marius] details the build process on his project page, advising others to print the parts at 0.2 resolution — potentially even upping the extrusion multiplier to 1.1 — to prevent gaps in the print that would compromise the airtight seal needed for the barometer to work properly.

Additionally, thick glue or epoxy is recommended for the rest of the assembly process — it doesn’t have to be pretty, but it does need to be sealed! The final product can be easily tested by simply holding the jar.

While this barometer helps one make healthy choices, not all are created equal. This one tells you flat out how you should consider getting to work, while others have been tricked into behaving like touch sensors.

Old Rabbit Ears Optimized For Weather Satellite Downlink

Communicating with a satellite seems like something that should take a lot of equipment. A fancy antenna and racks full of receivers, filters, and amplifiers would seem to be the entry-level suite of gear. But listening to a weather satellite with an old pair of rabbit ears and an SDR dongle? That’s a thing too.

There was a time when a pair of rabbit ears accompanied every new TV. Those days are gone, but [Thomas Cholakov (N1SPY)] managed to find one of the old TV dipoles in his garage, complete with 300-ohm twinlead and spade connectors. He put it to work listening to a NOAA weather satellite on 137 MHz by configuring it in a horizontal V-dipole arrangement. The antenna legs are spread about 120° apart and adjusted to about 20.5 inches (52 cm) length each. The length makes the antenna resonant at the right frequency, the vee shape makes the radiation pattern nearly circular, and the horizontal polarization excludes signals from the nearby FM broadcast band and directs the pattern skyward. [Thomas] doesn’t mention how he matched the antenna’s impedance to the SDR, but there appears to be some sort of balun in the video below. The satellite signal is decoded and displayed in real time with surprisingly good results.

Itching to listen to satellites but don’t have any rabbit ears? No problem — just go find a cooking pot and get to it.

Continue reading “Old Rabbit Ears Optimized For Weather Satellite Downlink”