Field Expedient Stick Welder From Cordless Tool Battery Packs

The self-proclaimed and actual “smartest idiot on YouTube” is back with another entry from the “don’t try this at home” file. [AvE] recently did a teardown of a new DeWalt cordless drill-driver, and after managing to get everything back together, he was challenged by a viewer to repurpose the 20V battery packs into an impromptu stick welder.

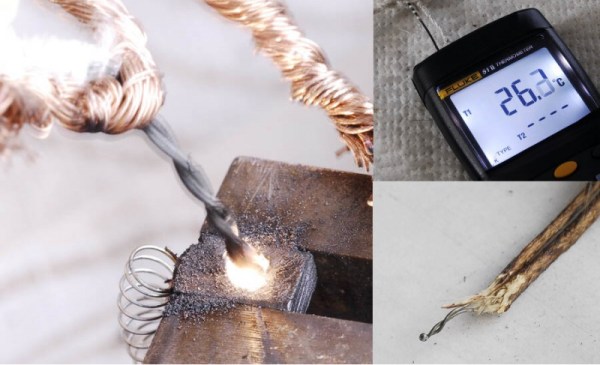
AvE_short[AvE] delivered – sort of. His first attempt was with the two battery packs in parallel for higher current, but he had trouble striking an arc with the 1/8″ rod he was using. A freeze-frame revealed an incredible 160A of short-circuit current and a welding rod approaching the point of turning into plasma. Switching to series mode, [AvE] was able to strike a reasonable arc and eventually lay down a single splattery tack weld, which honestly looks better than some of our MIG welds. Eventually his rig released the blue smoke, and the postmortem teardown of the defunct packs was both entertaining and educational.

While we can’t recommend destroying $100 worth of lithium-ion battery packs for a single tack weld, it’s interesting to see how much power you’re holding in the palm of your hand with one of these cordless drills. We saw a similar technique a few years back in a slightly more sophisticated build; sadly, the YouTube video in that post isn’t active anymore. But you can always stay tuned after the break for the original [AvE] DeWalt teardown, wherein blue smoke of a different nature is released.

Continue reading “Field Expedient Stick Welder From Cordless Tool Battery Packs”

Give Me A Welder And Rod Stock And I’ll Build You The World

Metal fabrication is a an art that often goes under appreciated. The ability to take common stock in the form of sheet, pipe (square or round), and in this case rod, and make it into anything is intoxicating for the artist and super villain inside of each of us. Recently [asciiArtVandaly] took on an interesting job and was thoughtful enough to make a photo album of the process. He literally created the world out of metal.

The build is a wire-frame globe. The latitude and longitude rods are rolled to the proper arc, but holding them in place is a bit of a trick. This image shows the welding jig built just for this project. It has large and small nobs to match the increasing spacing of the rods, with washers holding down ever other joint. If you want to see an example of rod-rolling check out the unrelated How It’s Made segment found after the break.

This jig is visually stunning to look at, but the math used to lay something like this out is only mildly interesting compared to the work done to add the continents to the piece. Each of these were cut out and then hand hammered to match the curve of the globe before being welded in place and outfitted with lighting for cities. That’s a skill you can’t get without a lot of practice — and get this, [asciiArtVandalay] does it as a hobby. Who knew robot engineers needed hobbies?

The finished globe is about eighty pounds of stainless steel. The build ends up being corporate art for a company sure to turn [Tyler Durden’s] eye.

Continue reading “Give Me A Welder And Rod Stock And I’ll Build You The World”

Horn Antenna

Building A Horn Antenna For Radar

So you’ve built yourself an awesome radar system but it’s not performing as well as you had hoped. You assume this may have something to do with the tin cans you are using for antennas. The obvious next step is to design and build a horn antenna spec’d to work for your radar system. [Henrik] did exactly this as a way to improve upon his frequency modulated continuous wave radar system.

To start out, [Henrik] designed the antenna using CST software, an electromagnetic simulation program intended for this type of work. His final design consists of a horn shape with a 100mm x 85mm aperture and a length of 90mm. The software simulation showed an expected gain of 14.4dB and a beam width of 35 degrees. His old cantennas only had about 6dB with a width of around 100 degrees.

The two-dimensional components of the antenna were all cut from sheet metal. These pieces were then welded together. [Henrik] admits that his precision may be off by as much as 2mm in some cases, which will affect the performance of the antenna. A sheet of metal was also placed between the two horns in order to reduce coupling between the antennas.

[Henrik] tested his new antenna in a local football field. He found that his real life antenna did not perform quite as well as the simulation. He was able to achieve about 10dB gain with a field width of 44 degrees. It’s still a vast improvement over the cantenna design.

If you haven’t given Radar a whirl yet, check out [Greg Charvat’s] words of encouragement and then dive right in!

Stretch Bike Hauls All

cargobike

Need to haul some stuff? Got nothing to haul it with? Then fashion yourself a cargo bicycle! We’ve seen cargo bikes before, but none quite like this one. Built from a German “klapprad”, [Morgan] and his father fashioned a well constructed cargo bicycle which is sure to come in handy for many years.

They started by cutting the bike in half and welding in a 1 meter long square tubing extension. The klapprad style bicycle is made from thick metal stock, making it sturdy and easy to weld. This process also make it a true “stretch” vehicle as opposed to one that replaces the front end in order to keep the handle bar assembly near the rider.

Along with some nicely done woodwork and carbon fiber, they used parts from an old mountain bike including a front fork, front bearing and handlebar, tubing from an old steel lamp, a kickstand from a postman motorcycle, and a kitchen sink to complete the build. It should handle well so long as the weight of the cargo is not heavier than the weight of the driver.

On Not Getting Metal Fume Fever With Galvanized Conduit

galv

You can find galvanized steel pipes at Home Depots and construction sites all around the world. These relatively thin-walled steel pipes would make for great structural members if it weren’t for the fact they were covered in a protective layer of zinc. This layer of galvanization lends itself to crappy welds and some terrible fumes, but badass, TV personality, and hacker extraordinaire [Hackett] shows us how to strip the galvanization off these pipes with chemicals available at any hardware store.

Since the galvanization on these pipes covers the inside and the outside, grinding the small layer of zinc off these pipes is difficult at best. To be sure he gets all the zinc off this pipe, [Hackett] decided to chemically strip the pipes with a cup full of muriatic acid.

The process is simple enough – fill a cup with acid, dunk the ends of the pipes, and clean everything up with baking soda. A great way to turn scrap pipe into a usable material, make a cool paper mache volcano, and avoid ‘ol galvie flu

Continue reading “On Not Getting Metal Fume Fever With Galvanized Conduit”

Scratch Built Camera Tripod

scratch-built-camera-tripod

We’re used to seeing hacked camera mounts but [CroBuilder] mentioned to us that nobody is really making plain old tripods themselves. He loves to work in his shop so he spent about ten hours building this tripod for himself.

We’d say it’s built to last, but that comes at the cost of weighing a lot. He used square tubing for the legs, which are tripled up in order to allow them to telescope. Each leg has two pipes mounted to the central hub that he fabricated out of hexagonal pipe. A bolt and wing nut acts as hinge and clamp. On the bottom section of the leg there’s a tab spanning the two pieces and another clamping mechanism to hold the adjustable bottom portion of the leg in position.

He finished up the project with black paint on many of the pieces, with the legs themselves polished until shiny. Will rust be a problem if he doesn’t use a clear coat?

The nice thing about a quality tripod is that you can use them for more than just cameras. For instance, add some components to make your own laser level.

Build Your Own Steel Reinforced Storm Shelter

build-a-steel-reinforced-storm-shelter

The last few years have seen a lot of dangerous storms rip through middle section of the United States. We’re surprised to hear that many residents in that part of the country don’t have basements to take refuge in when in imminent danger. But a resourceful hacker will always be able to find a way to improve their own situation. This example is particularly useful. It’s a steel storm shelter which opens into the garage.

It all starts with a cage made of square tube. With the skeleton fully assembled it is wrapped in steel plate, adding weld joints running nearly the entire length of each of the cage’s ribs. The image at the left shows the steel door frame clamped in position. Check out the finished version on the right after the shelter has been slid into place and bolted to the concrete slab.

The Reddit discussion includes a debate on whether the door should swing in or out. Swinging out means you could be trapped if the opening is blocked by debris. But there may be scientific research that proves this is a better orientation. Either way, we hope the three dead bolts, door latch, and heavy-duty hinges will stand up to the pressure if this is ever used.