Ultimate Bokeh With A Projector Lens

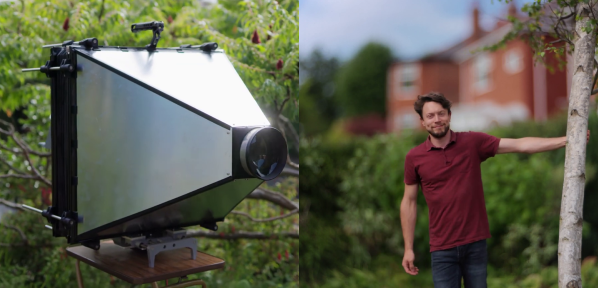
Bokeh is a photography term that’s a bit difficult to define but is basically soft, aesthetically pleasing background blur, often used to make a subject stand out. Also called “background separation” or “subject isolation”, achieving it optically requires a fast lens with an aperture below 2.8 or preferably lower. These lenses can get very expensive, but in the video after the break [Matt] from [DIY Perks] blows all the commercially available options out of the water. Using an old episcope projector, he built a photography rig with background separation equivalent to that of a non-existent 35mm f0.4 lens.

Unlike most conventional projectors used to project a prerecorded image, episcopes were used to project an image of physical objects, like books. To use this lens directly in a camera is impossible, due to the size of the imaging circle projected out the back of the lens. At a diameter of 500mm, there is simply no imaging sensor available to capture it. Instead, [Matt] built a projection screen for the image and photographed it from the opposite side with a normal camera.

The projection screen was made by sandwiching a sheet of diffuser film between two sheets of clear acrylic held in a frame of aluminum extrusions. To block out all other light, [Matt] added aluminum shrouds on either side of the screen, which also serves to mount the lens and a camera. The shroud on the lens’ side is mounted on a separate aluminum frame, enabling the image to be focused by adjusting the distance between the screen and lens. Linear rods and bearings on 3D printed mounts allow smooth motion, while a motor-driven lead screw connected to a wired remote does the actual adjustment. The gap between the two halves was covered with bellows made from black paper. Continue reading “Ultimate Bokeh With A Projector Lens”

Making A Projector Screen Out Of Flex Seal Works Okay, Kinda

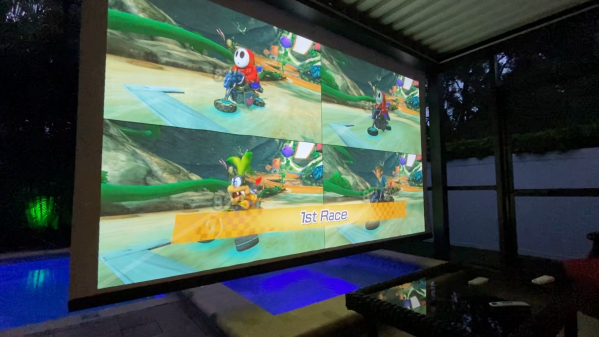
Watching movies on the big screen is fun, but getting out to the cinema or drive-in can be a hassle. It’s possible to get the same experience at home with a little creativity, as shown in this DIY projector screen build by [The Hook Up].

The build started with a giant motorized roller screen designed for a patio. It was scored on the cheap as it was salvaged after removal from its original home. Having seen a screen door turned into a boat with the help of Flex Seal, [The Hook Up] was confident that the flyscreen could be sealed up and used for projection.

Right away, the going got tough. Light applications weren’t really filling in the holes in the flyscreen, while thick applications had major issues with runs. Eventually, the screen was painted with 3 gallons of white Flex Seal and hung up to test.

The runs caused issues, as the lumpy screen texture was distracting when viewing movies. Additionally, the glossy finish was creating unsightly reflections. After some trial and error, the issues were solved by sanding the Flex Seal surface flat and using matte clear spray paint to dull the shine.

The result was a grand projection screen that rolls down at the touch of a button, the likes of which we’ve seen before, though at significant cost. [The Hook Up] readily admitted that the several hundred dollars invested might have been better spent on buying a pre-made screen. Nonetheless, it’s a cool project, and we respect the creator for putting in the work! Video after the break.
Continue reading “Making A Projector Screen Out Of Flex Seal Works Okay, Kinda”

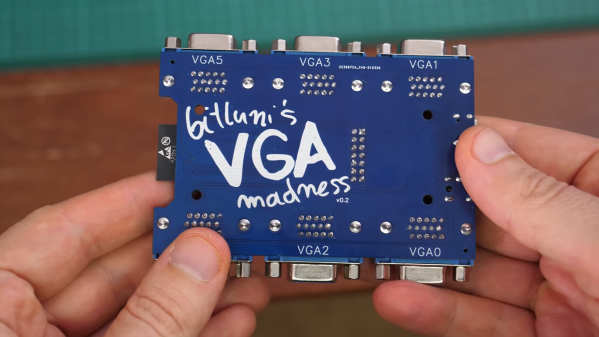
VGA PCB.

Running Six VGA Projectors From A Single ESP32

Today’s microcontrollers are high-speed powerhouses that can do absolutely wonderous things. By virtue of fast clock speeds and special DMA hardware, it’s often possible to achieve great feats that seem almost ridiculous at face value. [Bitluni] decided to demonstrate just that, running six (6!) VGA displays from a single ESP32.  (Video, embedded below.)

The ESP32 clocks in at 240 MHz at top speed. It also features some nifty DMA hardware along with GPIO mapping that makes it perfectly suited to this task. [Bitluni] was thus able to set it up to drive up to six VGA displays at one bit per pixel monochrome output. Alternatively, ganging up six output pins into two sets of three, he was able to run two VGA displays with 3-bit color. The resolution is an impressive 640 x 400 in both cases, and [Bitluni] demonstrated the hardware by driving six projectors with a starfield display.

Is it useful? Perhaps not yet, but there’s certainly a few applications we could think of. Share your own ideas in the comments. In the meantime, check out [Bitluni]’s other great works for the ESP32.

Continue reading “Running Six VGA Projectors From A Single ESP32”

Collapsible Pattern Projector Is A Bright Idea

It’s fantastic that we’re living in the age of downloadable PDF patterns, it really is. But printing out a bunch of sheets of paper and taping them together is a tedious and tiresome process that can introduce error right from the start. This goes for any type of pattern, from sewing to R/C planes.

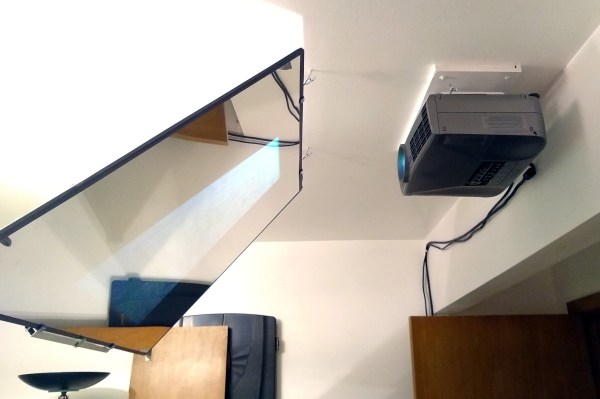
[Quinn]’s quarantine project is designed to cover both of those and everything in between. It’s a pattern projector made from stuff already on hand — a couple of offset projectors to scavenge parts from, and a large, trapezoidal mylar mirror from an old rear projection TV. At maximum zoom it projects a 4′ x 3′ image onto the tabletop, which sounds perfect for a whole lot of sewing patterns. At minimum zoom, the projected image fits on a foam core board.

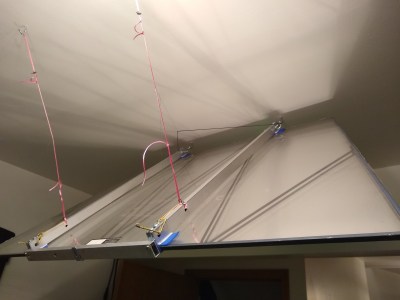
We love that this dreamy setup can be stowed away so easily on hooks in the ceiling. [Quinn] had to perform a few hacks to make it all work together, including fabricating a bracket and some adjustable ties to hold the mirror aloft at just the right correct angle.

Need something smaller? Check out this Pi-powered pocket projector. Want a cinema-quality setup? You just have to find the right auctions.

A True 4K Projector From Scrap EBay Components

Cinemas all over the world have become no-go zones with COVID-19 around, but watching the latest blockbuster on the small screen at home is simply not the same. You could bring the big screen home, but buying a quality projector is going to set you back a small pile of cash. Fortunately [Matt] from [DIY Perks] has an alternative for us, demonstrating how to build your own true 4K projector with parts bought off eBay, for a fraction of the price.

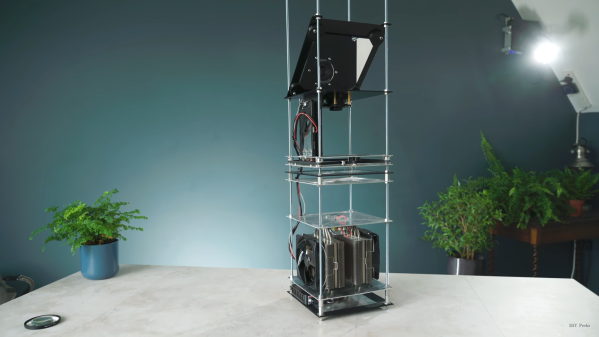
The core of the projector is a small 4K LCD panel, which is from a modified Sony smartphone. [Matt] disassembled the phone, removed the backlight from the LCD, which leaves it semi-transparent, and mounted it at a right angle to the rest of the phone body. The battery was also replaced with a voltage regulator to simulate a full battery. To create a practical projector, a much brighter backlight is needed. [Matt] used a 100W 10 mm diameter LED for this purpose. The LED needs some serious cooling to prevent it from burning itself out, and a large CPU cooler does the job perfectly. Two Fresnel lenses in series are used to turn the diverging light from the LED into a converging light source to pass through the LCD. An old 135 mm large format camera lens is placed at the focal point of light to act as a projection lens. The entire assembly is mounted on a vertical frame of threaded rods, nuts, and aluminium plates. [Matt] also used these threaded rods with GT2 pulleys to create a simple but effective moving platform for the projection lens that allows the focus of the projected image to be adjusted. The frame is topped off by a 45-degree mirror to project the image against a wall instead of the roof, and the frame is covered with aluminium panels.

The video after the break goes into incredible detail on how projector functions and how to build your own down. It definitely looks like a doable build for most hackers. [Matt] will also be releasing a complete PDF build guide in the next few weeks. Continue reading “A True 4K Projector From Scrap EBay Components”

Projector And NES Mini Hide Out Inside The Real Thing

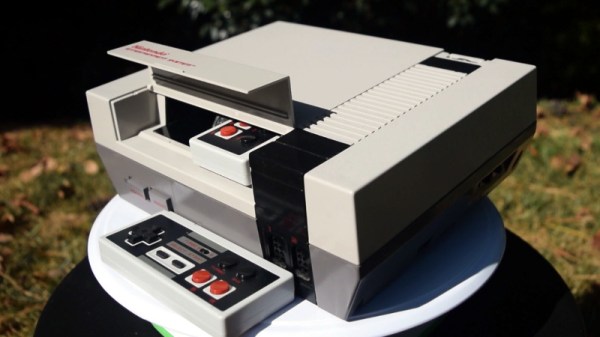
Taking a page out of the Xzibit Engineering Handbook, [Geeksmithing] recently decided that the gutted carcass of an original Nintendo Entertainment System would make a perfect home for…a smaller NES. Well, that and two wireless controllers. Plus a projector. Oh, and batteries so it can be used on the go. Because really, at that point, why not?

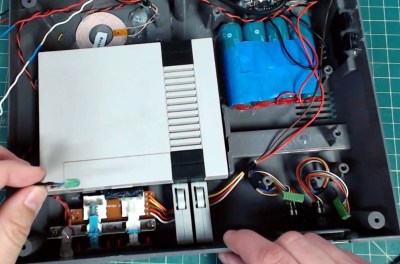
The video after the break starts with a cleverly edited version of a legitimate NES commercial from the gaming glory days of the 1980s, and segues into an rundown of all the modern hardware [Geeksmithing] crammed into the case of this legendary console. It helps that the official NES Classic used for the project is so much smaller than its more than thirty year old predecessor, leaving plenty of room inside to get creative. We particularly like the dual wireless controllers which are conveniently hiding inside the original cartridge slot.

Frankly, that alone would have made this project worthwhile in our book, but [Geeksmithing] didn’t stop there. He also added in a pico projector that’s normally covered up by the black facia on the rear of the console, complete with a “kickstand” to tip the system up to the appropriate angle. Continuing with the theme of enabling ad-hoc NES play sessions, he also packed in enough batteries to keep the system running for a respectable amount of time. There’s even put an inductive charging coil in the bottom of the system so he can top off the batteries just by dropping the system on a modified SNES mousepad.

Last time [Geeksmithing] checked in, he was embedding a Raspberry Pi into a Super Mario Thwomp that was made from real concrete. We can’t wait to see what he comes up with next.

Continue reading “Projector And NES Mini Hide Out Inside The Real Thing”

A Petite Pico Projector For Portable Pi

A few years ago, new, innovative pico projectors, influenced by one of the TI development kits, started appearing in Kickstarter projects and other various DIY endeavours. Those projects fizzled out, most likely due to the cost of the projectors, but we got a few laughs out of it: that wearable smartphone that projected a screen onto your wrist used the same technology.

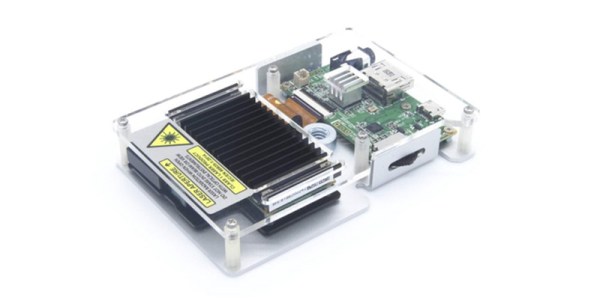
But there’s a need for a small projector, a pico projector, or in this case a femto projector. It’s the Nebra Anybeam, and it’s a small projector that uses lasers, and it comes in the form of a Raspberry Pi hat. We would like to congratulate the team for shipping the ideal use case of their product first.

The key features of this pico projector address the shortcomings of existing projectors that can fit in your pocket. This uses a laser, and there’s no bulb, and the power consumption can be as low as 3 Watts. Power is provided over a micro USB cable. The resolution of this projector is 720p, which is sufficient for a quick setup for watching a movie, but the brightness is listed as equivalent to 150 ANSI lumens, about the same as small projectors from a few years ago.

But of course the big selling point isn’t the brightness or resolution, it’s all about the smallness of the projector itself. There is a developer’s kit, a Pi Hat, a fit-in-your-pocket version with an enclosure, and a ‘monster ball’ version of the Anybeam.