Direct memory access (DMA) systems in computers are more powerful than you might think, and [Bruce Land] and [Joseph Primmer] have done some clever hacking to take full advantage of this on the PIC32 microcontrollers. This is a cool proof-of-concept hack — you can do general computing in the DMA subsystem without using the CPU at all if you don’t mind taking your time — but they also include two useful examples: a direct digital synthesis machine and a random number generator. Both of these run using exactly 0% CPU time.
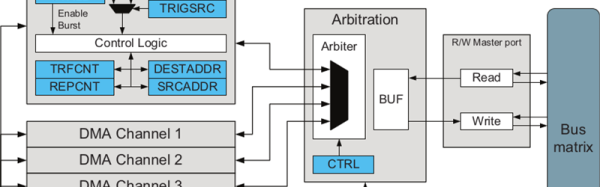
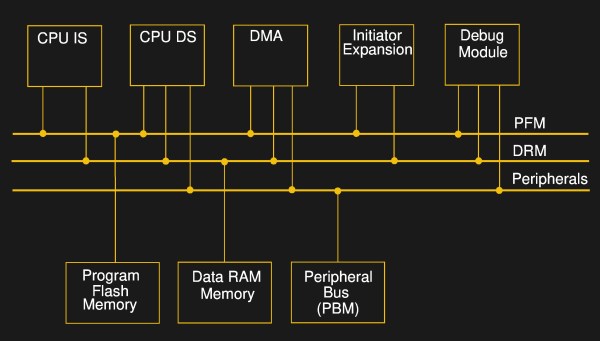
How do they do it? DMA is a mechanism for shuttling data around in memory or between hardware peripherals without involving the CPU. Say you want to take a large block of memory containing music, and spit it out slowly to an I2S audio converter. A DMA subsystem could be configured to take an interrupt from the sound chip, pass it a chunk of data, increment the data pointer, and wait for the next interrupt.
The gimmick, which goes back at least to [Rushanan] and [Checkoway]’s “Run DMA” paper, is that you can modify the memory source and destination addresses of one DMA service from another DMA service, and that some registers automatically perform mathematical operations on whatever data is put into them. Combine these together, and you’ve got transport-triggered programming.
(An awesome side-note: our own [Al Williams] developed a one-instruction transport-triggered CPU way back in the day: the One Instruction Wonder.)
What is this good for? Writing simple helper applications that run independent of the CPU on a PIC32 microcontroller. [Land] and [Primmer]’s direct-digital synthesis example is a great one. But there are a lot of cases where you simply want to take in some new data and pre-process it a little bit before it enters the main program flow. While creating weird machines in the DMA engine might be a slower way to get it done, it keeps the CPU free for doing other stuff. We’re sure you’ll come up with something.