Raspberry Pi Tracks Starter Fermentation For Optimized Sourdough

Those of you who’ve never had a real sourdough have never had real bread. Good food fights back a little when you eat it, and a proper sourdough, with its crispy crust and tangy center, certainly fits the bill. Sourdough aficionados, your humble writer included, all have recipes that we pretend are ancient family secrets while in reality we’re all just guessing. Sourdough is partly science, partly art, but mostly delicious black magic.

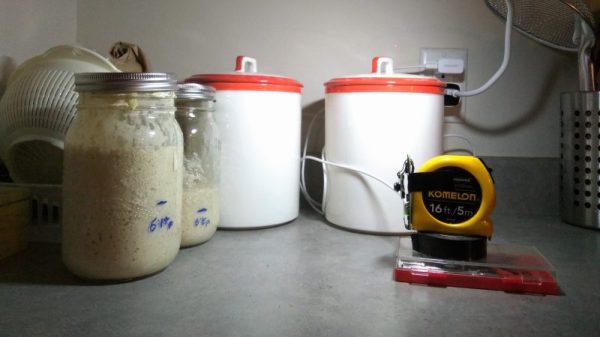
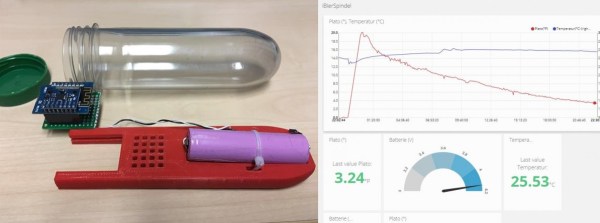
In an effort to demystify his sourdough process, [Justin Lam] has gone digital with this image processing sourdough starter monitor. Sourdough breads are leavened not by the addition of brewers yeast (Saccharomyces cerevisiae), but by the inclusion of a starter,  a vibrant ecosystem of wild yeasts that is carefully nurtured, sometimes for years. Like any other living thing, it needs to be fed, a task that should happen at the point of maximum fermentation. Rather than guess when this might be, [Justin] used a Raspberry Pi Zero and PiCam to capture a time-lapse video of the starter as the beasties within give off their CO₂, thus expanding it up inside its container. A little Python does the work of thresholding and finding the top of the starter as it rises, allowing [Justin] to plot height of the starter over time. He found that peak height, and therefore peak fermentation, occurs about six hours after feeding. He has used his data to better inform his feeding schedule and to learn how best to revive neglected starters.

Surprisingly, this isn’t the first time we’ve discussed sourdough here. It seems that someone uses Git for iterative sourdough recipe development, and we once featured a foundry made from a pyrolyzed loaf of sourdough.

Continue reading “Raspberry Pi Tracks Starter Fermentation For Optimized Sourdough”

Listen To Your Fermentation To Monitor Its Progress

If you are a wine, beer, or cider maker, you’ll know the ritual of checking for fermentation. As the yeast does its work of turning sugar into alcohol, carbon dioxide bubbles froth on the surface of your developing brew, and if your fermentation container has an airlock, large bubbles pass through the water within it on a regular basis. Your ears become attuned to the regular “Plop… plop… plop” sound they make, and from their interval you can tell what stage you have reached.

[Chris] automated this listening for fermentation bubbles, placing a microphone next to his airlock and detecting amplitude spikes through two techniques: one using an FFT algorithm and the other a bandpass filter. Both techniques yielded similar graphs for fermentation activity over time.

He has a few ideas for improvement, but notes that his system is vulnerable to external noises. There is also an admission that using light to detect bubbles might be a more practical solution as we have shown you more than once with other projects, but as with so many projects on these pages, it is the joy of the tech as much as the practicality that matters.

IoT Device Pulls Its Weight In Home Brewing

floating-square
The iSpindel floating in a test solution.

Brewing beer or making wine at home isn’t complicated but it does require an attention to detail and a willingness to measure and sanitize things multiple times, particularly when tracking the progress of fermentation. This job has gotten easier thanks to the iSpindel project; an ESP8266 based IoT device intended as a DIY alternative to a costly commercial solution.

Hydrometer [Source: grapestompers.com]

Tracking fermentation normally involves a simple yet critical piece of equipment called a hydrometer (shown left), which measures the specific gravity or relative density of a liquid. A hydrometer is used by winemakers and brewers to determine how much sugar remains in a solution, therefore indicating the progress of the fermentation process. Using a hydrometer involves first sanitizing all equipment. Then a sample is taken from the fermenting liquid, put into a tall receptacle, the hydrometer inserted and the result recorded. Then the sample is returned and everything is cleaned. [Editor (and brewer)’s note: The sample is not returned. It’s got all manner of bacteria on/in it. Throw those 20 ml away!] This process is repeated multiple times, sometimes daily. Every time the batch is opened also increases the risk of contamination. Continue reading “IoT Device Pulls Its Weight In Home Brewing”

Fail Of The Week: Exploding Fermentation

It’s no secret that hackers like fermentation, both the process and the end results. I myself have a crock of sauerkraut happily bubbling away in the kitchen right now. Fermentation can lead to tasty endpoints, and the process itself, which basically amounts to controlled rotting, is a fascinating set of biochemical reactions. But done wrong, fermentation can result in injury, as it did at CCC this year when a fermentation vessel exploded.

"It was the one on the left, officer. He did it."
“It was the one on the left, officer. He did it.”

Exactly what happened isn’t really clear, except that Food Hacking Base ran a number of workshops at CCC 2015, several of which involved fermented foods or drinks. A Grolsch-style bottle with a ceramic flip-top was apparently used as a fermentation vessel, but unfortunately the seal was not broken. The bottle found its way to another tent at CCC, this one running an SMD soldering workshop. Carbon dioxide gas built up enough pressure in the bottle to shatter it and send shrapnel flying through the workshop tent. According to a discussion thread on the incident, “people got hurt and need to go to the hospital because glas [sic] particles were stuck in their faces, a throat was cut and an eyelid bleeding.” The explosion was quite energetic, because, “we also found a 20cm long piece of glass that went trough [sic] the ceiling of the tent and propelled for another 4-5 meters afterwards.”

We’ve seen lots of Hackaday projects involving instrumentation and automation of fermentation, including some with really large vessels. The potential for destruction if such a vessel isn’t properly vented is pretty high. At the very least, you’ll be left with a really big mess to clean up. Be careful out there – microbes are not to be trifled with. We don’t want to give you the wrong idea about CCC; this year was incredible as [Elliot Williams] reported during his time there.

Now it’s off to the kitchen to check on my kraut.

[Thanks to Morgan for the tip.]

The Biohacking Movement And Open Source Insulin

In March of 2014, I knew my eight year old daughter was sick. Once borderline overweight, she was now skeletally thin and fading away from us. A pre-dawn ambulance ride to the hospital gave us the devastating news – our daughter had Type 1 diabetes, and would be dependent on insulin injections for the rest of her life.

This news hit me particularly hard. I’ve always been a preparedness-minded kind of guy, and I’ve worked to free myself and my family from as many of the systems of support as possible. As I sat in the dark of the Pediatric ICU watching my daughter slowly come back to us, I contemplated how tied to the medical system I had just become. She was going to need a constant supply of expensive insulin, doled out by a medical insurance system that doesn’t understand that a 90-day supply of life-saving medicine is a joke to a guy who stocks a year supply of toilet paper. Plus I had recently read an apocalyptic novel where a father watches his 12-year old diabetic daughter slip into a coma as the last of her now-unobtainable insulin went bad in an off-grid world. I swore to myself that I’d never let this happen, and set about trying to find ways to make my own insulin, just in case.

Continue reading “The Biohacking Movement And Open Source Insulin”

Hacklet 35 – BeagleBone Projects

The Raspberry Pi 2 is just barely a month old, and now that vintage console emulation on this new hardware has been nailed down, it’s just about time for everyone to do real work. You know, recompiling stuff to take advantage of the new CPU, figuring out how to get Android working on the Pi, and all that good stuff that makes the Pi useful.

It will come as no surprise to our regular readers that there’s another board out there that’s just as good in most cases, and in some ways better than the Pi 2. It’s the BeagleBone Black, and for this edition of the Hacklet, we’re focusing on all the cool BeagleBone projects on Hackaday.io.

lcdSo you have a credit card sized Linux computer and a small, old LCD panel. If it doesn’t have HDMI, VGA or composite input, there’s probably no way of getting this display working, right? Nope. Not when you can make an LCD cape for $10.

[Dennis] had an old digital picture frame from a while back, and decided his BeagleBone needed a display. A few bits of wire and some FPC connectors, and [Dennis] has a custom display for his ‘Bone. It’s better than waiting for that DSI display…

bed[THX1082] is making a bed for his son. This isn’t your usual race car bed, or even a very cool locomotive bed. No, this is a spaceship bed. Is your bed a space ship? No, I didn’t think so.

Most of the work with plywood, MDF, paint, and glue is done, which means the best feature of this bed – a BeagleBone Black with an LCD, buttons, a TV, and some 3D printed parts – is what [THX] is working on right now. He’s even forking a multiplayer networked starship simulator to run in the bed. Is your bed a starship simulator?

beer

Beer. [Deric] has been working on a multi-step fermentation controller using the BeagleBone Black. For good beer you need to control temperatures and time, lest you end up with some terrible swill that I’d probably still drink.

This project controls every aspect of fermentation, from encouraging yeast growth, metabolization of sugars, and flocculation. The plan is to use two circuits – one for heating and one for cooling – and a pair of temperature sensors to ensure the beer is fermenting correctly.


If you’re looking for more BeagleBone Projects, there’s an entire list of them over on Hackaday.io with GLaDOs Glasses, Flight Computers, and Computer Vision.

Goldilocks Climate Box Keeps Lager Fermentation Environment Just Right

September was warmish in many places around the world including [Ole]’s native Denmark. But that did not stop him from brewing lager flavored with plums from his own garden, and neither did his indifference to lagers in general.

Lager fermentation requires a consistent, low temperature. While many homebrewers might modify an electric refrigerator, [Ole] wasn’t interested in the cost of running a second one just for brewing beer. Instead, he built a climate box to work with the cool temperature in his garage. Starting with scrap wood from other projects, he lined the walls with polystyrene and put a layer of wood on the floor to help support the fermentation bucket.

Maintaining a consistent temperature in the box called for both heating and cooling. He pulled the Peltier from a 12V cooler meant to run off a car’s cigarette lighter, and used a spare ceramic heater that was lying around in case his primary reptile warmer went on the fritz.

An Arduino and a custom shield drive separate PID controllers for the Peltier and the heater. The shield has a temperature probe, and he extended the USB outside the climate box so the PIDs can be adjusted without disturbing the inside temperature. The schematic, board file, and code are all available in a zip you can get from his post.

The Peltier couldn’t quite compensate for the overly warm weather and the heat caused by the fermentation, but it was stable enough to produce a nice, plum-flavored lager he has dubbed Lektor Blom­mes malt­bol­che, which is a triple Danish pun he explains in the write-up.