Extract Fumes In Midcentury Style With Nixie Tubes And Military Surplus

Nobody wants to breathe solder fumes; that’s a given. For most of us, an industrial-looking fan-and-filter made in China and picked up cheap feels like more than enough to keep our lungs clear. Other people, people like [George Conneely], have more refined tastes. Why have a fume extractor when you can have a work of art?
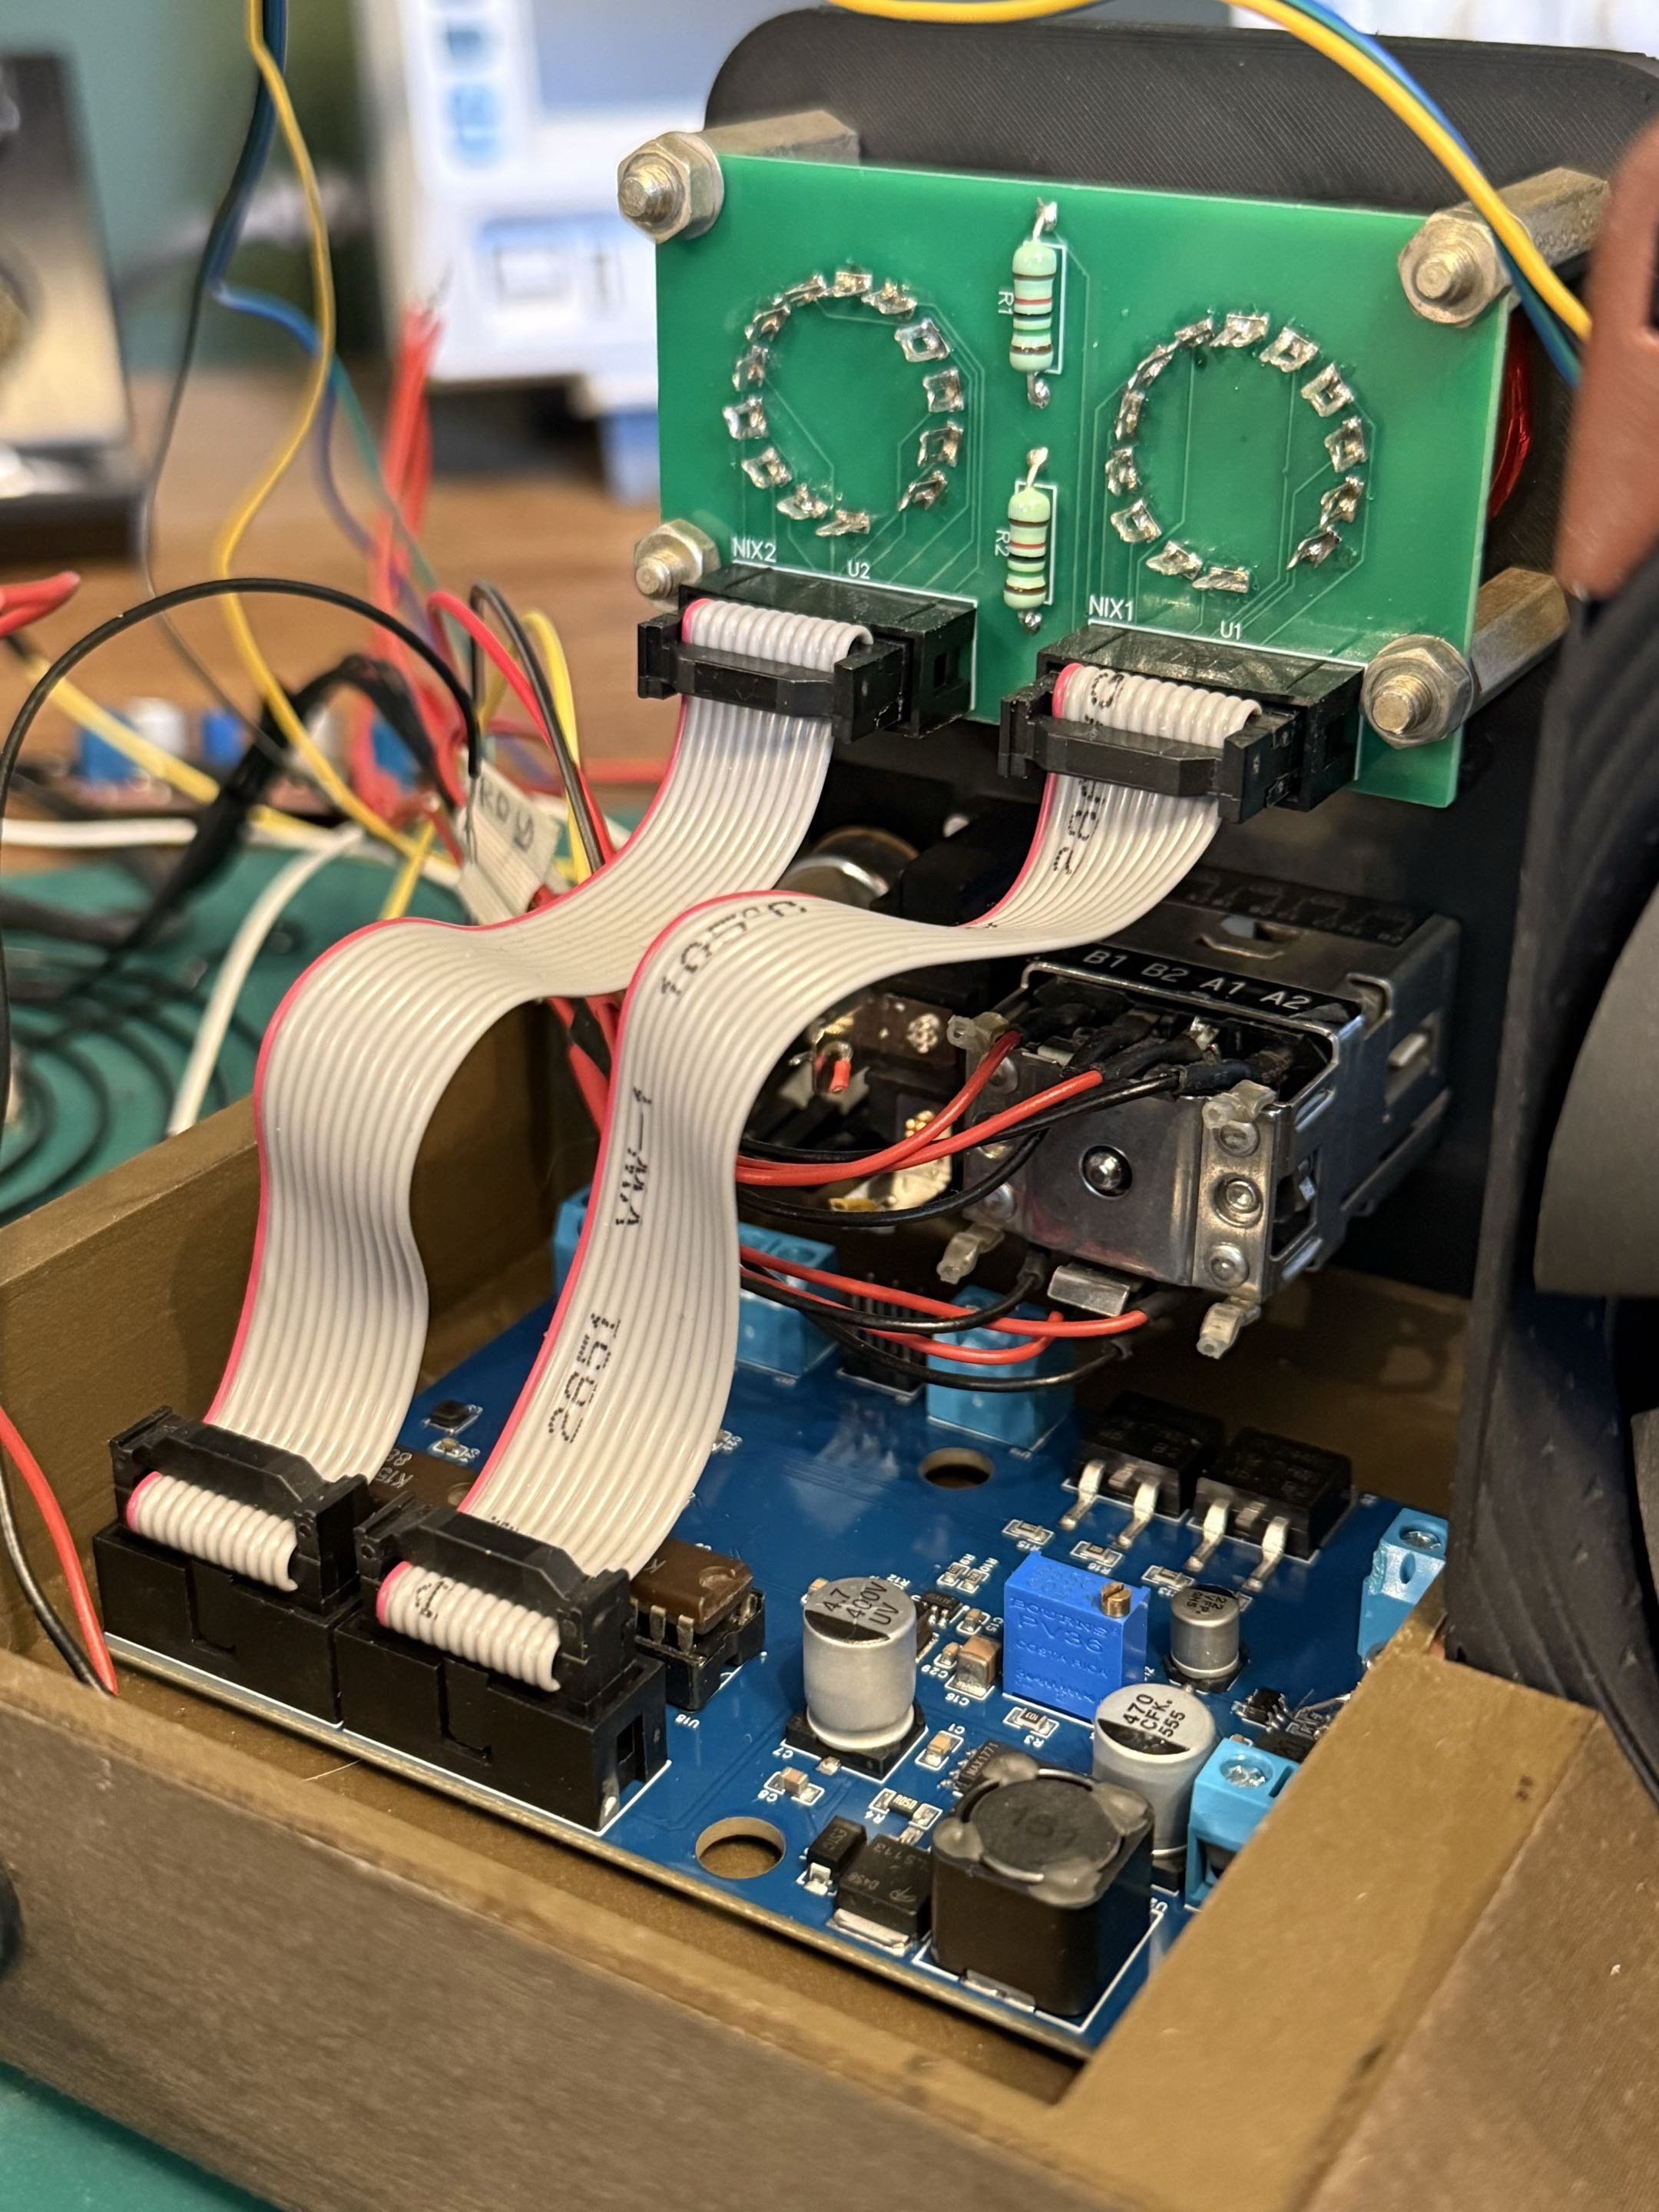
The insides aren’t quite as pretty as the outside, but it’s a clean build.

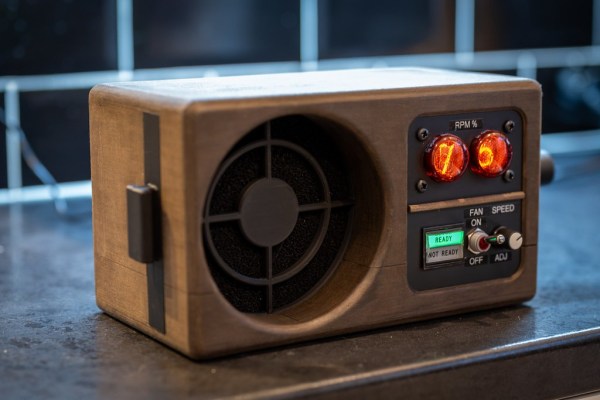
This is one of those projects where the images really speak for themselves, because the whole point is to be beautiful. Sure, the wooden case is lovingly sculpted by a—wait, it’s 3D-printed!? Yes, with the right stain and care applying it, it seems Wood PLA can fool the eye, or at least the camera. Inside that PLA case there’s a custom PCB with an ATMega microcontroller and some MOSFETS to drive the Nixie tubes. The two digits represent the fan’s set RPM as a percentage of maximum, as is clearly labeled. Using a READY/NOT READY indicator pulled from a Panvia Tornado to show whether the fan has actually spun up to its set speed is an amazing touch.

The only problem with this build is that it is too nice. We’d almost rather see it on Don Draper’s desk than risk dirtying it on a lab bench. Evidently, [George] ascribes to the philosophy that one should surround oneself with beauty whenever possible. Your tastes may differ, but to many, nixie tubes certainly qualify– whether on a desk clock or in a car’s dashboard, there’s just something about that incandescent glow.

Thanks to [George] for the tip.
fume extractor

Solder Smarts: Hands-Free Fume Extractor Hack

[Ryan] purchased a large fume extractor designed to sit on the floor below the work area and pull solder fumes down into its filtering elements. The only drawback to this new filter was that its controls were located near his feet. Rather than kicking at his new equipment, he devised a way to automate it.

By adding a Wemos D1 Mini microcontroller running ESPHome, a relay board, and a small AC-to-DC transformer, [Ryan] can now control the single push button used to cycle through speed settings wirelessly. Including the small transformer inside was a clever touch, as it allows the unit to require only a single power cable while keeping all the newfound smarts hidden inside.

The relay controls the button in parallel, so the physical button still works. Now that the extractor is integrated with Home Assistant, he can automate it. The fan can be controlled via his phone, but even better, he automated it to turn on by monitoring the power draw on the smart outlet his soldering iron is plugged into. When he turns on his iron, the fume extractor automatically kicks in.

Check out some other great automations we’ve featured that take over mundane tasks.

This Extra-Large, Two-Stage Fume Extractor Really Sucks

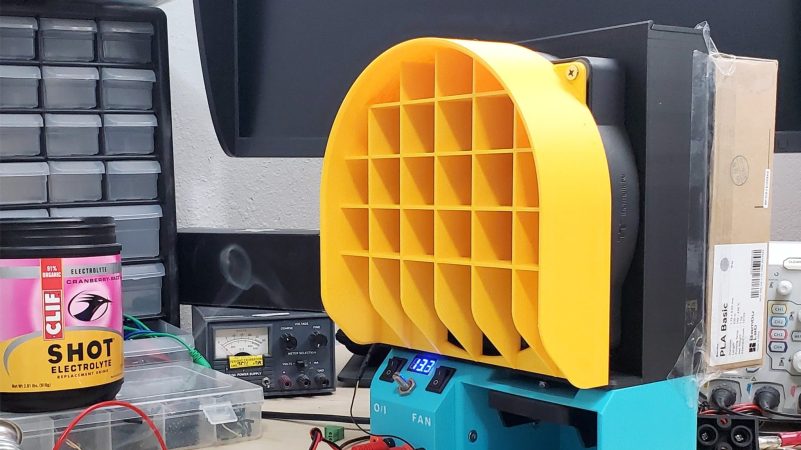
Solder fumes are not nice on the lungs; nor are fumes from superglue, epoxy, or a whole mess of other things we often find ourselves using on the bench. Some people might be able to go the fume hood route to toss that all outside, but for the rest of us, there’s fume extractors. [Raph] has produced an extra-large, carbon-filtering, two-stage fume extractor that by all accounts really sucks — it is effective at hoovering up solder fumes up to 10″ from its inlet.

Photo of fume extractor
Note the 18V tool battery in the base. That’ll go for a bit.

Even better, [Raph] built a battery box for an 18 V cordless tool battery, and broke out banana plugs so this doubles as a variable power supply via a cheap LM2596 based DC-DC converter. It also serves as a speed controller for the fans, which makes us wonder if you can adjust the PSU output and the fan speed independently…

Maximum suckage is achieved through careful baffle design. Check out the blog to see the trial-and-error process at work. Of course, having a 200 mm axial fan and 140 mm blower fan front and rear is going to move some air no matter what. Which is required to get air flow through the 38 mm thick activated carbon filter that should scrub all nasties quite nicely. We aren’t filtration experts but we can agree with [Raph]’s estimate that it will last “a while”.

If you want to roll your own, all of the STEP files are on GitHub, and [Raph]’s blog has an excellent step-by-step build guide. We’ve seen other hacks from [Raph] before, from his dovetailed modular breadboard to the machine that shaped his bed and automation for his camper van.

Big Server Fan Becomes Fume Extractor

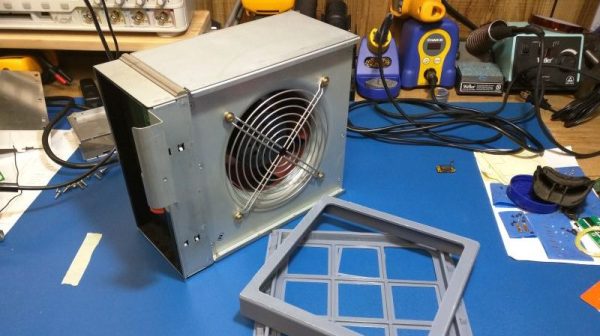
[Anthony Kouttron] wanted a fume extractor for his personal electronics lab, but he didn’t like the look of the cheap off-the-shelf units that he found. Ultimately, he figured it couldn’t be that hard to build own portable fume extractor instead.

The build is based around a mighty 110-watt centrifugal fan from an IBM server that’s rated at approximately 500 CFM. It’s a hefty unit, and it should be, given that it retails at over $200 on DigiKey. [Anthony] paired this fan with off-the-shelf HEPA and activated carbon filters. These are readily available from a variety of retailers. He didn’t want to DIY that part of the build, as the filter selection is critical to ensuring the unit actually captures the bad stuff in the air. He ended up building a custom power supply for the 12-volt fan, allowing it to run from common drill batteries for practicality’s sake.

Few of us have need for such a beefy fume extractor on the regular. Indeed, many hobbyists choose to ignore the risk from soldering or 3D printing fumes. Still, for those that want a beefy fume extractor they can build themselves, it might be worth looking over [Anthony]’s initial work.

We’ve seen some other great DIY fume extractors before, too. Even those that use drill batteries! If you’ve been cooking up your own solution, don’t hesitate to drop us a line!

Power Tool Battery Fume Extractor

A solder fume extractor is something we could probably all use. While there isn’t much to them, [Steven Bennett] put a lot of thought into making one that was better for him, and we admired his design process, as well as the extractor fan itself. You can see the finished result in the video below.

The electrical design, of course, is trivial. A computer fan, a switch, and a battery — in this case, a Makita power tool battery. But the Fusion 360 design for the 3D printed parts got a lot of thought to make this one of the best fume extractor fans we’ve seen.

Continue reading “Power Tool Battery Fume Extractor”

Kirby Sucks, Literally

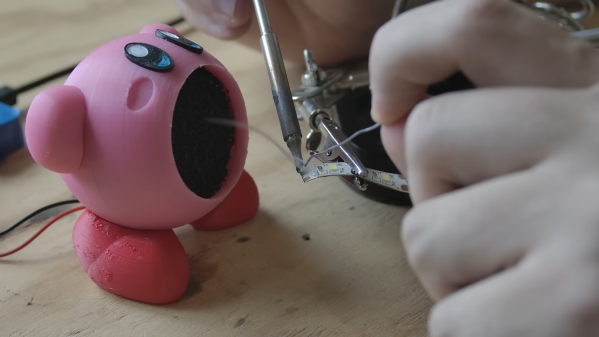
What’s common between one of the most legendary video game characters of all time and a fume extractor ? They both suck. [Chris Borge] is not an electronics hobbyist and only does some occasional soldering. This made his regular fume extractor bulky and inconvenient to position where needed. What could serve him better would be a small extractor that could be attached to a clip or an arm on his helping hand accessory. Being unable to find an off-the-shelf product or a suitable 3d printed design that he liked, he built the Kirby 40mm Fume Extractor.

His initial idea was for a practical design more suited to his specific needs. But somewhere along the way, the thought of a Kirby fan popped up in his head, and it was too good an idea to pass up. Several Kirby fan designs already existed, but none that satisfied [Chris]. Getting from paper sketch to CAD model required quite an effort but the result was worth the trouble, and the design was quite faithful to the original character features. The main body consists of two halves that screw together, and an outlet grill at the back. The body has space for a 40 mm fan and a 10 mm charcoal filter in the front. The wires come out the back, and connect directly to a power supply barrel jack. Arms and eyes are separate pieces that get glued to the body. The feet glue to an intermediate piece, which slides in a dove tail grove in the body. This allows Kirby to be tilted at the right position for optimum smoke extraction.

While Kirby served the purpose, it still didn’t meet the original requirement of attaching to a clip or arm on the helping hand. So [Chris] quickly designed a revised, no-frills model which is essentially a square housing to hold the fan and the filter. It has a flexible stand so it can be placed on a bench. And it can also be attached to the helping hand, making it a more utilitarian design. This design has the charcoal filter behind the fan, but he also has a third design for folks who prefer to have the filter at the front.

He now had a more useful, practical fume extractor, but he couldn’t bring himself to discard his original Kirby. So he printed a couple more 3D parts so that Kirby could fit the end of his vacuum cleaner hose. Now, Kirby sits on his bench, and helps suck up all the bits and bobs of trash on his workbench. We’re sure Kirby is quite pleased with his new role.

Continue reading “Kirby Sucks, Literally”

Overengineered Fume Extractor, Version 2

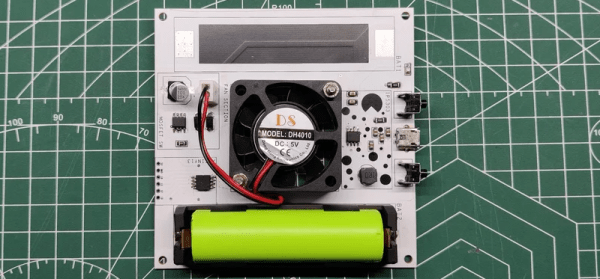
We all know the temptation of adding one more feature to your latest project. [Arnov Sharma] didn’t resist the urge. Building on his 3D-printed fume extractor, he developed a new version made of PCB material.

The device has a 18650 battery and corrects several flaws in the original design we covered earlier. In particular, the new version uses a quiet fan and consumes less power. There is also a 3D-printed filter housing that uses cotton as a filter media. Continue reading “Overengineered Fume Extractor, Version 2”