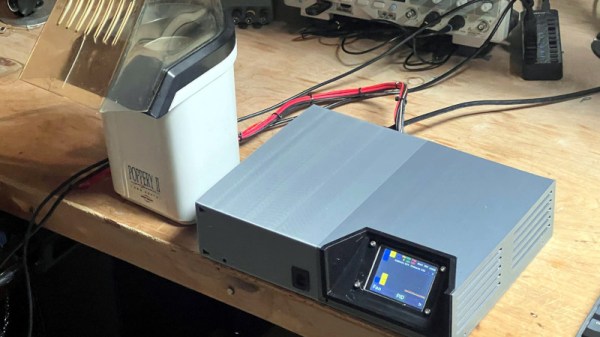
The preparation and consumption of coffee has become something of an art from in our community, with many people going to extravagant lengths to achieve the perfect cup. [Eric Sorensen] was keen to roast his own beans, but given the price of a dedicated roaster, instead made his own using a hot air popcorn popper.
The story unfolds in several parts, and starts with disabling the thermal cutout on the popper to be replaced with thermal sensors. An Arduino controls both the fan and the heating coil to regulate and vary the roasting temperature over time. Perhaps it’s the software and user interface that most makes this project shine, with a graphical interface on a 320 by 240 pixel touch screen, and a graphing profile interface more reminiscent of a reflow oven than a kitchen appliance. The whole thing is neatly packed away with its power supply in a slimline case, and while we’re no bean experts, we appreciate the uniform brown of the finished product.
Coffee roasters have appeared here numerous times over the years. One of the more recent was this wobble disk design.
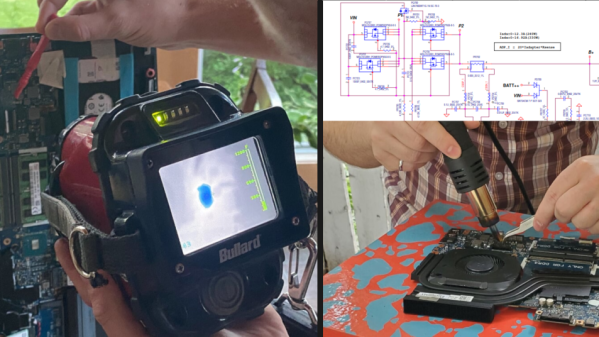
It started with a friend’s Alienware laptop that would only boot to a black screen and get very hot in the process. With the help of a thermal imaging camera and some schematics, [Troy] was able to see that one of the closely-spaced MOSFETs in the power supply appeared to be the culprit. Swapping the power MOSFETs out with replacements seemed a reasonable approach, so armed with a hot air rework station he got to work. But that’s where problems began.
The desoldering process was far from clean, in part because the laptop’s multi-layer PCB had excellent thermal management, sucking away heat nearly as fast as [Troy]’s hot air gun could lay it down. It ended up being a messy slog of a job that damaged some of the pads. As a result, the prospects of soldering on a replacement was not looking good. But reviewing the schematic and pondering the situation gave [Troy] an idea.
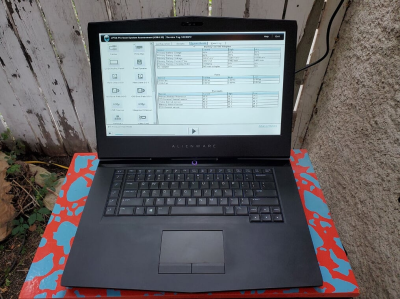
One expensive laptop, brought back to service.
According to the schematic, the two MOSFETs (at least one of which was faulty) had parallel counterparts on the other side of the board. This is typically done to increase capacity and spread the thermal load somewhat. However, according to the current calculations on the schematic, these parts are expected to handle about 20 A in total, but the datasheets show that each of the MOSFETs could handle that kind of current easily (as long as heat sinking could keep up.) In theory, the laptop didn’t need the extra capacity.
Could the laptop “just work” now that the faulty part had simply been removed? [Troy] and his friend [Mike] were willing to give it a shot, so after cleaning up the mess as best they could, they powered the laptop on, and to their mild surprise, everything worked! Some stress testing with intensive gaming showed that the thermal problems were a thing of the past.
Oregon State University must be a pretty good place to go to school if you want to hack on robots. Their robotics club, which looks active and impressive, has a multi-part video series on how to solder surface mount components that is worth watching. [Anthony] is the team lead for their Mars Rover team and he does the job with some pretty standard-looking tools.
The soldering station in use is a sub-$100 Aoyue with both a regular iron and hot air. There’s also a cheap USB microscope that looks like it has a screen, but is covered in blue tape to hold it to an optical microscope. So no exotic tools that you’d need a university affiliation to match.
Chip decapping videos are a staple of the hacking world, and few things compare to the beauty of a silicon die stripped of its protective epoxy and photographed through a good microscope. But the process of actually opening that black resin treasure chest seems elusive, requiring as it does a witch’s brew of solvents and acids.
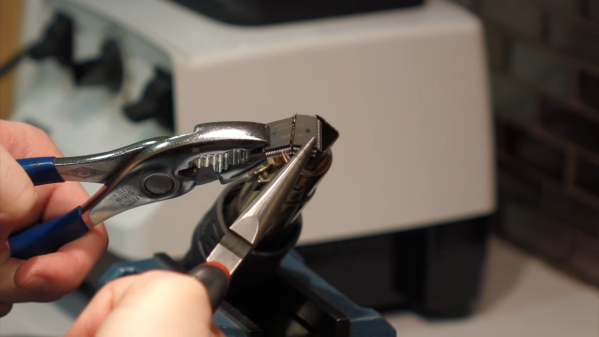
Or does it? As [Curious Marc] documents in the video below, a little heat and some finesse are all it takes, at least for some chips. The method is demonstrated by [Antoine Bercovici], a paleobotanist who sidelines as a collector of old chips. After removing chips from a PCB — he harvested these chips from an old PlayStation — he uses hot air to soften the epoxy, and then flexes the chip with a couple of pairs of pliers. It’s a bit brutal, but in most of the Sony chips he tried for the video, the epoxy broke cleanly over the die and formed a cleavage plane that allowed the die to be slipped out cleanly. The process is not unlike revealing fossils in sedimentary rocks, a process that he’s familiar with from his day job.
He does warn that certain manufacturers, like Motorola and National, use resins that tend to stick to the die more. It’s also clear that a hairdryer doesn’t deliver enough heat; when they switched to a hot air rework station, the success rate went way up.
The simplicity of this method should open the decapping hobby up to more people. Whether you just want to take pretty pictures or if reverse engineering is on your mind, put the white fuming nitric acid down and grab the heat gun instead.
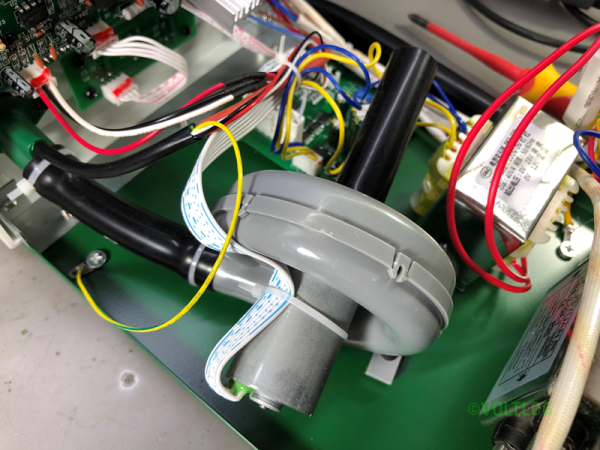
[Voltlog] has had a 952 hot air rework station for a long time. You’ll recognize it when you see it — they are the ubiquitous soldering iron and hot air gun combination from China sold under numerous brand names. He didn’t think the old station was as good as some of the newer devices available, and did a teardown and review of the BST-863 station that can be had for well under $200. You can see the video below.
He was impressed with the build quality of the workpiece holder. It lets you store the hot air gun and keep it in standby mode. He liked the touchscreen, too, although the beeping seemed a bit annoying. However, in general, the operating noise was less than the older unit it replaced.
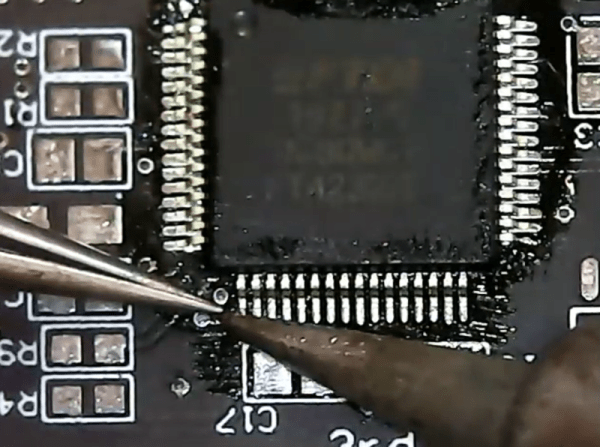
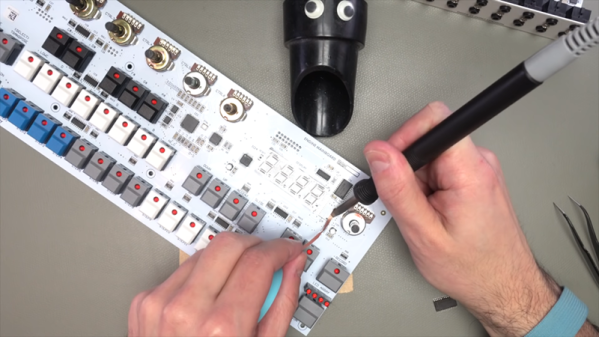
We all have that friend who brings us their sad busted electronics. In [Leo’s] case, he had a MIDI sequencer from a musician friend. It had a dead display and the manufacturer advised that a driver IC was probably bad, even sending a replacement surface mount part.
[Leo] wasn’t convinced though. He knew that people were always pushing on the switches that were mounted on the board and he speculated that it might just be a bad solder joint. As you can see in the video below, that didn’t prove out.
The next step was to fire up a hot air gun. Instead of removing the chip, he wanted to reflow the solder anyway. He was a little worried about melting the 7-segment LEDs so he built a little foil shield to protect it. That didn’t get things working, either.
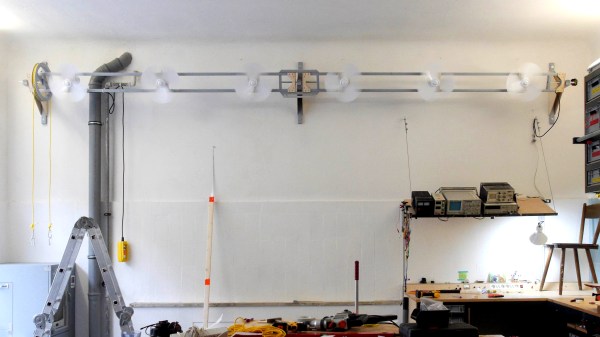
If your workshop has ceilings as high as [Niklas Roy]’s 3.6 meters (11.8 feet), then you’re familiar with his problem. Hot air rises, and there it usually stays until the heat is transferred outdoors. But in the winter time we need that heat indoors and down low. One solution is to install ceiling fans that blow that hot air back down. However, [Niklas] often builds tall things that would collide with those fans. And so he had to hack together some wall hugging fans which will be both high up and out of the way.
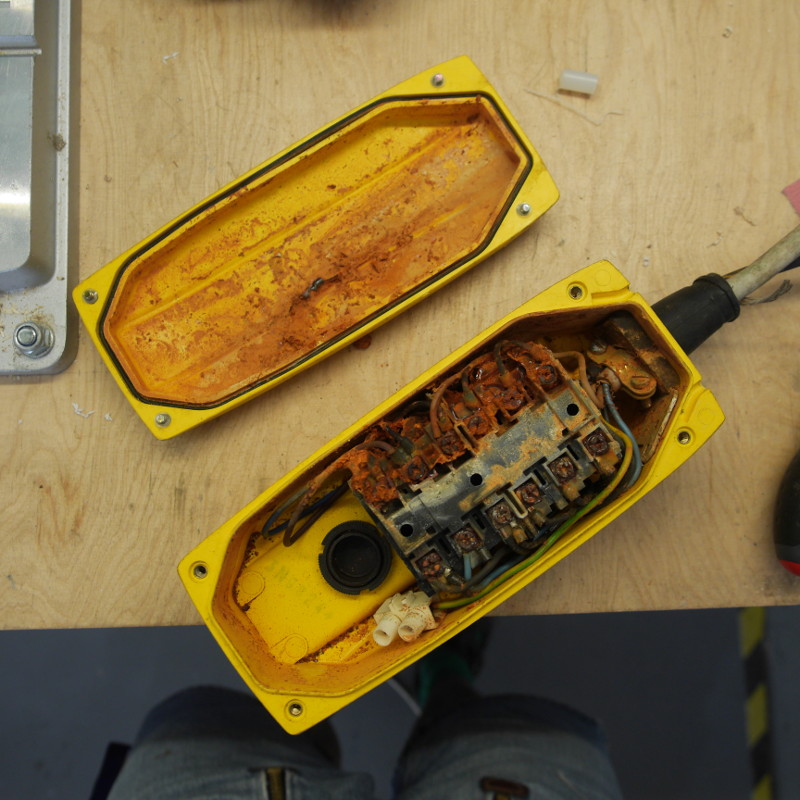
Corroded industrial controller
For the fans he’s using six of those ubiquitous standing fans, the ones that normally sit on a post a few feet off the ground and swivel back and forth. Discarding the posts, he mounted the fan bodies to a horizontal wooden frame with a wheel attached to one end, one that he’d made for another project. A rope around the wheel, and hanging down, makes it easy to tilt the fans. For controlling the fans, a friend had given him an old industrial controller, and opening it up, all he saw was corrosion. Cleaning it all out he installed an old Russian 3-position switch from his collection.
In the future he’d like to add a closed-loop control system that would not only turn the fans on and off but also adjusting their speed. For now, however, he reports that it works really well. Check out his page for build photos and more details.
Meanwhile, winter really is coming to these northern latitudes and so here are more hacks to prepare you. For automated shovelling snow, how about an RC controlled 3D printed snow blower. And while you’re snug and warm inside remotely controlling your snow blower, you can still be getting exercise using a DIY bicycle roller. But if you do venture outside, perhaps you’d want to zip around on a dogless dog sleigh.