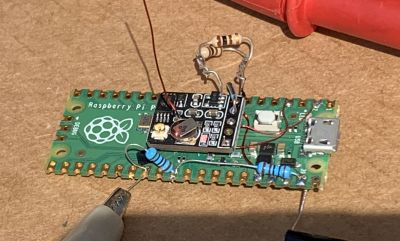
They say that if you love something, you should set it free. That doesn’t mean that you should spend any more on it than you have to though, which is why [EngineerGuy314] put together this Raspberry Pi Pico high-altitude balloon tracker that should only set you back about $12 to build.
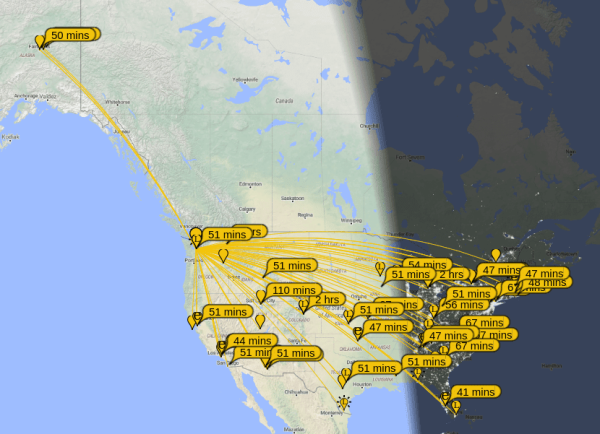
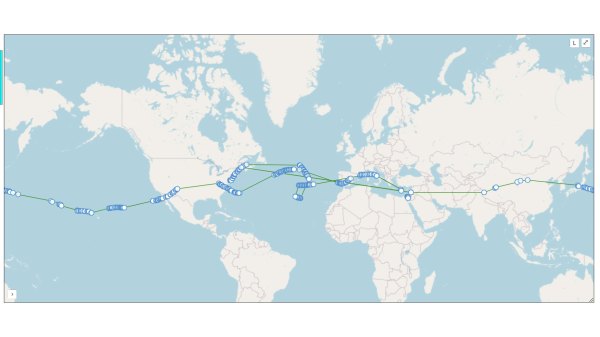
This simplified package turns a Pico into a tracking beacon — connect a cheap GPS module and solar panel, and the system will transmit the GPS location, system temperature, and other telemetry on the 20-meter band using the Weak Signal Propagation Reporter (WSPR) protocol. Do it right, and you can track your balloon as it goes around the world.
The project is based in part on the work of [Roman Piksayin] in his Pico-WSPR-TX package (which we covered before), which uses the Pico’s outputs to create the transmitted signal directly without needing an external radio. [EngineerGuy314] took this a step further by slowing down the Pico and doing some clever stuff to make it run a bit more reliably directly from the solar panel.
The system can be a bit fussy about power when starting up: if the voltage from the solar panel ramps up too slowly, the Pico can crash when it and the GPS chip both start when the sun rises. So, a voltage divider ties into the run pin of the Pico to keep it from booting until the voltage is high enough, and a single transistor stops the GPS from starting up until the Pico signals it to go.
It’s a neat hack that seems to work well: [EngineerGuy314] has launched three prototypes so far, the last of which traveled over 62,000 kilometers/ 38,000 miles.