HF In Small Spaces

Generally, the biggest problem a new ham radio operator will come across when starting out on the high frequency (HF) bands is finding physical space for the antennas. For a quick example, a dipole antenna for the 20 m band will need around 10 m of wire, and the lower frequencies like 80 m need about four times as much linear space. But if you’re willing to trade a large space requirement for a high voltage hazard instead, a magnetic loop antenna might be just the ticket.

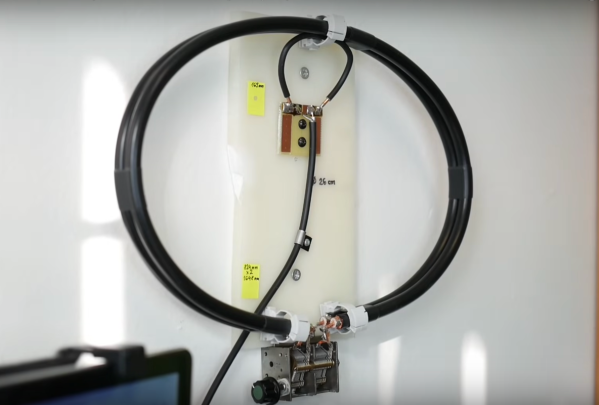
Loop antennas like these are typically used only for receiving, but in a pinch they can be used to transmit as well. To tune the antennas, which are much shorter than a standard vertical or dipole, a capacitor is soldered onto the ends, which electrically lengthens the antenna. [OM0ET] is using two loops of coax cable for the antenna, with each end soldered to one half of a dual variable capacitor which allows this antenna to tune from the 30 m bands to the 10 m bands, although he is using it mostly for WSPR on 20 m. His project also includes the use of an openWSPR module, meaning that he doesn’t have to dedicate an entire computer to run this mode.

The main downsides of antennas like these is that they are not omnidirectional, are not particularly good at transmitting, and develop a significantly high voltage across the capacitor as this similar mag loop antenna project demonstrated. But for those with extreme limitations on space or who, like [OM0ET] want a simple, small setup for running low-power applications like WSPR they can really excel. In fact, WSPR is a great mode for getting on the air at an absolute minimum of cost.

Continue reading “HF In Small Spaces”

FLOSS Weekly Episode 768: Open Source Radio

This week Jonathan Bennett and Doc Searls talk with Tony Zeoli about Netmix and the Radio Station WordPress plugin. The story starts with the Netmix startup, one of the first places doing Internet music in the 1990s. That business did well enough to get bought out just before the Dot Com bubble burst in 2000. Today, Tony runs the Radio Station plugin, which is all about putting a station’s show schedule on a WordPress site.

In the process, the trio covers Internet radio history, the licensing complications around radio and streaming, the state of local radio, and more. Is there a long term future for radio? Does Creative Commons solve the licensing mess? Is AI going to start eating radio, too? All this and more!

Continue reading “FLOSS Weekly Episode 768: Open Source Radio”

Simulating A Time-Keeping Radio Signal

As far as timekeeping goes, there’s nothing more accurate and precise than an atomic clock. Unfortunately, we can’t all have blocks of cesium in our basements, so various agencies around the world have maintained radio stations which, combined with an on-site atomic clock, send out timekeeping signals over the air. In the United States, this is the WWVB station located in Colorado which is generally receivable anywhere in the US but can be hard to hear on the East Coast. That’s why [JonMackey], who lives in northern New Hampshire, built this WWVB simulator.

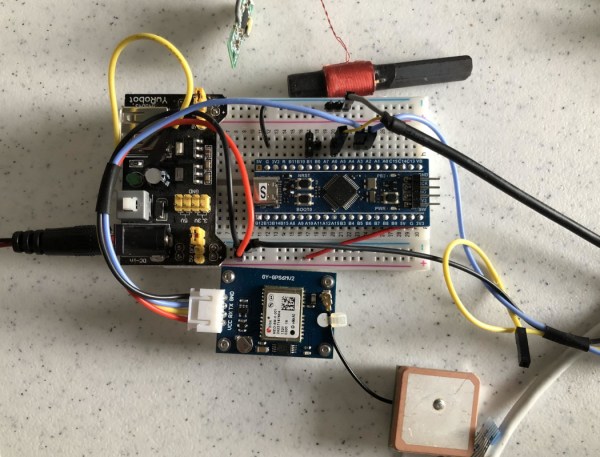
Normally, clocks built to synchronize with the WWVB station include a small radio antenna to receive the 60 kHz signal and the 1-bit-per-second data transmission which is then decoded and used to update the time shown on the clock. Most of these clocks have internal (but much less precise) timekeeping circuitry to keep themselves going if they lose this signal, but [JonMackey] can go several days without his clocks hearing it. To make up for that he built a small transmitter that generates the proper timekeeping code for his clocks. The system is based on an STM32 which receives its time from GPS and broadcasts it on the correct frequency so that these clocks can get updates.

The small radio transmitter is built using one of the pins on the STM32 using PWM to get its frequency exactly at 60 kHz, which then can have the data modulated onto it. The radiating area is much less than a meter, so this isn’t likely to upset any neighbors, NIST, or the FCC, and the clocks need to be right beside it to update. Part of the reason why range is so limited is that very low frequency (VLF) radios typically require enormous antennas to be useful, so if you want to listen to more than timekeeping standards you’ll need a little bit of gear.

Pico-Sized Ham Radio

There are plenty of hobbies around with huge price tags, and ham radio can certainly be one of them. Experienced hams might have radios that cost thousands of dollars, with huge, steerable antennas on masts that can be similarly priced. But there’s also a side to the hobby that throws all of this out of the window in favor of the simplest, lowest-cost radios and antennas that still can get the job done. Software-defined radio (SDR) turned this practice up to 11 as well, and this radio module uses almost nothing more than a microcontroller to get on the air.

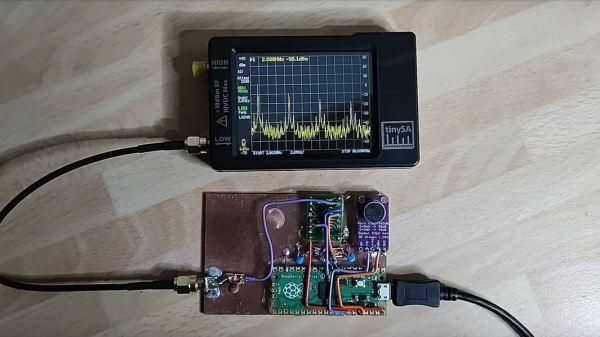
The design uses the capabilities of the Raspberry Pi Pico to handle almost all of the radio’s capabilities. The RF oscillator is driven by one of the Pico’s programmable I/O (PIO) pins, which takes some load off of the processor. For AM and SSB, where amplitude needs to be controlled as well, a PWM signal is generated on another PIO which is then mixed with the RF oscillator using an analog multiplexer. The design also includes a microphone with a preamplifier which can be fed into a third PIO; alternatively it can receive audio from a computer via the USB interface. More processor resources are needed when generating phase-modulated signals like RF, but the Pico is still quite capable of doing all of these tasks without jitter larger than a clock cycle.

Of course this only outputs a signal with a few milliwatts of power, so for making any useful radio contacts with this circuit an amplifier is almost certainly needed. With the heavy lifting done by the Pico, though, the amplifier doesn’t need to be complicated or expensive. While the design is simple and low-cost, it’s not the simplest radio possible. This transmitter sends out radio waves using only a single transistor but you will be limited to Morse code only.

Continue reading “Pico-Sized Ham Radio”

Building A GPS Receiver From The Ground Up

One of the more interesting facets of GPS is that, at least from the receiver’s point-of-view, it’s a fairly passive system. All of the information beamed down from the satellites is out in the ether, all the time, free for anyone on the planet to receive and use as they see fit. Of course you need to go out and buy a receiver or, alternatively, possess a certain amount of knowledge to build a circuit that can take those signals and convert them into something usable. Luckily, [leaning_tower] has the required knowledge and demonstrates it with this DIY GPS receiver.

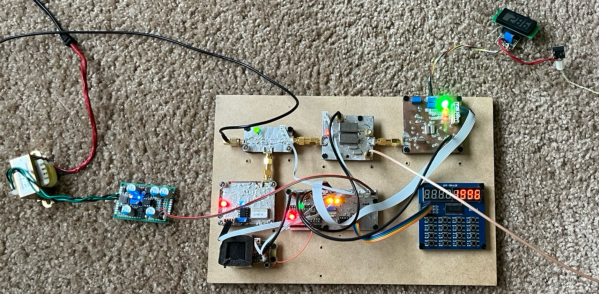
This receiver consists of five separate circuit boards, all performing their own function. The first, a mixer board, receives the signal via an active antenna and converts it to a lower frequency. From there it goes to a second mixer and correlation board to compare the signal to a local reference, then a signal processing board that looks at this intermediate frequency signal to make sense of the data its seeing. Finally, an FPGA interfacing board ties everything together and decodes the information into a usable form.

Dealing with weak signals like this has its own set of challenges, as [leaning_tower] found out. The crystal oscillator had to be decapped and modified to keep from interfering with the GPS radio since they operated on similar frequencies. Even after ironing out all the kinks, the circuit takes a little bit of time to lock on to a specific satellite but with a second GPS unit for checking and a few weeks of troubleshooting, the homebrew receiver is up and running. It’s an impressive and incredibly detailed piece of work which is usually the case with sensitive radio equipment like GPS. Here’s another one built on a Raspberry Pi with 12 channels and a pretty high accuracy.

Bluetooth As Proxy For Occupancy

During [Matt]’s first year of college, he found in a roundabout way that he could avoid crowds in the dining hall by accessing publicly available occupancy data that the dining hall collected. Presumably this was data for the dining hall to use internally, but with the right API calls anyone could use the information to figure out the best times to eat. But when the dining hall switched providers, this information feed disappeared. Instead of resigning himself to live in a world without real-time data on the state of the dining hall, he recreated the way the original provider counted occupancy: by using Bluetooth as a proxy for occupancy.

Bluetooth devices like smartphones, fitness sensors, and other peripherals often send out advertising packets into the aether, to alert other devices to their presence and help initiate connections between devices. By sniffing these advertising packets, it’s possible to get a rough estimate of the number of people in one particular place, assuming most people in the area will be carrying a smartphone or something of that nature. [Matt]’s Bluetooth-sniffing device is based on the ESP32 set up to simply count the number of unique devices it finds. He had some trouble with large crowds, though, as the first ESP32 device he chose didn’t have enough RAM to store more than a few hundred IDs and would crash once the memory filled. Switching to a more robust module seems to have solved that issue, and with a few rounds of testing he has a workable prototype that can run for long periods and log at least as many Bluetooth devices passing by as there are within its range.

While [Matt] hasn’t deployed this to the dining hall yet, with this framework in place most of the work has been done that, at least in theory, one of these modules could be easily placed anywhere someone was interested in collecting occupancy data. He has plans to submit his project to the university, to research the topic further, and potentially sell these to businesses interested in that kind of data. This isn’t an idea limited to the ESP32, either. We’ve seen similar projects built using the Raspberry Pi’s wireless capabilities that perform similar tasks as this one.

Thanks to [Adrian] for the tip!

The Trans-Harmonium Is A Strange Kind Of Radio-Musical Instrument

Pianos use little hammers striking taut strings to make tones. The Mellotron used lots of individual tape mechanisms. Meanwhile, the Trans-Harmonium from [Emily Francisco] uses an altogether more curious method of generating sound — each key on this keyboard instrument turns on a functional clock radio.

Electrically, there’s not a whole lot going on. The clock radios have their speaker lines cut, which are then rejoined by pressing their relevant key on the keyboard. As per [Emily]’s instructions for displaying the piece, it’s intended that the radio corresponding to C be tuned in to a local classical station. Keys A, B, D, E, F, and G are then to be tuned to other local stations, while the sharps and flats are to be tuned to the spaces in between, providing a dodgy mix of static and almost-there music and conversation.

It’s an interesting art piece that, no matter how well you play it, will probably not net you a Grammy Award. That would be missing the point, though, as it’s more a piece about “Collecting Fragments of Time,” a broader art project of which this piece is a part.

We do love a good art piece, especially those that repurpose old hardware to great aesthetic achievement.

Continue reading “The Trans-Harmonium Is A Strange Kind Of Radio-Musical Instrument”