Polymer Discovery Gives 3D-printed Sand Super Strength

Research activity into 3D printing never seems to end, with an almost constant stream of new techniques and improvements upon old ones hitting the news practically daily. This time, the focus is on a technique we’ve not covered so much, namely binder jetting additive manufacturing (BJAM for short, catchy huh?) Specifically the team from Oak Ridge National Laboratory, who have been exploring the use of so-called hyperbranched Polyethyleneimine (PEI) as a binder for jetting onto plain old foundry silica sand (nature, free access.)
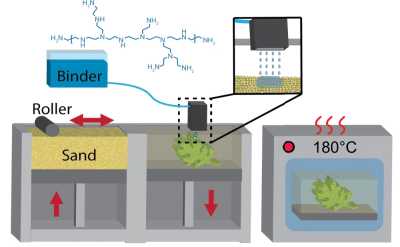
Roll, spray, bake. Simples.

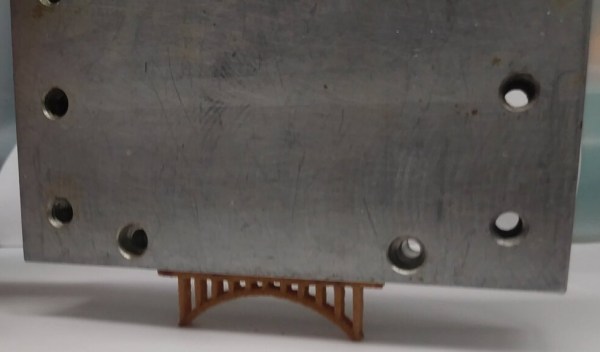
The PEI binder was mixed with a 75:25 mix of water and 1-propanol (not to be mixed up with 2-propanol aka isopropanol) to get the correct viscosity for jetting with a piezoelectric print head and the correct surface tension to allow adequate powder bed penetration, giving optimal binding efficiency. The team reported a two-fold increase in strength over previous jetting techniques, however, the real news is what they did next; by infusing the printed part (known as the green part) with common old ethyl cyanoacrylate (ECA, or super glue to us) the structural strength of the print increased a further eight times due to the reaction between the binder and the ECA infiltrate.

To further bestow the virtues of the PEI binder/ECA mix, it turns out to be water-soluble, at least for a couple of days, so can be used to make complex form washout tooling — internal supports that can be washed away. After a few days, the curing process is complete, resulting in a structure that is reportedly stronger than concrete.  Reinforce this with carbon fiber, and boy do you have a tough building material!

Not bad for some pretty common materials and a simple printing process.

We covered a similar binder jetting process for using sawdust a little while ago, and a neat way of printing with metal powder by carrying it in a stream of argon and cooking it with a laser, but there is an opening for a DIY effort to get in on the binder jetting game.

Thanks [Victor] for the tip!

Building A Kinetic Sand Art Table

Many of us have marveled at art installations that feature marbles quietly and ceaselessly tracing out beautiful patterns in sand. [DIY Machines] is here to show us that it’s entirely possible to build one yourself at home!

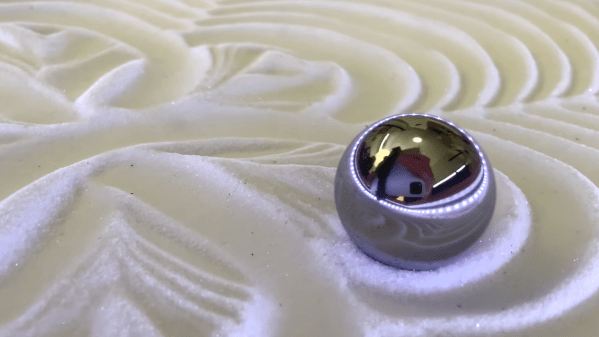
The basic mechanism is simple enough. The table uses a Cartesian motion platform to move a magnet underneath a table. On top of the table, a metal sphere attached to the magnet moves through craft sand to draw attractive patterns. An Arduino and Raspberry Pi work together to command the stepper motors to create various patterns in the sand.

Low-cost pine is used to build most of the table, with oak used for the attractive bare wooden top. RGB LEDs surround the sand surface in order to light the scene, with options for mad disco lighting or simple white light for a subtler look. Other nice touches include sitting the craft sand atop a layer of faux leather, so the ball moving through the sand doesn’t make annoying crunching sounds as the ball moves.

It’s a great build that focuses on the smaller details like noise that can make a big difference to the final experience. We’ve seen similar projects before, too. Video after the break.
Continue reading “Building A Kinetic Sand Art Table”

These Plastic Pavers Are Earth Savers

Plastic waste is everywhere you look, and there’s seemingly no end in sight for both the demand and production of plastic goods. So isn’t it time to try putting all that waste from the plastic industry to good use? [Nzambi Matee], a materials engineer in Kenya, thinks so. She was tired of seeing plastic littering the streets of Nairobi, and saw an opportunity to solve two problems at once — cleaning up the streets and paving them with plastic.

Three years ago, [Nzambi] quit her job as an oil industry data analyst and used all her savings to pursue a solution for the pesky plastic problem. She built a lab in her mother’s backyard and begin experimenting with plastics and sand, melding them together to make blocks.

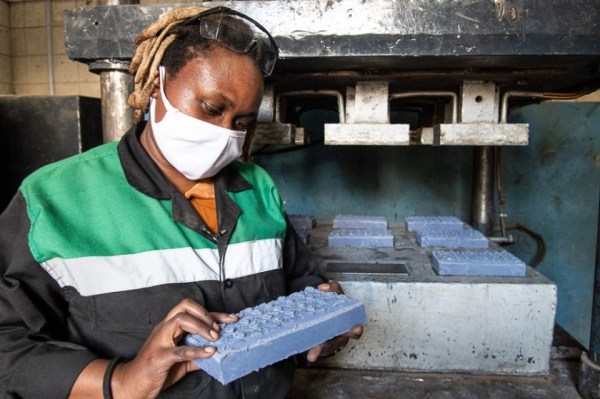
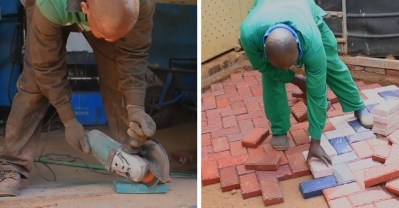
After about a year of trial and error, she had discovered which plastics worked and which didn’t. Then she developed machinery to churn out the sand-plastic paste and stamp it into sturdy paving bricks. Her company Gjenge Makers gets most of their plastic free from factories that would otherwise have to pay to dispose of it. The bricks are strong, lightweight, and nearly indestructible compared to concrete pavers. In the video after the break, there’s a shot of [Nzambi] spiking one on the ground to demonstrate its toughness.

Now, her company produces about 1,500 of these pavers each day. [Nzambi] and her team are planning to start making building blocks as well. With a melting point somewhere above 350° C, the material seems pretty well-suited for that purpose.

Want to do more than just recycle your plastic, but don’t know how? You could start by turning plastic bottles into rope, and then use the rope to make things like brooms and brushes.

Continue reading “These Plastic Pavers Are Earth Savers”

Tracked Robot Makes Sand Drawings

[Ivan] seems to enjoy making 3D printed vehicles with tracks. His latest one uses 50 servo motors to draw patterns in the sand at the beach. You can see it work in the video below. Well, more accurately you can see it not work and then work as the first iteration didn’t go exactly as planned.

An Arduino Mega 2560 provides the brains and the whole unit weighs in at almost 31 pounds, including the batteries. We didn’t see Ivan’s design files, although it wouldn’t be hard to do your own take on the robot.

Continue reading “Tracked Robot Makes Sand Drawings”

This Artist Drags His Feet Across Sand And Snow

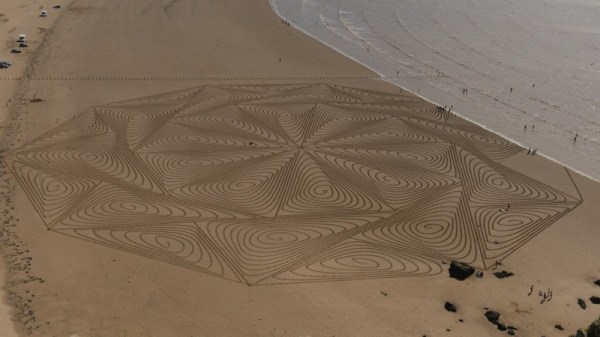
You may have seen Simon Beck’s work a few years back. The snow artist, known for creating large-scale works of art with nothing but snowshoes, has been creating geometrically inspired fractals and mathematical forms for years. An orienteer and map-maker by day, he typically plans out his works in advance and chooses sites based on their flat terrain. The lack of slopes prevents skiers from traversing the area beforehand and helps with measuring the lines needed to create the drawing.

He starts off by measuring the distance he has to be from the center by using a compass and walking in a straight line towards a point in the distance, making curves based on relative position to other lines. Once the primary lines are made, he measures points along the way using pace counting and joins secondary lines by connecting the points. The lines are generally walked three times to solidify them before filling in the shaded areas. The results are mesmerizing.

He has since expanded to sand art, using the same techniques that gained him fame in ski resorts and national parks on the sandy shores. Unfortunately, tidal patterns, seaweed, and beach debris make it slightly harder to achieve pristine conditions, but he has managed to create some impressive works of art nonetheless.

Continue reading “This Artist Drags His Feet Across Sand And Snow”

Project Egress: Casting The Hatch Handle

Every door needs a handle, even – especially – the door of a spaceship. And [Paul] from “Paul’s Garage” got the nod to fabricate the handle for the Apollo 11 Command Module hatch being built as part of Project Egress.

For those not familiar with Project Egress, it’s a celebration of the 50th anniversary of the first Moon landing that aims to recreate an important artifact from the mission: the Unified Crew Hatch, or UCH, from the Apollo 11 Command Module Columbia. Forty-four makers from various disciplines have been tasked with making the various pieces of the UCH, and each one is free to use whatever materials and methods he or she wants. [Paul] chose what will probably turn out to be the consensus material – aluminum – and decided to play to his strengths by casting the part.

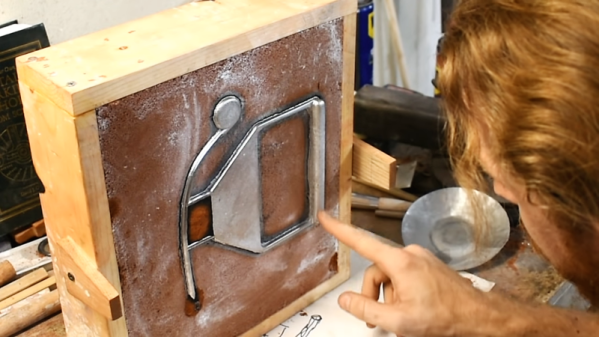
The handle itself is a chunky affair, as one would expect from something designed to be handled by an astronaut. [Paul] started with a 3D-printed version of the handle and created a two-piece mold in casting sand. The original part was probably machined, which meant that it didn’t have the draft angle that cast parts are supposed to have to make removal from the molding medium easier. [Paul] lucked out and got a perfect mold, and a perfect pour from silicon aluminum to boot. All the casting needed was a little cleanup and some holes to bolt it to the door.

[Paul]’s handle will get shipped to the Smithsonian along with the other parts, like [Fran Blanche]’s latch assembly, so that [Adam] can assemble the hatch live during the 50th-anniversary celebration later this month. Stay tuned for more Project Egress coverage as the parts keep rolling in.

Continue reading “Project Egress: Casting The Hatch Handle”

Solder SMDs With A Pan O’ Sand

For those that grew up working with through-hole components, surface mount parts can be challenging to deal with. However, there are plenty of techniques out there that are more than accessible to the DIY set. With the right gear, soldering SMD boards is a snap – just get yourself a hot pan of sand (Youtube link, embedded below)!

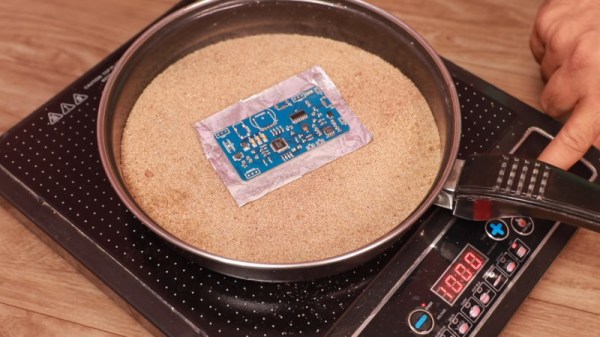
The process starts with a professionally manufactured PCB, and accompanying stencil. All major PCB CAD packages are capable of generating stencil files these days, and many manufacturers will throw in a laser cut stencil for minimal extra cost with a PCB order. The board is first mounted on a stable surface, and has solder paste applied, before components are placed with tweezers. Perfect placement isn’t necessary, as the surface tension of the molten solder pulls components into their correct orientations. The populated board is then placed on a bed of sand in a frying pan, which is placed on an induction cooktop. The board is then heated until the solder melts, and all the components are neatly reflowed. Once allowed to cool, the board is done!

The trick is that the sand helps evenly heat the circuit board, while keeping it a safe distance away from the heat source. Results are good, and the process is far quicker than hand soldering. It’s easy to keep an eye on the process too. Of course, the traditional method is still to use the humble toaster oven, but new techniques are always useful. We’ve seen it done with a Bunsen burner, too. Video after the break.

Continue reading “Solder SMDs With A Pan O’ Sand”