Hackaday Prize Entry: A Better DIY CT Scanner

If you’re entering something in The Hackaday Prize this year, [Peter Jansen] is a guy you need to watch out for. Last year, he won 4th place with the Open Source Science Tricorder, and this year he’s entering a homebrew MRI machine. Both are incredible examples of what can be built with just enough tools to fit on a workbench, but even these builds don’t cover everything [Peter] has built. A few years ago, [Peter] built a desktop CT scanner. The CT scanner worked, but not very well; the machine takes nine hours to acquire a single slice of a bell pepper. At that rate, any vegetable or fruit would begin to decompose before a full scan could be completed.

This didn’t stop a deluge of emails from radiology professors and biomedical folk from hitting [Peter]’s inbox. There are a lot of people who are waiting for back alley CT scans, but the CT scanner, right now, just isn’t up to the task. The solution is iteration, and in the radiology department of hackaday.io, [Peter] is starting a new project: an improved desktop CT scanner.

The previous version of this CT scanner used a barium check source – the hottest radioisotope source that’s available without a license – and a photodiode detector found in the Radiation Watch to scan small objects. This source is not matched to the detector, there’s surely data buried below the noise floor, but somehow it works.

For this revision of a desktop CT scanner, [Peter] is looking at his options to improve scanning speed. He’s come up with three techniques that should allow him to take faster, higher resolution scans. The first is decreasing the scanning volume: the closer a detector is to the source, the higher the number of counts. The second is multiple detectors, followed up by better detectors than what’s found in the Radiation Watch.

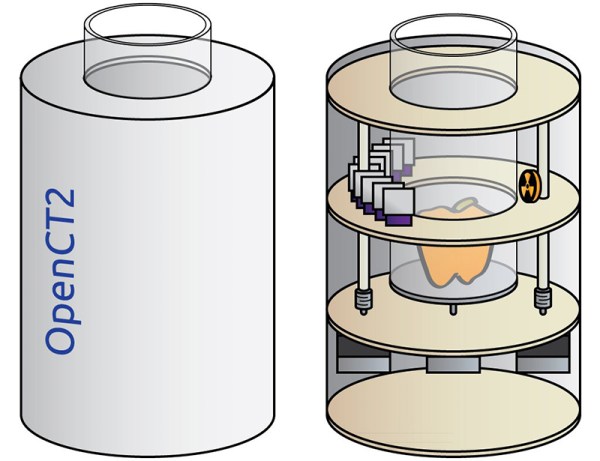
The solution [Peter] came up with still uses the barium check source, but replaces the large photodiode with multiple PIN photodiodes. There will be a dozen or so sensors in the CT scanner, all based on a Maxim app note, and the mechanical design of this CT scanner greatly simplifies the build.

Compared to the Stargate-like confabulation of [Peter]’s first CT scanner, the new one is dead simple, and should be much faster, too. Whether those radiology professors and biomed folk will be heading out to [Dr. Jansen]’s back alley CT scan shop is another question entirely, but it’s still an amazing example of what can be done with a laser cutter and an order from Mouser.

The 2015 Hackaday Prize is sponsored by:

The Most Powerful Bitcoin Mining Rig Yet

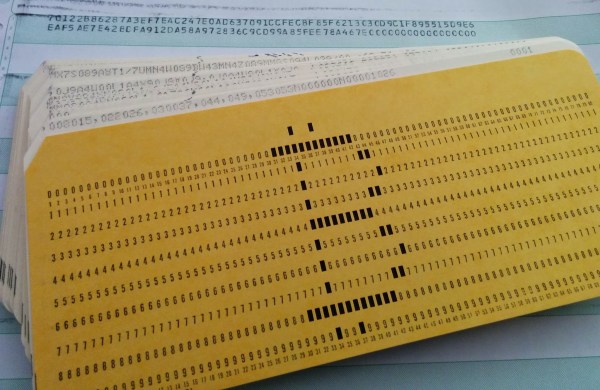
In days of yore, one could mine Bitcoin without much more than an AMD graphics card. Now, without specialized hardware it’s unlikely that you’ll make any appreciable headway in the bitcoin world. This latest project, however, goes completely in the other direction: [Ken] programmed a 55-year-old IBM mainframe to mine Bitcoin. Note that this is technically the most powerful rig ever made… if you consider the power usage per hash.

Engineering wordplay aside, the project is really quite fascinating. [Ken] goes into great detail about how Bitcoin mining actually works, how to program an assembly program for an IBM 1401 via punch cards, and even a section about networking a computer from this era. (Bonus points if he can get retro.hackaday.com to load!) The IBM boasts some impressive stats for the era as well: It can store up to 16,000 characters in memory and uses binary-coded decimal. All great things if you are running financial software in the early ’60s or demonstrating Bitcoin in the mid-2010s!

If it wasn’t immediately obvious, this rig will probably never mine a block. At 80 seconds per hash, it would take longer than the lifetime of the universe to do, but it is quite a feat of computer science to demonstrate that it is technically possible. This isn’t the first time we’ve seen one of [Ken]’s mainframe projects, and hopefully there are more gems to come!

Hackerspace Happenings: Santa Barbara Hackerspace Moving

Occasionally we get a few tips on our hotline telling us of hackerspace happenings. Either a space is moving, they need some help to install a moat around the space, or there’s a mini-conference of weird and esoteric technology happening sometime soon. The latest such tip is from the Santa Barbara Hackerspace. They’re moving, the new space doesn’t have a leaky roof, and they’re looking for some people to help out.

The new space features necessary hackerspace upgrades like no carpet, 120, 220, and 440 Volt outlets, actual parking, and a non-leaky roof. You can get by with a leaky roof in Santa Barbara, but having a roof that doesn’t have holes in it is always a bonus.

Add this to the space’s existing battery of equipment – everything from laser cutters, bandsaws, and welders to oscilloscopes, an amateur radio station, and a forge and anvil, there’s a lot anyone can do in this space.

Pump Up The Volume With The 3D Printed Syringe Pump Rack

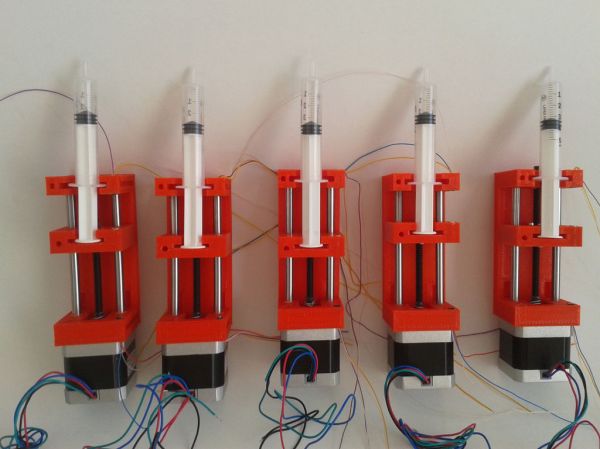
Syringe pumps are valuable tools when specific amounts of fluid must be dispensed at certain rates and volumes. They are used in many ways, for administering IV medications to liquid chromatography (LC/HPLC). Unfortunately, a commercial pump can cost a pretty penny. Not particularly thrilled with the hefty price tag, [Aldric Negrier] rolled up his sleeves and made a 3D-printed version for 300 USD.

[Aldric] has been featured on Hackaday before, so we knew his latest project would not disappoint. His 3D Printed Syringe Pump Rack contains five individual pumps that can operate independently of each other. Five pieces are 3D-printed to form the housing for each pump. In addition, each pump is composed of a Teflon-coated lead screw, an Arduino Nano V3, a Pololu Micro stepper motor driver, and a NEMA-17 stepper motor. The 3D Printed Syringe Pump Rack runs on a 12V power supply using a maximum of 2 amps per motor.

While the standard Arduino IDE contains the Stepper library, [Aldric] wanted a library that allowed for more precise control and went with the Accelstepper library. The 3D Printed Syringe Pump Rack has a measured accuracy of 0.5µl in a 10ml syringe, which is nothing to laugh at.

Syringe pump racks like [Aldric’s] are another great example of using open source resources and the spirit of DIY to make typically expensive technologies more affordable to the smaller lab bench. If you are interested in other open source syringe pump designs, you can check out this entry for the 2014 Hackaday Prize.

Continue reading “Pump Up The Volume With The 3D Printed Syringe Pump Rack”

Hackaday Prize Worldwide: San Francisco

Summer is heating up and so is the Hackaday Prize. In two weeks we’ll put down stakes in San Francisco for a day-long workshop followed by a meetup in the hippest of bars.

The Zero to Product workshop will be held on June 13th at Highway1 — the well-known hardware startup accelerator in San Francisco. This workshop is created and led by [Matt Berggren] who is an expert in electronic design and PCB layout.

RSVP Before Tickets are Gone!

Zero to Product workshop in Pasadena a few weeks ago

RSVP for the workshop and you’ll be well on your way to knowing what goes into professional-level PCB design. Basic knowledge of electronics is all you need, prior layout experience isn’t required. Bring along a computer with the newest version of Eagle on it if you want to follow along, but this is not a requirement. It will certainly jumpstart any PCB design you are working on for your 2015 Hackaday Prize entry. If you haven’t started your entry yet, this is a great crowd to help with brainstorming!

Whether or not you are at the workshop, we’re planning to head out for a bit of fun afterward. This casual meet up is at Lucky Strike starting around 7:30pm. It’s up to you if you want to bowl, imbibe, or both. Please RSVP; since we haven’t rented the place out we’d like to have an idea of how many hackers are coming. And don’t forget, it’s a tradition at Hackaday bar meetups to bring a small bit of hardware to show off as you meet new people. See you in June!


The 2015 Hackaday Prize is sponsored by:

Water measurement

Itemizing Water Consumption At Home

For a while now [Florian] has wanted to itemize his water usage at home to keep better track of where his water bill is coming from — and to help him develop water conscious habits. He’s not done yet, but has had a pretty good start.

Faucet Sensor

The problem with measuring the water usage of everything in your house is that the plumbing involved to install sensors is a rather big job — so instead he assumed constant flow in some places and just used sensors on the valves to determine how long the valve was open for, which gives him a fairly accurate number for water usage.

On the right is his kitchen faucet which features a super quick arcade button hack to keep track of it being on or off.

The toilet was a bit trickier. He ended up designing a 3D printed mount attached to the lever on the inside of the tank — it’s pretty universal so he’s included the .STL files on his website if anyone wants to try implementing this system.

Continue reading “Itemizing Water Consumption At Home”

An Open Source Toolchain For ICE40 FPGAs

FPGAs are great, but open source they are not. All the players in FPGA land have their own proprietary tools for creating bitstream files, and synthesizing the HDL of your choice for any FPGA usually means agreeing to terms and conditions that nobody reads.

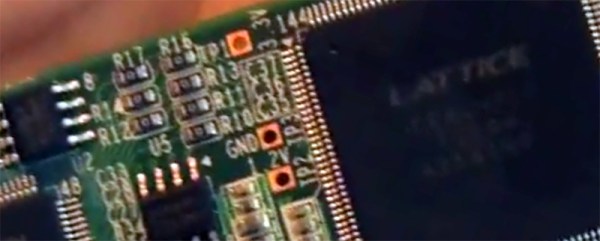
After months of work, and based on the previous work of [Clifford Wolf] and [Mathias Lasser], [Cotton Seed] has released a fully open source Verilog to bitstream development tool chain for the Lattice iCE40LP with support for more devices in the works.

Last March, we saw the reverse engineering of the Lattice ICE40 bitstream, but this is a far cry from a robust, mature development platform. Along with Yosys, also written by [Clifford Wolf] it’s relatively simple to go from Verilog to an FPGA that runs your own code.

Video demo below, and there’s a ton of documentation over on the Project IceStorm project page. You can pick up the relevant dev board for about $22 as well.

Continue reading “An Open Source Toolchain For ICE40 FPGAs”