Digital Wind Chimes

Quality wind chimes are not cheap. No matter how much you spend, though, they generally sound the same year after year. If that bothers you, maybe [sensatroniclab] can help. They’ve posted a simple design for a digital wind chime using the Ototo music generator.

The Ototo is reasonably priced and promises to let you make music from anything (well, anything conductive, anyway).  Because the Ototo handles all the music production, the only real building part of the project is the wind sensors. The sensors are made with conductive fabric with a marble at the end for weight.

In the video below you can see [Matthew Ward] talk about the device and actually play it like you might a harp. This would be a good school project owing to the simplicity of using the Ototo, although [sensatroniclab] is actually working on accessibility music projects.

Continue reading “Digital Wind Chimes”

Identify Your Devices By Their Unintentional Radiation

RFID was supposed to revolutionize asset tracking, replacing the barcode everywhere. Or at least that was the prediction once tags got under five cents apiece. They still cost seven to fifteen cents, even in bulk, and the barcode is still sitting pretty. [Chouchang (Jack) Yang] and [Alanson Sample] of Disney Research hope to change that.

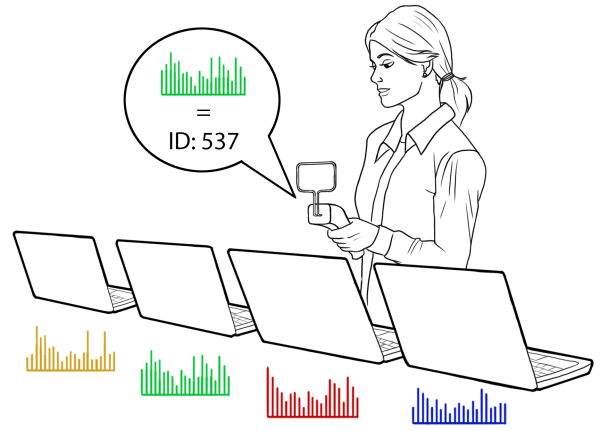
Instead of tagging every electronic device, they use whatever electromagnetic emissions the device currently produces when it’s powered up. What’s surprising is not that they can tell an iPhone from a toy lightsaber, but that they can tell the toy lightsabers apart. But apparently there’s enough manufacturing and tolerance differences from piece to piece that they appear unique most of the time.

The paper (PDF) goes through the details and procedure. The coolest bit? The sensor they use is an RTL-SDR unit with the radio-mixer front end removed and replaced with a simple transformer. This lets them feed baseband (tuning from 0 to 28.8 MHz) straight into the DAC ADC and on to the computer which does the heavy math. Sawing off the frontend of a TV tuner is a hack, for those of you out there with empty bingo cards.

If you like statistics, you’ll want to read the paper for details about how they exactly do the classification of objects, but the overview is that they first start by figuring out what type of device they’re “hearing” and then focusing on which particular one it is. The measure that they use ends up being essentially a normalized correlation.

While we’re not sure how well this will scale to thousands of devices, they get remarkably good results (around 95%) for picking one device out of five. The method won’t be robust to overclocking or underclocking of the device’s CPU, so we’re concerned about temperature and battery-voltage effects. But it’s a novel idea, and one that’s ripe for the hacker-rebuild. And for the price of an RTL-SDR, and with no additional per-tag outlay as with an RFID system, it’s pretty neat.

Thanks [Static] for the tip! Via Engadget.

Real-time Driving Of RGB LED Cube Using Unity3D

RGB LED cubes are great, but building the cube is only half the battle – they also need to be driven. The larger the cube, the bigger the canvas you have to exercise your performance art, and the more intense the data visualization headache. This project solves the problem by using Unity to drive an RGB LED cube in real-time.

Landscape animation RGB Cube - small
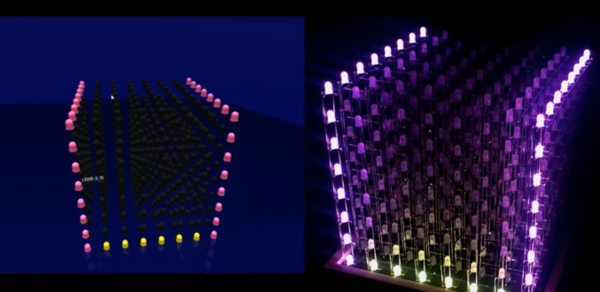
We’re not just talking about driving the LEDs themselves at a low level, but how you what you want to display in each of those 512 pixels.

In the video, you can see [TylerTimoJ]’s demo of an 8x8x8 cube being driven in real-time using the Unity engine. A variety of methods are demonstrated from turning individual LEDs on and off, coloring swaths of the cube as though with a paintbrush, and even having the cube display source image data in real-time (as shown on the left.)

Continue reading “Real-time Driving Of RGB LED Cube Using Unity3D”

3D Print It Or Fix It?

[Tim Trzepacz] is working on a pretty cool MIDI controller project over on Hackaday.io. It involves, naturally, a bunch of knobs and buttons. And it’s one of these nice arcade-style buttons that broke when he slammed on his car brakes and it went flying.

He tried gluing the plastic bits back together, but we all know how that works — temporarily. Next, he thought that maybe he could 3D-print a model of the arcade button’s housing. Besides being a lot of work, [Tim] didn’t have a reliable printer on hand. But he did have filament and a soldering iron.

The rest of the story is a slightly ugly mess, but it looks like it’ll work. (And it’s on the inside of the case, after all.) A working part is a good part.

The irony here is that the original choice of 3 mm ABS filament as a printing material is that it’s cheap and available because it’s commonly used in plastic welding. And there are more elegant ways to melt the plastic than with a soldering iron. And more ways to get it melted than direct heating, like ultrasonic welding and friction welding, for instance.

But we still like to see the occasional quickly hacked together effort, at least one per day. What’s your craziest plastic welding success or failure?

Hackaday Prize Entry: Open Source Electrospinning Machine

Electrospinning is a fascinating process where a high voltage potential is applied between a conductive emitter nozzle and a collector screen. A polymer solution is then slowly dispensed from the nozzle. The repulsion of negative charges in the solution forces fine fibers emanate from the liquid. Those fibers are then rapidly accelerated towards the collector screen by the electric field while being stretched and thinned down to a few hundred nanometers in diameter. The large surface area of the fine fibers lets them dry during their flight towards the collector screen, where they build up to a fine, fabric-like material. We’ve noticed that electrospinning is hoped to enable fully automated manufacturing of wearable textiles in the future.

[Douglas Miller] already has experience cooking up small batches of microscopic fibers. He’s already made carbon nanotubes in his microwave. The next step is turning those nanotubes into materials and fabrics in a low-cost, open source electrospinning machine, his entry for the Hackaday Prize.

Continue reading “Hackaday Prize Entry: Open Source Electrospinning Machine”

Find A Drone

Flying a drone usually leads to–sooner or later–crashing a drone. If you are lucky, you’ll see where it crashes and it won’t be out of reach. If you aren’t lucky, you’ll know where it is, but it will be too high to easily reach. The worst case is when it just falls out of the sky and you aren’t entirely sure where. [Just4funmedia] faced this problem and decided to use some piezo buzzers and an Arduino to solve it.

Yeah, yeah, we know. You don’t really need an Arduino to do this, although it does make it easy to add some flexibility. You can pick two tones that are easy to hear and turn on the buzzers with a spare channel or sense a loss of signal or power.

Continue reading “Find A Drone”

Build A Replica Apple ///

[Mr. Name Required] pointed us to a great video on the modeling of a replica Apple /// to the small scale needed to contain a Raspberry Pi by [Charles Mangin].

[Mr. Name] pointed out that the video was a great example of the use of reference photos for modeling. [Charles] starts by finding the references he needs for the model. Google image search and some Apple history websites supplied him with the required images.

He modeled the Apple /// in Autodesk 123. It has sketch tools, but he chose to craft the paths in iDraw and import them into the software. This is most likely due to the better support for boolean combination tools in vector editing software. Otherwise he’d have to spend hours messing with the trim tool.

Later in the video he shows how to change the perspective in photographs to get a more orthographic view of an object. Then it’s time for some heavy modeling. He really pushes 123 to its limit.

The model is sent off for professional 3D printing to capture all the detail. Then it’s some finishing work and his miniature Apple /// is done. Video after the break.

Continue reading “Build A Replica Apple ///”