Hackit: Laser Cut Your Own Jigsaw Puzzle

If you have a laser printer, you’ve got your Christmas presents sorted out. At least if your family likes jigsaw puzzles. The idea is very simple, laminate a photograph onto some laser-cuttable board, and then run the laser over the outline of the pieces. Bam! Instant puzzle.

The trick is generating the puzzle outline, and of course there’s an online application for that. It’s got options that let you customize the piece count and shapes, and then download the result as an SVG image.

Unfortunately, it’s closed-source and makes the pieces a little bit too uniform for our liking — many of the pieces have exactly the same shape as each other. Are you up to the challenge of writing a better one? We’d love to see it, because the idea of a simple puzzle overlay for laser cutters is too good. Help us get started with some brainstorming in the comments below. How do you go about generating meaningfully unique jigsaw edges algorithmically?

Once you’ve got the puzzle cut out, you can seal up the surface nicely, toss it in a box, and then you’ve got a personalized present. To put it together, we suggest an accompanying DIY pick-and-place tool. (And kudos to [Kristina] for the best headline of 2015 on that one!)

Thanks to Hackaday alum [George Graves] for the tip!

Personal Compass Points To Your Spawn Point

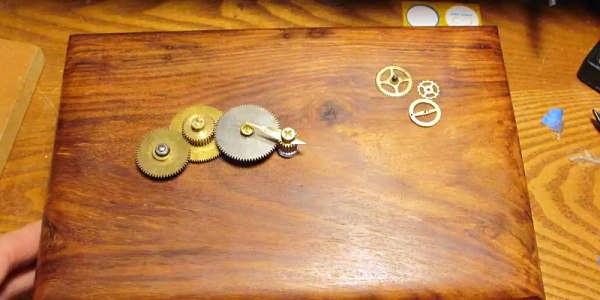
A conventional compass points north (well, to magnetic north, anyway). [Videoschmideo]  wanted to make a compass that pointed somewhere specific. In particular, the compass — a wedding gift — was to point to a park where the newlywed couple got engaged. Like waking up in a fresh new Minecraft world, this is their spawn point and now they can always find their way back from the wilderness.

The device uses an Arduino, a GPS module, a compass, and a servo motor. Being a wedding gift, it also needs to meet certain aesthetic sensibilities. The device is in an attractive wooden box and uses stylish brass gears. The gears allow the servo motor to turn more than 360 degrees (and the software limits the rotation to 360 degrees). You can see a video of the device in operation, below.

Continue reading “Personal Compass Points To Your Spawn Point”

Ultra Simple Magnetic Levitator

Want to build a magnetic levitator in under two hours? With a total of 7 parts, including the coil, it just cannot get simpler than what [How-ToDo] shows here! It is not only an extremely simple circuit, it also has the advantage of using only discrete components: a MOSFET, hall effect sensor, diode and two resistors, that’s it.

The circuit works by sensing the position of the levitating magnet, using the hall effect sensor , then turns the coil on and off in response via the MOSFET. The magnet moves upwards when the coil is energized and falls down when it is not. This adjustment is made hundreds of times a second, and the result is that the magnets stays floating in mid air.

This is the kind of project that can make a kid get interested in science: it combines easy construction with visually amazing behavior, and can teach you basic concepts (electromagnetism and basic electronics in this case). Excellent for a school project.

For the more advanced enthusiast, more sophisticated levitator design based on an Atmega8 micro-controller will be of interest.

Continue reading “Ultra Simple Magnetic Levitator”

After The Prize: A Libre Space Foundation

The Hackaday Prize is the greatest hardware build-off on the planet, and with that comes some spectacular prizes. For the inaugural Hackaday Prize in 2014, the top prize was $196,418. That’s a handsome sum, and with that, the right hardware, and enough time, anything is possible.

The winners of the first Hackaday Prize was the SatNOGs project. The SatNOGs project itself is very innovative and very clever; it’s a global network of satellite ground stations for amateur cubesats. This, in itself, is a huge deal. If you’re part of a student team, non-profit, or other organization that operates a cubesat, you only have access to that satellite a few minutes every day — whenever it’s in the sky, basically. SatNOGs is a project to put directional, tracking antennas everywhere on Earth, all connected to the Internet. This is a project that gives global ground station coverage to every amateur-built cubesat.

It’s been two years since SatNOGs won the Hackaday Prize, so how are they doing now? I caught up with some of the midwest reps of SatNOGs at this year’s Hamvention, and the project is doing very well. The steerable antenna mount designed by the SatNOGs project is fantastic, some of the Earth stations are seeing a lot of use, and the network is growing.

Two years is a long time, and since then SatNOGs has evolved into the Libre Space Foundation, a not-for-profit foundation with a mission to promote, advance and develop free and open source technologies and knowledge for space.

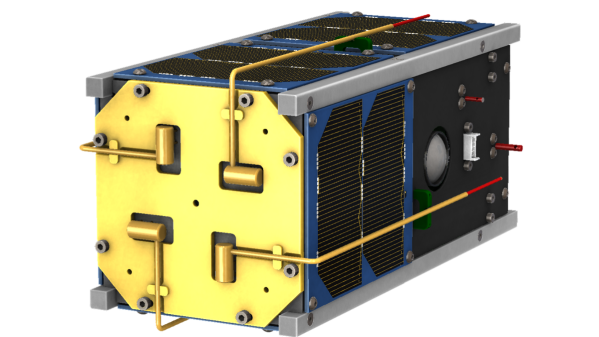
The premier project for the Libre Space Foundation is the UPSat, the first Open Source satellite ever launched. For the last two years, this is what the Libre Space Foundation has been working on, and soon this satellite will be orbiting the Earth. The satellite itself was recently delivered, and next month it will be launched to the International Space Station aboard a Cygnus spacecraft. After that, it will be deployed to low Earth orbit from Nanoracks’ deployment platform on the station.

This is truly an amazing project. SatNOGs brought a network of ground stations to amateur cubesats orbiting the Earth, and now the Libre Space Foundation will put an Open Source satellite into low Earth orbit. All the documentation is available on Github, and this is the best the open hardware movement has to offer. We’re proud to have SatNOGs and the Libre Space Foundation proving that Open Hardware can change the world, and we can only hope this year’s winner of the Hackaday Prize has such an impact.

Bake A Fresh Raspberry Pi: Never Struggle To Configure A Pi Again

[David Ferguson] has put together a nice little tool called Pi Bakery. Half MIT Scratch, half configuration utility, it puts a nice visual face on all the various start-up scripts, and kludges that the Raspberry Pi community uses to configure the popular single board computer.

Raspberry Pi’s are a little weird. They mostly get crammed into the slots microcontrollers used to live in. The nice part about microcontrollers is that they just turn on and start going. There’s no OS to boot. No file system to mount. Of course the downside to microcontrollers is often that there’s no OS to boot and file system to mount. Regardless, mostly you’ve got to spend a bit configuring a Raspbian install before a Raspberry Pi really starts to encroach on the microcontroller’s territory.

Pi Bakery abstracts all this. You can drag blocks, representing scripts, in the order you’d like them run. If you want to your Pi to boot up, connect to WiFi, and then start a VNC server it’s as easy a dragging the blocks in the right order and filling in the blanks. You can see an example of it in operation in the video after the break.

Continue reading “Bake A Fresh Raspberry Pi: Never Struggle To Configure A Pi Again”

Brazing Aluminum

Where do you stand on one of the eternal questions of metalwork: brazing, or welding? As your Hackaday writer, and the daughter of a blacksmith, it’s very much on the welding side here. Brazed joints can come apart too easily, which is why in the territory this is being written in at least, they are not permitted for the yearly vehicle roadworthiness test. If you’ve ever had to remove a brazed-on patch with an angle grinder, you’ll know which one you’d trust in a crisis.

What if the metal in question is aluminum? [George Graves] sends us a link to a forum discussion on the subject from a few years ago, and to a YouTube video which we’ve embedded below the break. Miracle brazing rods claim astounding toughness, but the world divides into those who favour TIG’s strength versus those who point to brazing’s penetration far between the surfaces of the metal to be joined. Having experimented with them a while back, we’ll admit that it’s true that aluminum brazing rods join broken parts impressively well. But yet again you won’t see this Hackaday writer riding a bike that wasn’t welded with the trusty TIG torch.

Take a look at the video, and see what you think. Even if it’s not a joint you’d stake your life on it’s still a technique that’s a useful addition to your workshop arsenal.

Continue reading “Brazing Aluminum”

Laser Pointer Clock Makes Timekeeping A Drawn-Out Affair

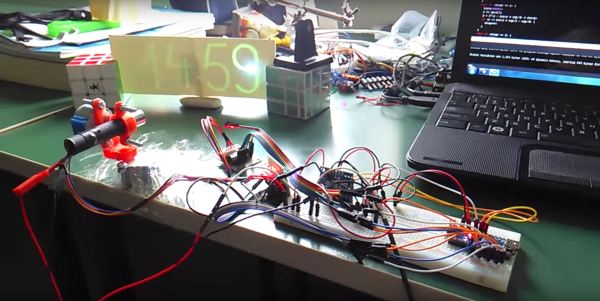
Designing a unique clock to flex your technical skills can be a rewarding experience and result in an admirable showpiece for your home. [Andres Robam] saw an opportunity to make a laser-pointer clock that draws the current time onto a glow-in-the-dark sticker.

A pair of stepper motors tilt and pan the laser’s mount — designed in SolidWorks and 3D printed. There was an issue with the motor’s shaft having some slack in it — enough to affect the accuracy of the laser. [Andres] cleverly solved the issue by using a pen’s spring to generate enough tension in the system, correcting it. A NODEmcu v2 is the brains of the clock — chosen because of its built-in WiFi capacity and compatibility with the Arduino IDE — and a 5mW laser sketches the time onto the sticker.

Continue reading “Laser Pointer Clock Makes Timekeeping A Drawn-Out Affair”