Stephanie Kwolek: Saving Lives With Kevlar

Almost a really bad day in the woods.

Like most accidents, it happened in an instant that seemed to last an eternity. I had been felling trees for firewood all afternoon, and in the waning light of a cold November day, I was getting ready to call it quits. There was one tiny little white pine sapling left that I wanted to clear, no thicker than my arm. I walked over with my Stihl MS-290, with a brand new, razor sharp chain. I didn’t take this sapling seriously — my first mistake — and cut right through it rather than notching it. The tree fell safely, and I stood up with both hands on the saw. Somehow I lost my footing, swiveled, and struck my left knee hard with the still-running chainsaw. It kicked my knee back so hard that it knocked me to the ground.

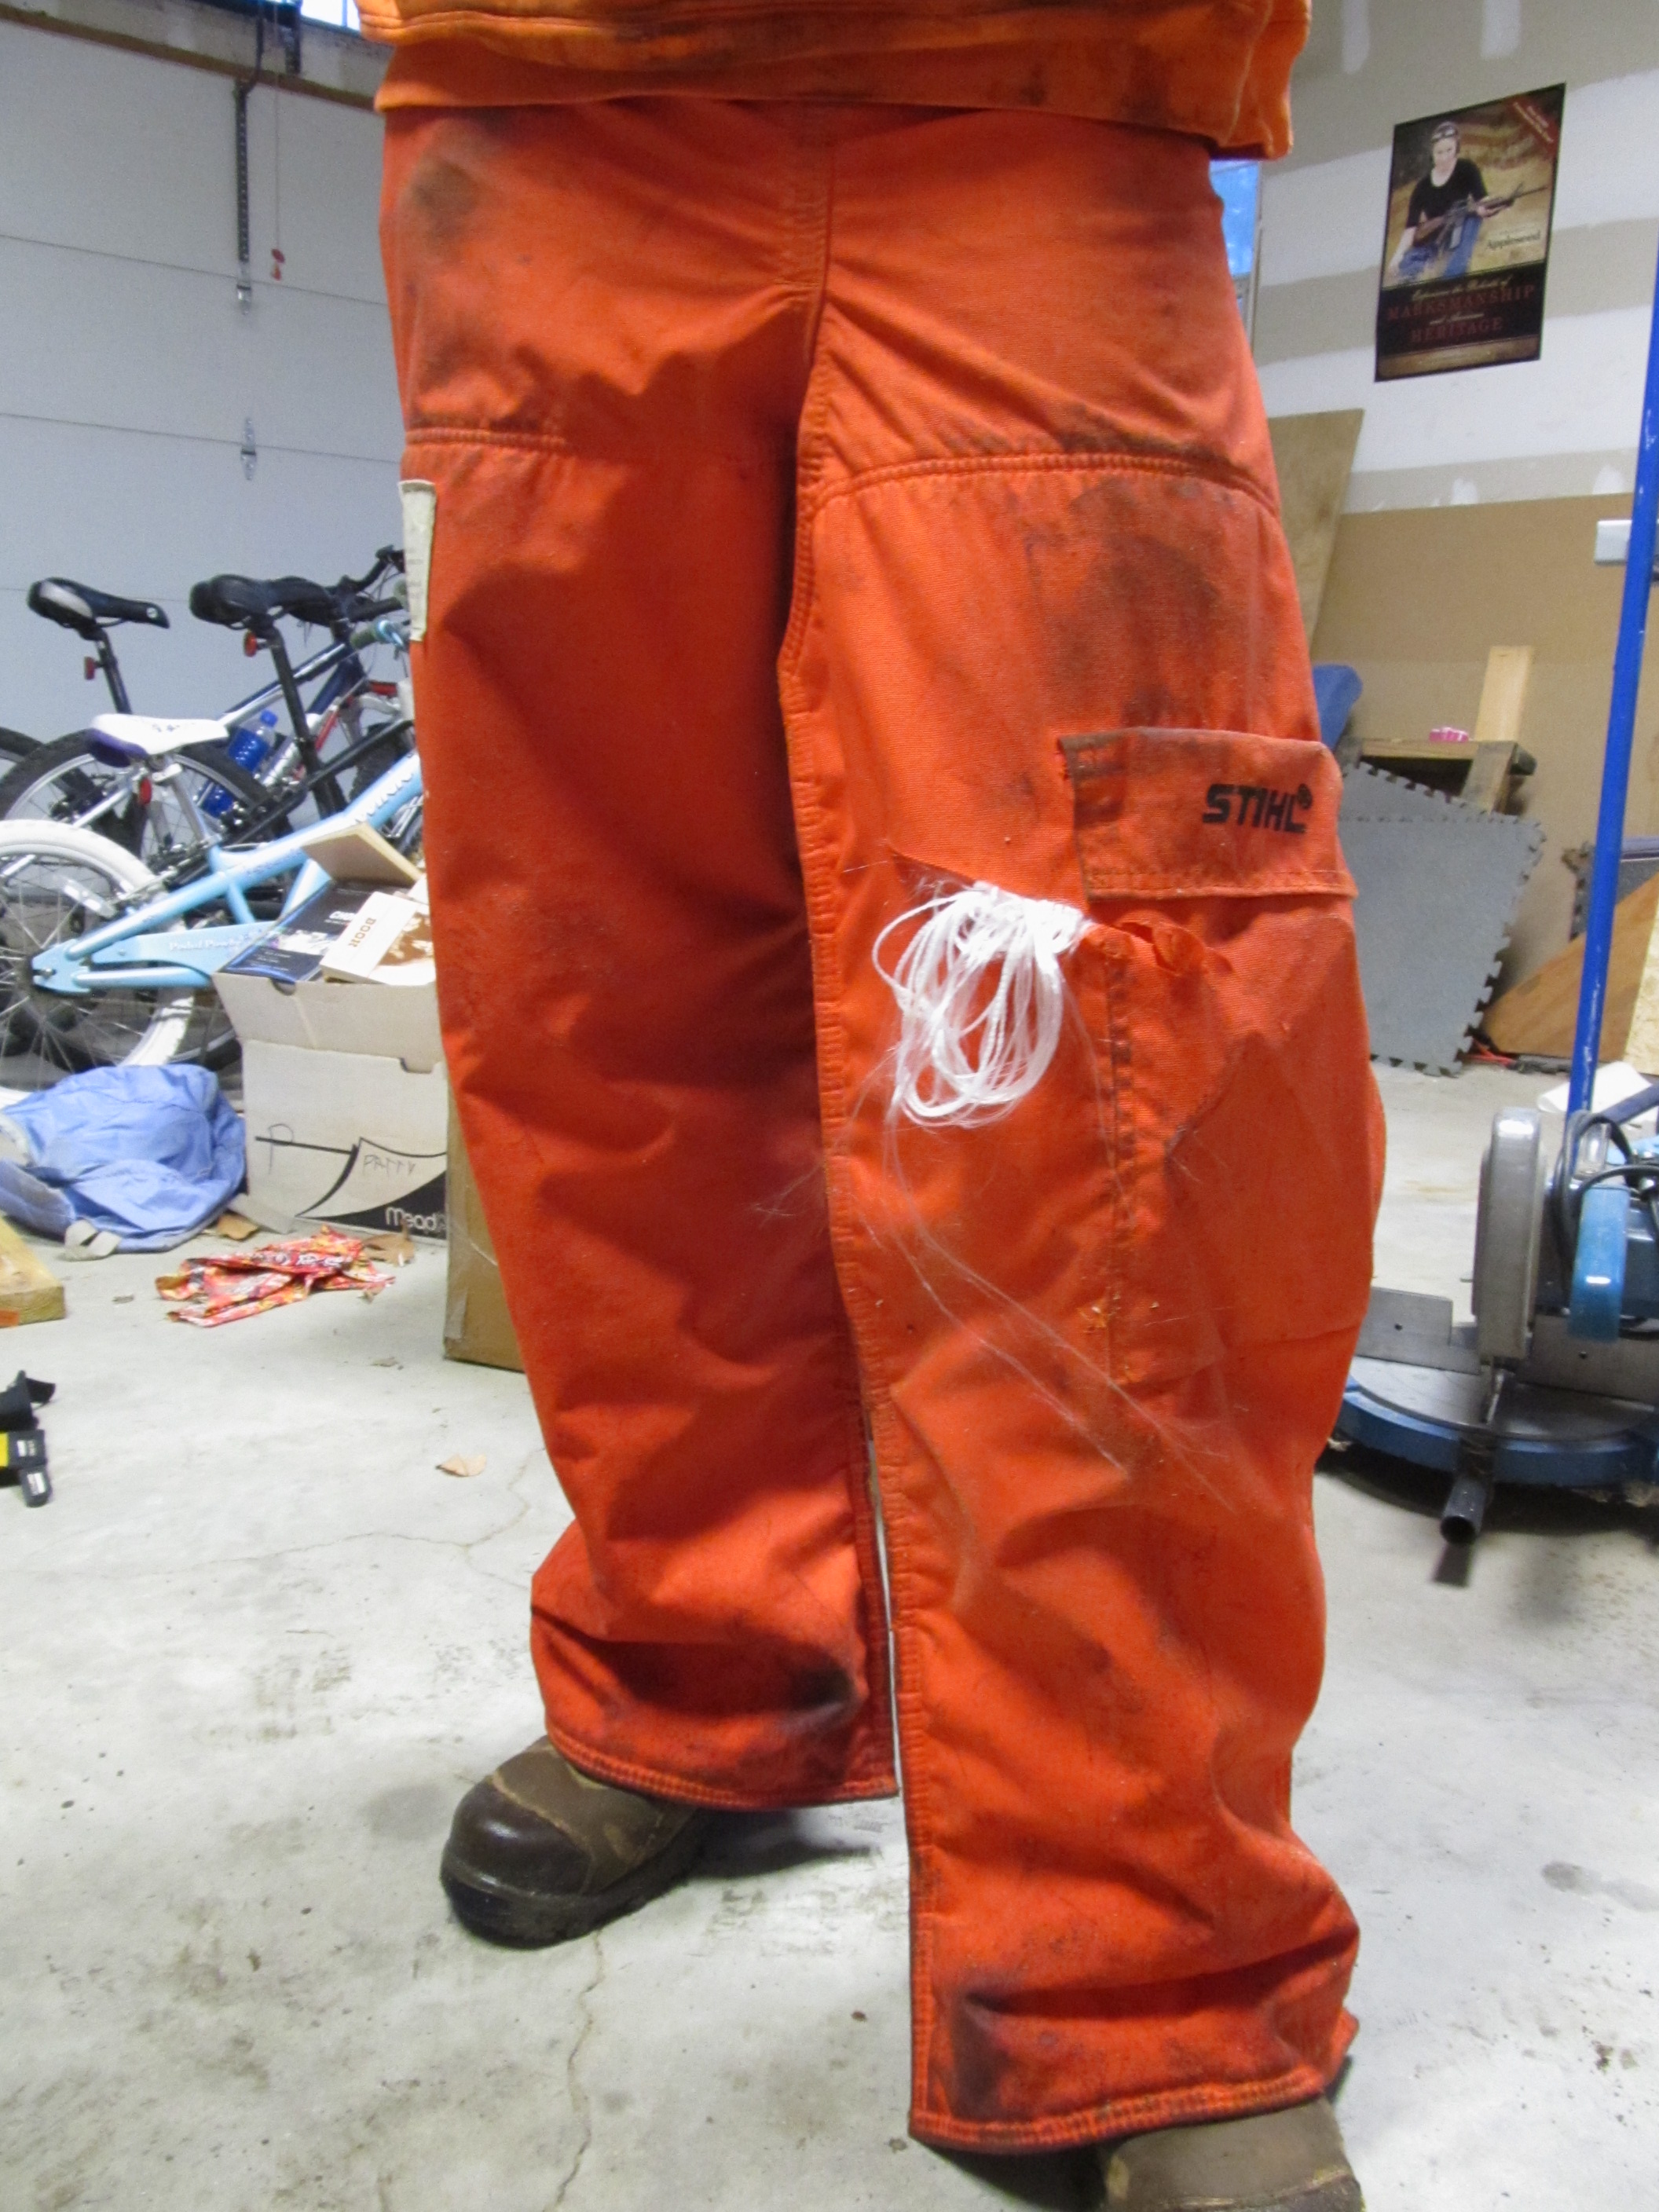
In another world, that would likely have a been a fatal injury — I was alone, far from the house, and I would have had mere minutes to improvise a tourniquet before bleeding out. But as fate would have it, I was protected by my chainsaw chaps, full of long strands of the synthetic fiber Kevlar.

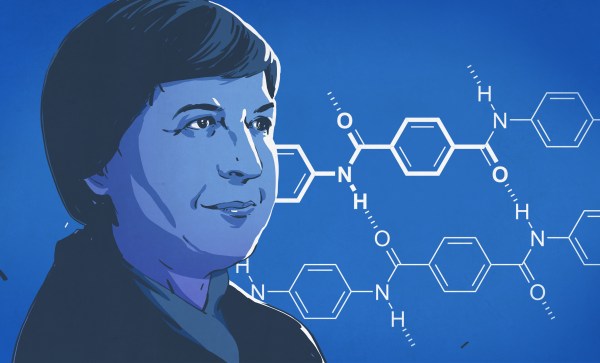
The chain ripped open the chaps, pulled the ultrastrong fibers out, and instantly jammed the saw. I walked away feeling very stupid, very lucky, and with not a scratch on me. Although I didn’t realize it at the time,  I owed my life to Stephanie Kwolek.

Continue reading “Stephanie Kwolek: Saving Lives With Kevlar”

Hacked 3D TV Glasses May Cure Lazy Eye

Lazy eye (technically Amblyopia) is a sight disorder that affects about 3% of the population where one eye is stronger than the other. Historically, treatment is via an eyepatch or special drops, but research shows that it may be better not to cover up the strong eye for long periods. It suggests that occluding the eye for short periods using a liquid crystal panel can yield better results. To that end, [Raninn] decided to hack some LCD glasses meant for 3D TV viewing to make a low-cost lazy eye treatment device.

This is his second version of [Raninn’s] glasses. The first one took two batteries and didn’t generate enough voltage for the LCD panels. The newer design uses a Dickson charge pump to generate a higher voltage from the battery and surface mount MOSFETs to switch voltages to the panels.

The write up is very complete with details about how to create even the PC board. He didn’t get into a lot of details about hacking the glasses. We assume that’s because your glasses may be different from his. These shutter glasses aren’t too complicated, you’ll just need to find the connections to the panel.

One of our favorite shutter glasses hacks came from [Dino] who built a set of automatic sunglasses for himself. Many of us wear glasses and for those with bifocals we keep waiting for an eyeglasses hack that makes automatic mult-focals a reality.

Review: LimeSDR Mini Software Defined Radio Transceiver

It’s fair to say that software-defined radio represents the most significant advance in affordable radio equipment that we have seen over the last decade or so. Moving signal processing from purpose-built analogue hardware into the realm of software has opened up so many exciting possibilities in terms of what can be done both with more traditional modes of radio communication and with newer ones made possible only by the new technology.

It’s also fair to say that radio enthusiasts seeking a high-performance SDR would also have to be prepared with a hefty bank balance, as some of the components required to deliver software defined radios have been rather expensive. Thus the budget end of the market has been the preserve of radios using the limited baseband bandwidth of an existing analogue interface such as a computer sound card, or of happy accidents in driver hacking such as the discovery that the cheap and now-ubiquitous RTL2832 chipset digital TV receivers could function as an SDR receiver. Transmitting has been, and still is, more expensive.

The LimeSDR Mini's chunky USB stick form factor.
The LimeSDR Mini’s chunky USB stick form factor.

A new generation of budget SDRs, as typified by today’s subject the LimeSDR Mini, have brought down the price of transmitting. This is the latest addition to the LimeSDR range of products, an SDR transceiver and FPGA development board in a USB stick format that uses the same Lime Microsystems LMS7002M at its heart as the existing LimeSDR USB, but with a lower specification. Chief among the changes are that there is only one receive and one transmit channel to the USB’s two each, the bandwidth of 30.72 MHz is halved, and the lower-end frequency range jumps from 100 kHz to 10 MHz. The most interesting lower figure associated with the Mini though is its price, with the early birds snapping it up for $99 — half that of its predecessor. (It’s now available on Kickstarter for $139.)

Continue reading “Review: LimeSDR Mini Software Defined Radio Transceiver”

Unbricking A 3D Printer The Hard Way: By Writing A Bootloader

There’s a sinking feeling when a firmware upgrade to a piece of equipment goes wrong. We’ve all likely had this happen and  bricked a device or two. If we are lucky we can simply reapply the upgrade or revert to a previous version, and if we’re unlucky we have to dive into a serial debug port to save the device from the junk pile. But what happens when both those routes fail? If you are [Arko], you reverse-engineer the device and write your own bootloader for it.

The offending bricked object was a Monoprice MP Mini Delta 3D printer to which he was foolhardy enough to apply new firmware after seeing a friend’s machine taking it without issue. Finding the relevant debug interface on its main PCB he applied the firmware upgrade again, only to realise that in doing so he had overwritten its bootloader. The machine seemed doomed, but he wasn’t ready to give up.

What follows in his write-up is a detailed examination of the boot mechanism and memory map of an ARM Cortex M0 processor as found in the Monoprice’s STM32F070CB. We learn about vector tables for mapping important addresses of interrupts and execution points, and the mechanics of a bootloader in setting up the application it launches. This section is well worth a read on its own, even for those with no interest in bricked 3D printers.

In the end he had a working bootloader to which he appended the application firmware, but sadly when he powered up the printer there was still no joy. The problem was traced to the serial connection between the ARM doing the printer’s business and the ESP8266 running its display. After a brainstorm suggestion with a friend, a piece of code was found which would set the relevant registers to allow it to run at the correct speed.

So after a lot of work that resulted in this fascinating write-up, there was a working 3D printer. He suggests that mere mortals try asking Monoprice for a replacement model if it happens to their printers, but we’re extremely glad he persevered. Without it we would never have had this fascinating write-up, and would be the poorer without the learning experience.

This isn’t the first time we’ve brought you 3D printer bootloader trickery.

3D Printed Transmission Invented Again; This Time Continuously Variable

We shouldn’t laugh, but we know the feeling very well. [Gear Down for What] invented a revolutionary transmission and fabricated it from scrap material when he was 16. Except he later found out the same design was the subject of a patent filed 14 years earlier. Dismayed he destroyed his prototype, but fast forward to today and he’s made a 3D model of a ratcheting continuously variable transmission. You can see a video of him explaining how it works below and put your own spin on the idea by grabbing the model from Thingiverse.

The model is just for demonstration purposes. We doubt it would wear well enough to use in practice but it’s great to get your hands on for a really intuitive understanding of the mechanism. Some modern automobiles use a continuously variable transmissions (CVT) and many recreational vehicles and motorcycles use them. Like any transmission, their job is to match the motor’s rotation to needed output torque and speed by offering different gearing ratios. Whereas a normal transmission provides a few fixed gears, a CVT changes seamlessly through a range of ratios.

Some of the design of the transmission is pretty tricky, like the cam adjustment. The video shows the rationale for how the design works and how it relates to tank steering (tank as in an Army tank; not like a gas tank). The model isn’t just plastic. It uses some screws and BBs, as well. However, if you have a 3D printer and wanted a good classroom demonstration, this is the ticket.

We’ve seen other geared variable transmissions for robots before. The planetary gears in the cam adjustment of this design are well understood. If you want to brush up your planetary knowledge, there’s no time like the present.

Continue reading “3D Printed Transmission Invented Again; This Time Continuously Variable”

Respectfully Modifying The Amiga 500

Modifying the Amiga 500 to speed up access to RAM in a memory expansion pack is a well documented procedure, with guides on the process written in the early 1990’s when the hardware was only a few years old. But as they were written for contemporary hardware, they make no concessions for how one should be treating a vintage computer that’s now over 30 years old. In 1993, cutting traces on the Amiga 500 motherboard was just a last ditch effort to eek a few more months of service life out of an outdated desktop computer. But in 2018, it’s kind of like when that old lady tried to “restore” a fresco of Jesus in Spain; it might be done with the best of intentions, but you still screwed the thing up good and proper.

Such things don’t fly over at [Inkoo Vintage Computing]. There you can find a guide that details the impressive lengths one can go to if they want to perform the classic modification without any irreversible changes to the motherboard. To avoid the cut traces and soldered bodge wires, this version of the modification makes use of a novel adapter that breaks out the necessary connections on the 8372A chip.

The adapter is simply a homemade PCB with both male and female plastic leaded chip carrier (PLCC) connectors. The few pins on the chip that needed rerouting are exposed as solder pads on the adapter for easy wiring. There are even a couple jumpers on the adapter to turn the modifications on and off.

Not surprisingly, the trickiest part of building this adapter was sourcing the antiquated PLCC connectors. Assuming you can even find them, you are then left with the challenging task of soldering them together. Judging by the pictures on the [Inkoo Vintage Computing] page, it’s no walk in the park.

Another similar arrangement is used in the expansion bay of the Amiga, where a pin is virtually “cut” in the connector. A tiny PCB is soldered to a 3×2 header to reroute the signals, and another jumper is used to enable and disable the pin. Luckily, the long pins on the Amiga memory expansion are forgiving enough that the little board can fit in between them without breaking electrical contact.

We’re no stranger to the Amiga 500 around these parts. We’ve covered how to get the 1987-vintage machine online in the 21st century, as well as employing a Raspberry Pi to emulate the original floppy drive. You can even make your own faux-Amiga with a 3D printed case, if you suffer from a sort of existential dread when working on a computer that’s older than you are.

The rust language logo being branded onto a microcontroller housing

Baremetal Rust On The Horizon

Rust Programming Langauge has grown by leaps and bounds since it was announced in 2010 by Mozilla. It has since become a very popular language owing to features such as memory safety and its ownership system. And now, news has arrived of an Embedded Devices Working Group for Rust aiming at improving support for microcontrollers.

Rust is quite similar to C++ in terms of syntax, however Rust does not allow for null or dangling pointers which makes for more reliable code in the hands of a newbie. With this new initiative, embedded development across different microcontroller architectures could see a more consistent and standardized experience which will result in code portability out of the box. The proposed improvements include IDE and CLI tools for development and setup code generation. There is also talk of RTOS implementations and protocol stack integration which would take community involvement to a whole new level.

This is something to be really excited about because Rust has the potential to be an alternative to C++ for embedded development as rust code runs with a very minimal runtime. Before Arduino many were afraid of the outcome of a simple piece of code but with rust, it would be possible to write memory-safe code without a significant performance hit. With a little community support, Rust could be a more efficient alternative. We have seen some Rust based efforts on ARM controllers and have covered the basics of Rust programming in the past if you want to get started. Good times ahead for hardware hackers.