Workshops Announced For Hackaday Belgrade

Hackaday is hosting a full conference in Belgrade, Serbia, on 26 May. Today we’re excited to announce the workshops that will take place at Hackaday Belgrade. Workshop tickets are available now, but space is extremely limited and we expect these workshops to fill up fast so purchase your ticket right now!

Details of each workshop are listed below. Topics this year include bringing art to your PCB designs, learning the fundamentals of e-textiles, and getting up-to-speed with FPGAs.

You must have a Hackaday Belgrade ticket in order to purchase a workshop ticket. This is our premier European conference, with the best hardware and technology culture you’ll find anywhere. We think of it as a Hacker Village that comes together for one incredible weekend in May. There will be a bar meetup the night before, talks and workshops all day on Saturday, followed by IDM and DJ sets during the hardware badge hacking which goes late into the night. In addition to the experience of being around a critical mass of excellent people, we’ll have refreshments and food throughout and the conference badge you’ll get is a piece of custom electronics for you to play with and hack on throughout the day.

It’s entertainment. It’s professional development. It’s the crowd of people you’ve always wanted to hang out with. This isn’t hype, it’s Hackaday Belgrade.

Creating Art in PCB

Brian Benchoff

This workshop will guide attendees through the process of creating art in PCBs. Topics covered will be the layer stackup of the modern PCB (copper, fiberglass, soldermask, and silkscreen), the current state-of-the-art using Chinese board houses, and how to implement graphics in PCB art using KiCad.

Interactive Poetic Glove

Lavoslava Benčić

In this e-textile workshop, participants will create a unique interactive wearable that generates sounds of various frequencies and responds to the touch (pressure). This includes learning about electronic elements and circuits with emphasis on the capacitive, conductive, and resistive properties of fabrics and yarns.

FPGA Development 101

Miodrag Milanovic

This workshop will show the capabilities of FPGA devices, providing an introduction into FPGA tools used and the Verilog hardware description language. We will go through prepared examples and show the differences in approach when doing design for FPGA and MCU.

Hackaday events always sell out so don’t wait to buy a ticket. Of all the things you could do this year, the Hackaday Belgrade Conference is one that’s worth disrupting your normal routine and making a pilgrimage — we “get” you and we want to see you at the con!

RIP DIP ARM

Every month, semiconductor manufacturers across the globe retire old devices. A product that has been superseded, isn’t selling well, or maybe whose application has declined, is removed from the catalogue and ceases to be manufactured. Usually these moments pass unnoticed, just one old device among many. Who is going to remark upon the demise of a chip for a VGA card for example, or a long-ago-left-behind Flash memory chip?

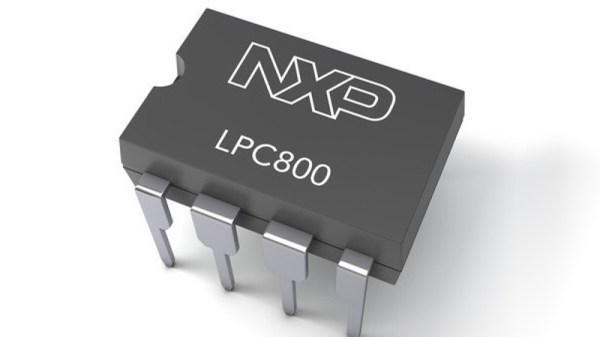
One has come to our attention that is pretty unremarkable, but that could concern some of our readers. NXP have stopped manufacturing the LPC810M021FN8. What on earth is an LPC810M021FN8, you ask, the answer being that it appears to have been the last microcontroller with an ARM core available in a DIP package. Even that in itself is hardly earth-shattering, for if you really must use an ARM core rather than any of the myriad 8, 16, or 32 bit microcontrollers still available you can always get a DIP breakout board for a small surface mount chip.

This turn of events comes as a reminder that, while breadboard-friendly and popular among a section of our community, DIP packages are now particularly old-school. Other once-popular devices such as the LPC1114 have also long-since ceased to be available in this format, and we have to wonder how long we will be able to take advantage of DIP packages for some of the other microcontroller families.

A few years ago this news might have come as something of a disaster, but it now has more of a sense of the passing of a bygone era. It’s normal to use microcontroller dev boards in a larger DIP format for prototyping, so maybe getting used to a bit of surface-mount soldering on a break-out board will be only for the truly hard-core when the last DIP package has been retired. Other than that of course, the 555 is still available in a DIP8, and you can make anything with one of them!

If you didn’t have a chance to take the 810 for a test drive, the usual suppliers still list it in stock, Adafruit have a starter pack for it, and it will no doubt be possible to find it in small quantities for years to come.

[Thanks Tod E. Kurt for the tip]

Superb Wood Floor Inlay Shows Off Computer-Augmented Tools

It’s been a few years since we first started hearing about “tools of the future changing the way we work” but this astounding whole-room floor inlay might be the best argument for them yet.

The Shaper Origin

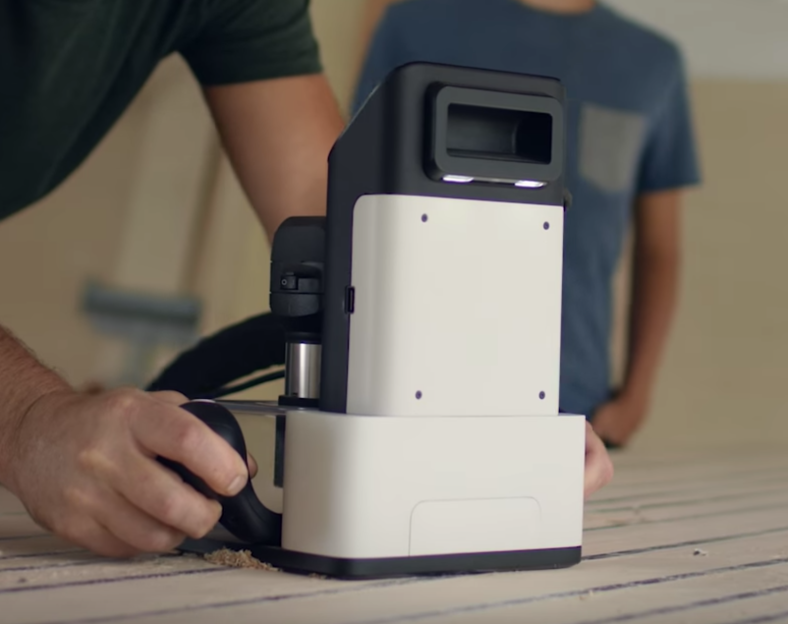
A couple of years ago we wrote a hands-on preview of a unique tool called the Shaper Origin. If a milling machine is classically defined as having a stationary tool head with moving stock, the Origin is the reverse. To use an Origin the user adheres specially marked tape to the stock material, then holds the origin down and moves it much like a hand router.

The Origin has a camera which tracks the fiducial patterns on the tape, allowing it to know its precise position, even across an entire room. The operator sees a picture on the screen of the tool that guides them with superimposed lines, while the tool head makes its own precision adjustments to perfectly cut the design in the X, Y, and Z.

Floor in Progress

But what do you use a tool like this for? Cutting boards, small tables, and toy blocks are fine examples but don’t highlight any unique features of the tool. Many could just as easily be made using a ShopBot, X-Carve, Carvey, or any of their ilk. What you can’t do with any of those tools (or really anything besides manual labor, endless patience, and master skill) is inlay an entire floor in situ.

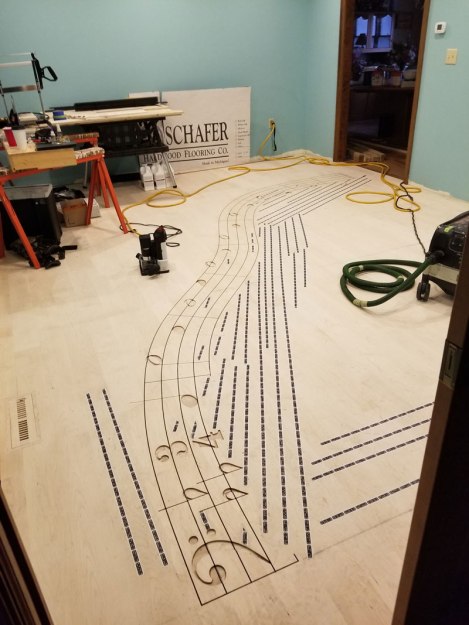
[Mark Scheller] (eight time winner of Wood Floor of the Year awards) used an Origin to cut a curvaceous 22 foot long rendition of the first 9 bars of Handel’s Passacaglia into the floor of a lucky homeowner’s music room. Without decades of practice, it’s difficult to imagine doing this any way besides with a Shaper Origin. You can’t put an entire room into a CNC router. The individual floorboards could be cut, but that would be tedious and increasingly difficult as the room gets larger. With the Origin it seems almost trivial. Do the design, place the marking tape, and cut. The same model is used to cut the inlays for a perfect fit. This is an incredible example of a unique use for this unusual tool!

Hackaday Links Column Banner

Hackaday Links: April 15th, 2018

San Fransisco is awash in electric scooters. Three companies — Lime, Bird, and Spin — have been dumping ‘smart’ electric scooters on the sidewalks of San Fransisco over the last few weeks. The business plan for all these companies is to allow anyone to ride them via an app. $1 unlocks the scooter, and rides are fifteen cents a minute. No one, it appears, is looking at the upside of abandoned, dead electric scooters: they’re a remarkable source of lithium batteries and brushless motors. Hello, my name is Mr. Cyberpunk. My friends and I drive around the city collecting abandoned electric scooters to harvest their batteries and motors. A quick hit from a drill in the middle of the top panel of a Bird scooter disables the cellular modem, but then you don’t get to harvest the Particle dev board. You’re welcome, Mr. Doctorow, for the scene in your next novel.

There are a huge number of tips and tricks that are obvious if you already know them, and genius if you don’t. Working with wood? Need to hide a gap? Use sawdust and wood glue to make DIY wood filler. The trick here is using sawdust from whatever you’re trying to hide a gap in, but it’s not a bad idea to keep a few small containers of different sawdusts if you’re working with exotic tropical hardwoods. Titebond III, mango.

Ever since the Bayeux tapestry meme generator of 2003, embroidery has been recognized as a legitimate art form. [Irene Posch] is using traditional embroidery skills to create a computer. Conductive thread exists, but you can’t make a computer out of just wire; you need some sort of switching element. This is a relay computer, with the relays built out of beads, coils of conductive thread, and a tiny flippy bit. This is the best picture you’re going to get of the relay. This is still a work in progress and the density of components means this will probably never meet any reasonable definition of ‘computer’, but it is digital logic, done completely with tools in the embroidery toolset.

You know what’s awesome? Hashtag Badgelife. What is Badgelife? It’s the hardware demoscene of independent electronic conference badges, mostly going down at DEF CON every year. This year, Badgelife is bigger than ever. Want proof? AND!XOR, the folks behind the infamous Bender badge and last year’s Hunter S. Rodriguez badge have unleashed this year’s design. It was a Kickstarter, until it sold out. The DC Furs have launched their pre-order whatever for a badge filled with LEDs and fleas. Most surprisingly, there will now be an official mini-village of Badgelife at this year’s Defcon! This is a hardware demoscene, people, and if you want to be as cool as the guys rocking Amiga homebrew in 1993, you gotta get on board with the badgelife.

Rotary Encoders Become I2C Devices

Rotary encoders are the bee’s knees. Not only do you get absolute positioning, you can also use a rotary encoder (with a fancy tact button underneath) for an easy UI for any electronics project. There’s a problem with rotary encoders, though: it’s going to use Gray code or something weird, and getting a rotary encoder to work with your code isn’t as easy as a simple button.

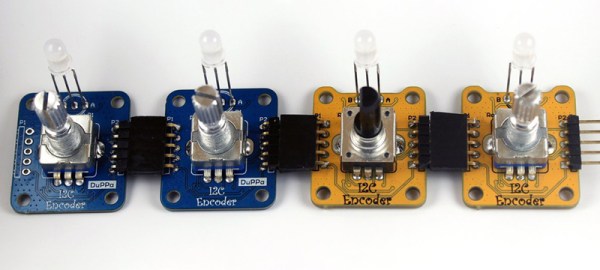
For his Hackaday Prize project, [fattore.saimon] has come up with the solution for using multiple rotary encoders in any project. It’s a board that turns a rotary encoder into an I2C device. Now, instead of counting rising and falling edges, adding a rotary encoder to a project is as easy as connecting four wires.

The project is built around the PIC16F18344, a small but surprisingly capable microcontroller that reads a rotary encoder and spits data out as an I2C slave device. Also on board are a few pins for an RGB LED, general purpose pins, the ability to set all seven bits of the I2C address (who wants 127 rotary encoders?), and castellated holes for connecting several boards together.

This project is an update of [fattore]’s earlier I2C Encoder, and there are a lot of improvements in the current version. It’s slightly smaller, has better connectors, and uses a more powerful microcontroller. That’s just what you need if you want a ton of rotary encoders for all those cool interactive projects.

Fail Of The Week: Casting A Bolt In A 3D-Printed Mold

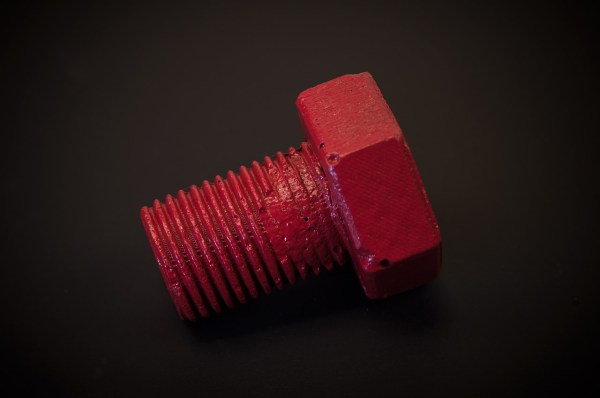
Here’s a weird topic as a Fail of the Week. [Pete Prodoehl] set out to make a bolt the wrong way just to see if he could. Good for you [Pete]! This is a great way to learn non-obvious lessons and a wonderful conversation starter which is why we’re featuring it here.

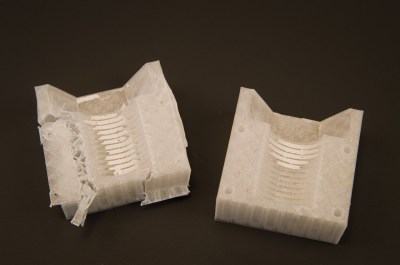
The project starts off great with a model of the bolt being drawn up in OpenSCAD. That’s used to create a void in a block which then becomes two parts with pegs that index the two halves perfectly. Now it’s time to do the casting process and this is where it goes off the rail. [Pete] didn’t have any flexible filament on hand, nor did he have proper mold release compound. Considering those limitations, he still did pretty well, arriving at the plaster bold seen above after a nice coat of red spray paint.

One side of the mold didn’t make it

He lost part of the threads getting the two molds apart, and then needed to sacrifice one half of the mold to extract the thoroughly stuck casting. We’ve seen quite a bit of 3D printed molds here, but they are usually not directly printed. For instance, here’s a beautiful mold for casting metal but it was made using traditional silicon to create molds of the 3D printed prototype.

Thinking back on it, directly 3D printed molds are often sacrificial. This method of pewter casting is a great example. It turns out gorgeous and detailed parts from resin molds that can stand up to the heat but must be destroyed to remove the parts.

So we put it to you: Has anyone out there perfected a method of reusable 3D printed molds? What printing process and materials do you use? How about release agents — we have a guide on resin casting the extols the virtues of release agent but doesn’t have any DIY alternatives. What has worked as a release agent for you? Let us know in the comments below.

Hackaday & Tindie UK Tour Adds Milton Keynes

Hackaday and Tindie are on the road in the UK and we want you to grab one of your projects and come hang out! We have three meetups scheduled over the coming week:

Fresh from our Dublin Unconference and following our London meetup which is happening today, Hackaday and Tindie are staying on the road. We’ve already told you about Nottingham on the 18th, and Cambridge on the 19th, to those two we’re adding Milton Keynes on the 23rd.

We’ll be at convening at Milton Keynes Makerspace on the evening of Monday the 23rd, a community hackspace venue with easy access and parking, and a vibrant community of members. It shares an industrial unit with the local Men In Sheds, so look out for their sign. Entry is free but please get a ticket so we know the amount of pizza and soft drinks we need to arrange. Bring along whatever you are working on, we’d love to see one of your projects, whatever it is!

At the end of the month we will also be at Maker Faire UK in Newcastle, Meeting you, our readers, is important to us, and though we can’t reach everywhere we would like to try to get further afield in the future. Please watch this space.