Overengineering The Humble USB Power Bank

Back in the flip phone days, you could get through the whole weekend before you had to even think about plugging the thing in. But as the processing power of our mobile devices increased, so to did their energy consumption. Today you’re lucky if your phone doesn’t die before you make it home at the end of the day. To avoid the horrors of having to live without their mobile devices, many people have resorted to lugging around small “power banks” to keep their phones topped off.
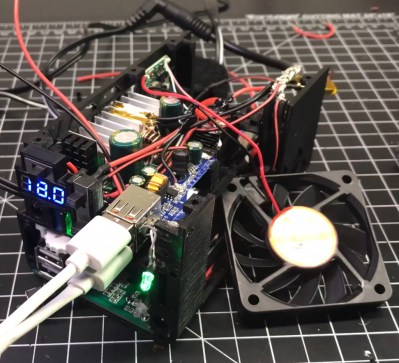
That said, the “Ultimate 18650 Power Bank” created by [Kennedy Liu] is on a whole new level. Only true Road Warriors need apply for this particular piece of kit. Inside the 3D printed enclosure is…well, pretty much everything. It’s got an internal inverter to power your AC devices, a Qi wireless charging coil, an adjustable DC output, displays for all relevant voltages, and naturally plenty of USB ports to charge your gadgets. Oh, and some RGB LEDs tossed in for good measure.

[Kennedy] packed a lot of hardware into this relatively small package, and in the video after the break, shows off exactly how everything is arranged inside of this power bank. A big part of getting the whole thing together is the 3D printed frame, which includes carefully designed insets for all of the key components. So if you want to build your own version, you’ll need to get the exact same hardware he used to make sure the puzzle fits together. Luckily, he’s provided links for all the relevant components for exactly that purpose.

Now, you might be wondering about the wisdom of packing all this electronic gear into a thermoplastic enclosure. But [Kennedy] has thought about that; in addition to tacking a heatsink onto pretty much everything, he’s added fans for active cooling and a fairly robust thermal overload protection scheme. By mounting thermally controlled switches to the heatsinks of the high-output components, the system can cut power to anything getting too hot before it has a chance to melt the plastic (or worse).

Most of the DIY power banks we’ve seen in the past have been little more than a simple collection of 18650 cells, so it’s interesting to see one with so much additional functionality packed in. Admittedly some elements of the construction are, to quote the great Dave Jones, “a bit how ya doin.” But with some refinements we think it would be a very handy device to have in your arsenal.

Continue reading “Overengineering The Humble USB Power Bank”

Protect Yourself — And Your Project — While Working With Mains Power

When debugging ordinary low-voltage circuitry, you’re pretty safe: unless you have some really power-hungry devices that need a ton of current, there aren’t that many truly bad things that can happen, so you can take a lot of liberties with electrical-safety rules. With mains-powered devices, you don’t have this luxury, and a lack of knowledge, sloppy work practices, or simple mistakes can cost you — and your project — dearly. While you still need to know what you’re doing and use the requisite caution, [Yann Guidon]’s latest project — and entry in the 2019 Hackaday Prize —  a mains protection box, might keep simple mistakes from becoming a disaster.

There are a number of precautions you can take when working with mains power. We’ve all used the simple in-line power strip so you can quickly switch off the current, but [Yann] has included a number of devices that can be configured in different ways to experiment with mains-powered devices safely. Built into a sturdy open-topped wooden box with carry handles, the project evokes the traditional breadboard in appearance and functionality. A number of different devices are included, which could be re-configured into different topologies if needed.

[Yann] included an isolation transformer, which can be useful not only for protection against shock in case of accidentally grounding, but also for noise suppression. There is also a variac, which allows the output voltage to be adjusted over a wide range for testing. Of course, circuit breakers are a must, and current and voltage meters keep you informed about what’s going on. A big, easy-to-access switch cuts the power quickly when needed.

The (maybe) final touch is an adjustable output current limit, which is still a work in progress. Built around a current-monitoring relay and a DPDT relay wired as a latch, this allows the output to be disconnected if it draws more than a specified current, equivalent to between 10 W and 100 W. This is the perfect thing for initial testing of new projects.

So, if you’re thinking of working on mains-powered projects, have a close look at what [Yann] has assembled, and learn proper safety procedures before you begin. One place to start is with a great series by our own Jenny List about mains safety: part one and part two. Stay safe out there!

Circuit VR: Resistance Measurement With Four Wires

If you want to measure resistance and you know Ohm’s law, it seems like you have an easy answer, right? Feed a known current through the thing you want to measure and read the voltage required. A little math, and that’s it. Or is it? If you are measuring reasonably large resistance and you don’t mind small inaccuracies, sure. But for tiny measurements or highly accurate measurements, you’d be better off using the four-wire method. What’s more is, understanding why you want to use the four-wire method is a great example of using an understanding of electronics to find solutions to problems.
Continue reading “Circuit VR: Resistance Measurement With Four Wires”

Gamifying Household Chores Helps Get The Kids To Pitch In

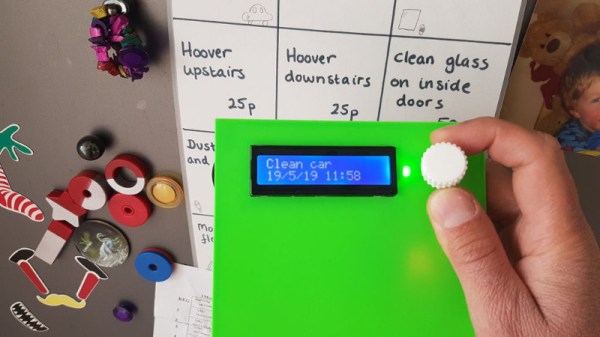
It’s rare to find anyone that gets excited about doing chores. This can lead to members of a household abrogating their duties. In these cases, enforcement is a common tactic. Tired of laminated chore grids and inconsistent results, [alastair-a] decided to tech up with an electronic chore tracking system.

[alastair-a]’s Task Manager is based around an Arduino Nano, fitted with the ever-popular HD44780-compatible LCD screen. Interfacing with the unit is via rotary encoder and RFID tag, while a real-time clock module keeps track of the time.

A custom data structure is used to manage tasks. This allows varying frequencies to be set for different tasks, as well as keeping track of the time of completion by different users. Each user has their own personal RFID tag, which can be swiped across the reader to indicate when a chore has been done.

The initial intent was to have the device print reports each week in order to reward the best performing members of the household. However, [alastair-a] reports the device was so popular with the younger members of the household, that they seem to have forgotten about rewards entirely!

We’ve seen chore reminders before; it’s often popular to build them as IoT devices.

Life On Contract: Product Development Lessons Big And Small

Developing a product and getting it out there to build a business is really hard. Whether it’s a single person acting alone to push their passion to the public, or a giant corporation with vast resources, everyone has to go through the same basic steps, and everyone needs to screw those steps up in the same way.

The reality is that the whole process needs to involve lots of aspects in order to succeed; small teams fail by not considering or dedicating resources to all of those aspects, and large teams fail by not having enough communication between the teams working on those pieces. But in truth, it’s a balance of many aspects that unlock a chance at a successful product. It’s worth recognizing this balance and seeking it out in your own product development efforts, whether you’re a one-engineer juggernaut or a large, established company.

Continue reading “Life On Contract: Product Development Lessons Big And Small”

Mobile SIGINT Hacking On A Civilian’s Budget

Signals Intelligence (SIGINT) refers to performing electronic reconnaissance by eavesdropping on communications, and used to be the kind of thing that was only within the purview of the military or various three letter government agencies. But today, for better or for worse, the individual hacker is able to pull an incredible amount of information out of thin air with low-cost hardware and open source software. Now, thanks to [Josh Conway], all that capability can be harnessed with a slick all-in-one device: the RadioInstigator.

In his talk at the recent 2019 CircleCityCon, [Josh] (who also goes by the handle [CrankyLinuxUser]) presented the RadioInstigator as an affordable way to get into the world of wireless security research beyond the traditional WiFi and Bluetooth. None of the hardware inside the device is new exactly, it’s all stuff the hacking community has had access to for a while now, but this project brings them all together under one 3D printed “roof” as it were. The end result is a surprisingly practical looking device that can be used on the go to explore huge swaths of the RF spectrum at a cost of only around $150 USD.

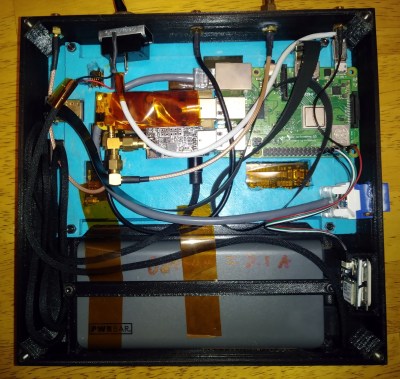
So what has [Josh] packed into this wireless toybox? It will probably come as little surprise to find out that the star of the show is a Raspberry Pi 3 B+, combined with a touch screen display and portable keyboard so the user can interface with the various security tools installed.

To help the RadioInstigator surf the airwaves there’s an RTL-SDR and a 2.4 Ghz nRF24LU1+ “Crazyradio”, both broken out to external antenna connectors on the outside of the device. There’s even an external SMA connector hooked up to the Pi’s GPIO pin, which can be used for low-power transmissions from 5 KHz up to 1500 MHz with rpitx. Everything is powered by a beefy 10,000 mAh battery pack which should give you plenty of loiter time to perform your investigations.

[Josh] has also written several Bash scripts which will get a trove of radio hacking tools installed on the Pi automatically, either by pulling them in through the official repositories or downloading the source and compiling them. Getting the software environment into a known-good state can be a huge time sink, so even if you don’t build your own version of the RadioInstigator, his scripts are still worth checking out.

You can do some pretty incredible things with nothing more than a Pi and an RTL-SDR, but we can’t help but notice there’s still plenty of room inside the RadioInstigator for more gear. It could be the perfect home for a Mult-RTL setup, or maybe even a VGA adapter for spoofing cell networks.

Continue reading “Mobile SIGINT Hacking On A Civilian’s Budget”

Tokyo Mechanical Keyboard Meetup Knocks Our Clacks Off

Just a few days ago, on the other side of the planet from this author, there was a mechanical keyboard meetup in Tokyo. Fortunately through the magic of the Internet we can all enjoy the impressive collection of devices people brought, and boy were there some interesting specimens. There were certainly the inevitable collections of strange artisan keycaps, unusual handmade switches, and keycap sets only available in one group buy five years ago in Nicaragua. But among the bright colors were some truly unique custom designs the likes of which we haven’t see before. A single source is hard to credit, you could check the hashtag #tokyomk6 on Twitter, or [obra]’s thread of photos, or this great blog post (video walkthroughs and photos included) from [romly].

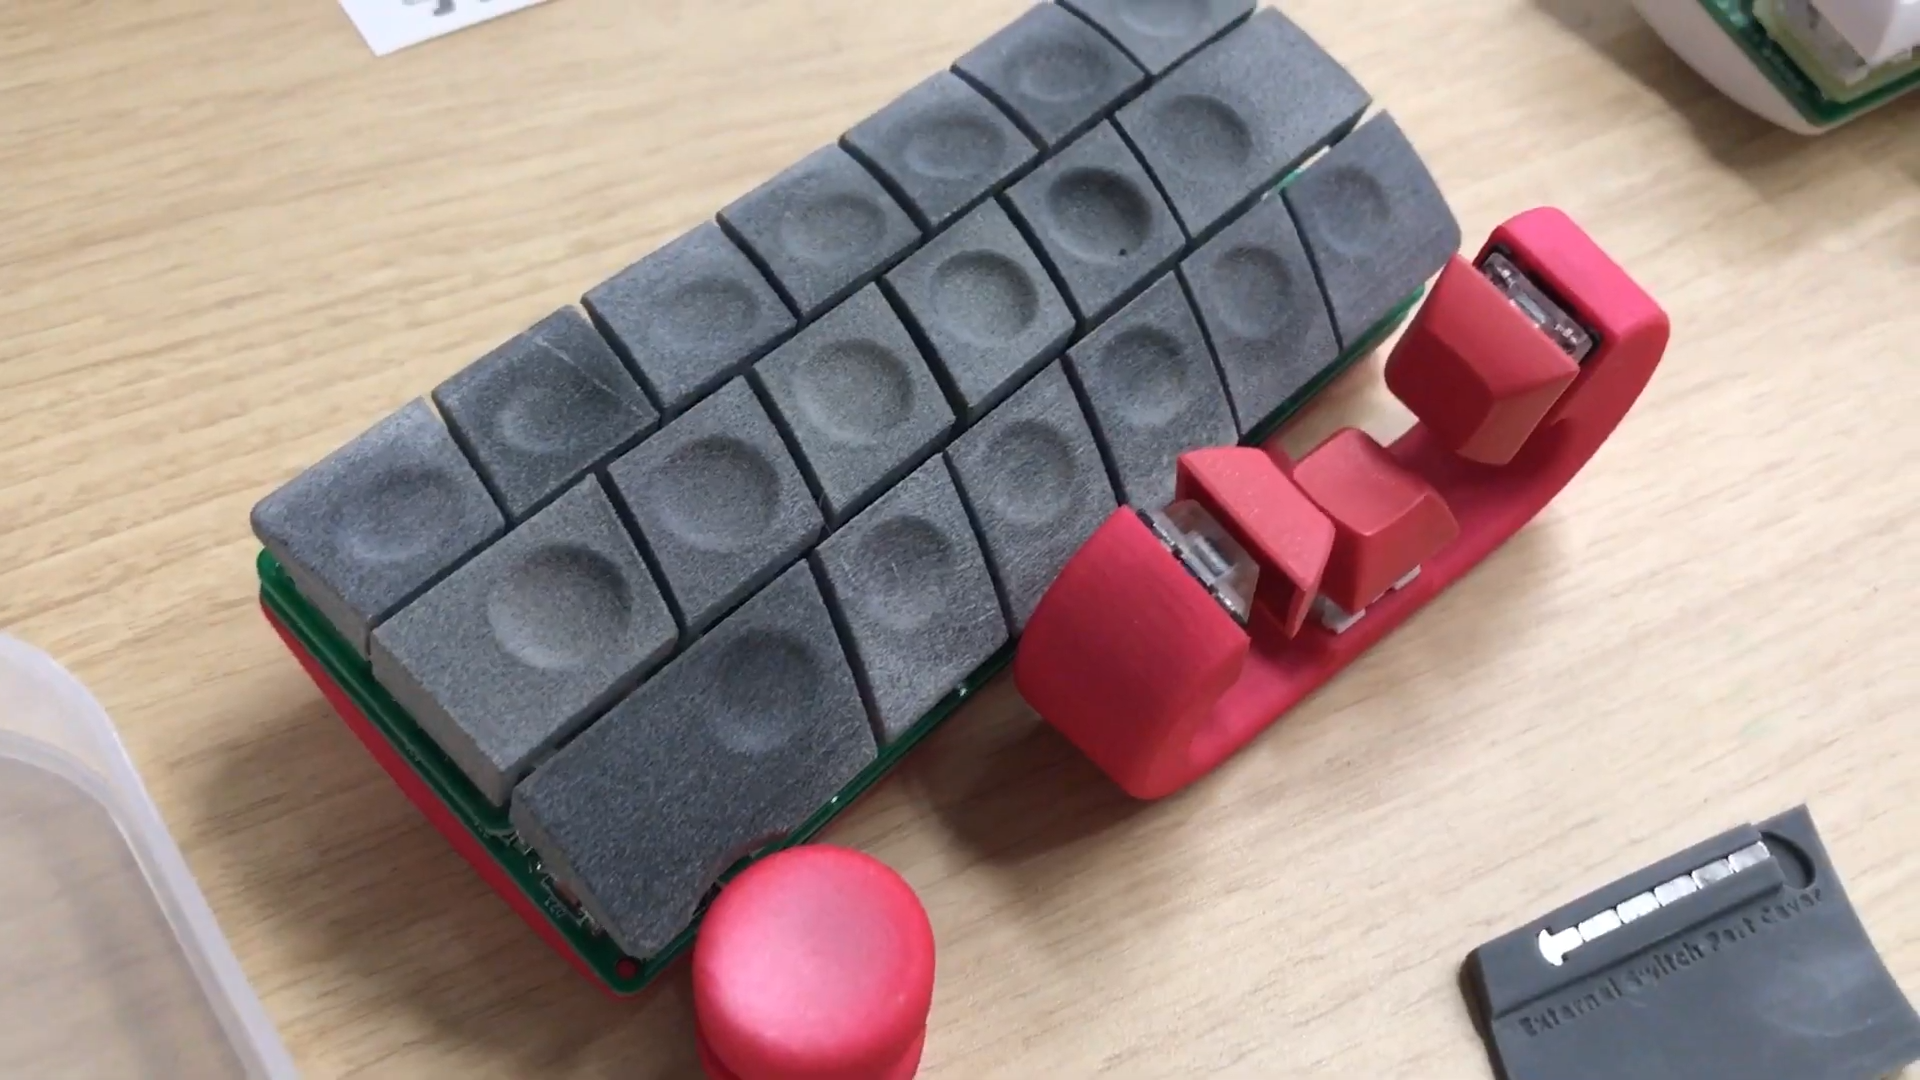
Speaking of [romly], one of their designs stands out as particularly unusual. There are a few things to note here. One is the very conspicuous surface profile of the (clearly totally custom) keycaps themselves. Instead of flat or cylindrical or spherical, these are round. Round like the outside of a log. If we didn’t know better it might look like the entire thing was sculpted or extruded as a single unit. And just below the deck are the perpendicular thumb clusters. Frankly we aren’t sure how to refer to this design feature. The switches are mounted at right angles facing inward so the user places a thumb inside it in a style reminiscent of the DataHand. It’s quite interesting, and we’d be love to know more about what specific functionality it provides.
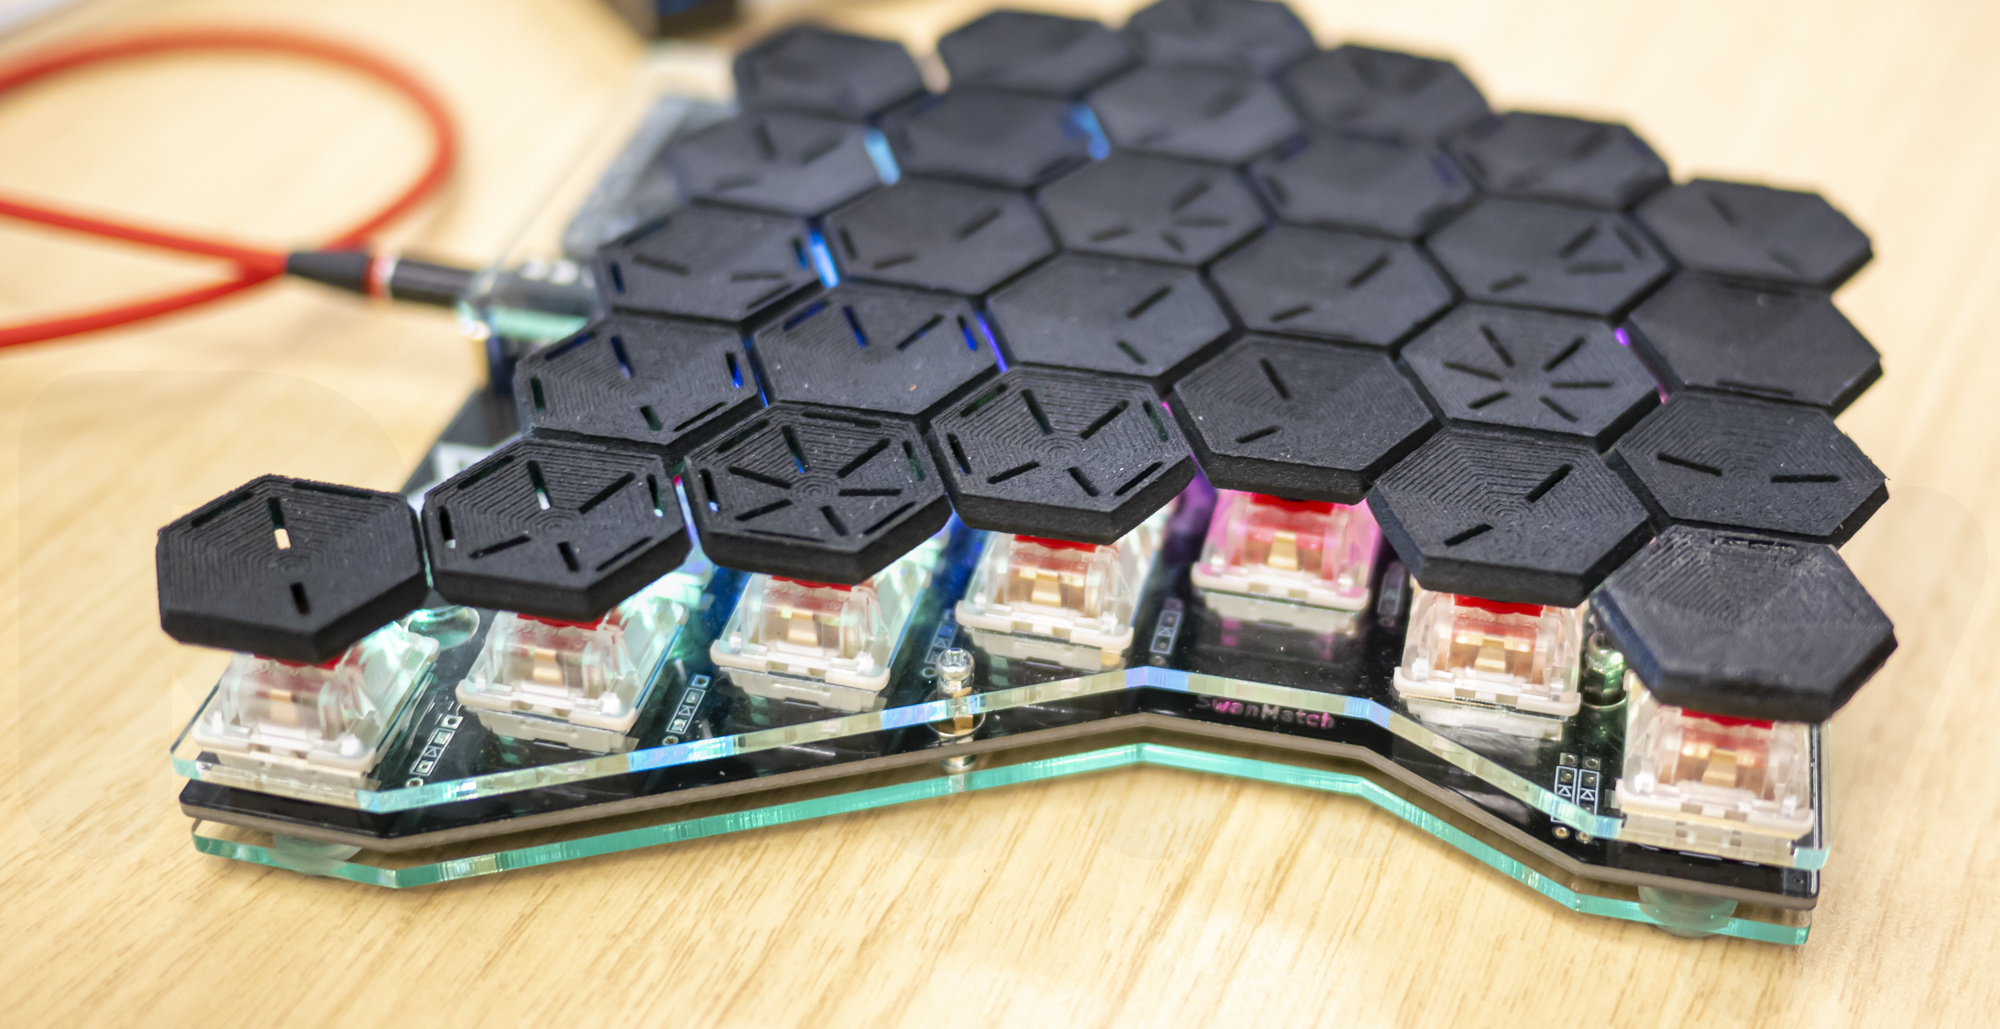
Another interesting entrant is this keyboard with unusually staggered switches and hexagonal caps (check out the individual markings!). Very broadly there are two typical keyboard layout styles; the diagonal columns of QWERTY (derived from a typewriter in the 1800’s) or the non slanted columns of an “ortholinear” or matrix style layout. By those metrics this is something like an ortholinear keyboard in that its switches overlap their neighbors by half, but the edge to edge close packed caps imply that it might be something else.  We’d be very interested to know how typing on this beast would be!

There were so many more awesome designs present at the meetup that this would never end if we tried to document them all. Take a look through the posts and call out anything else too excellent to go unnoticed!

Thanks [obra] for Tweeting about this so we could discover it.