Homemade Probe For 3D Printer: $3

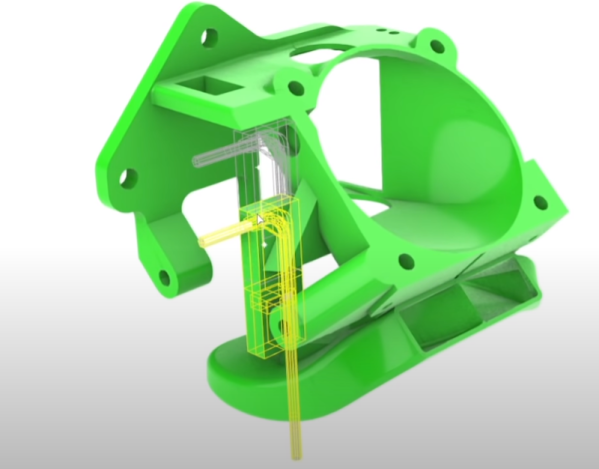
You have a few choices if you want to use a probe to level your 3D printer bed. Rarely, you’ll see optical or capacitive probes. More commonly, though, your probe will sense a metal print or uses a physical probe to touch the print bed. [Design Prototype Test] has long used a BLTouch which uses the latter method. However, putting it in a heated build chamber prevented it from working so he set out to make his own simple design using an Allen key.

We’ve seen Allen key sensors before, but usually, they use a microswitch. We’ve also seen microswitches used to directly probe the bed. But, in this case, a 3D printed fan shroud uses an optical sensor to note when the Allen key hits the bed.

Continue reading “Homemade Probe For 3D Printer: $3”

Pyrotechnic Posters Are Fireworks Drawn On Paper

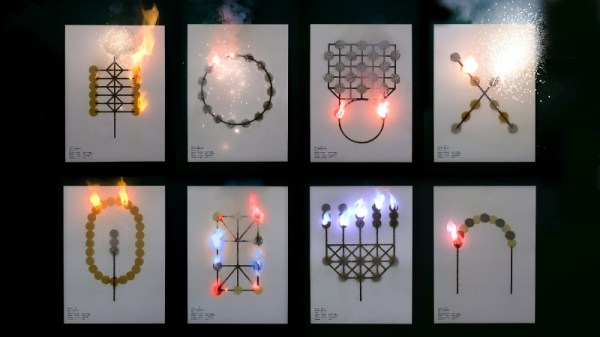
There’s a deep love many humans feel for fire; it’s often cited as one of the most important discoveries that led to the founding of civilization. The work of French artistic duo [Pinaffo-Pluvinage] definitely hits upon that, combining pyrotechnics with paper to make what are probably the most exciting posters you’ve ever seen, as reported by Heise Online.

The artworks are made with a variety of powders, including those for blue and red flames and one with a special “scintillating” effect.

The posters aren’t huge, measuring 50 cm x 70 cm. However, what they lack in size, they make up for with literal flames. Yes, the posters are laced with a variety of pyrotechnic powders that combust in a variety of designs and patterns to create a dynamic burning artwork once ignited.

Each poster is thus a work of art in both the visual and combustible realms. Different parts of the artwork burn at differnt rates and with different colored flames, adding to the performance when the poster is burned. Impressively, the artworks are not destroyed in the process; the pyrotechnic material burns off with much flame and smoke without destroying the poster itself.

Putting together the posters wasn’t as simple as simply doodling some designs. The duo had to develop their own methods to apply the pyrotechnic material to the paper. Reportedly, the effort took hundreds of experiments to get right.

It’s unclear exactly how the effect is achieved without burning the whole poster down; one suspects some kind of protective layer may be used. It’s quite the opposite of flash paper, which consumes the paper itself in the combustion.

In any case, fireworks experts will likely have some good ideas of the chemicals used to achieve the flaming effects; sound off in the comments if you know what’s what!

The pieces could be interpreted as a commentary on the transience of all things, or the artist’s intention could have been something different entirely. Who can say? Video after the break.

Continue reading “Pyrotechnic Posters Are Fireworks Drawn On Paper”

Maybe The Simplest Cloud Chamber

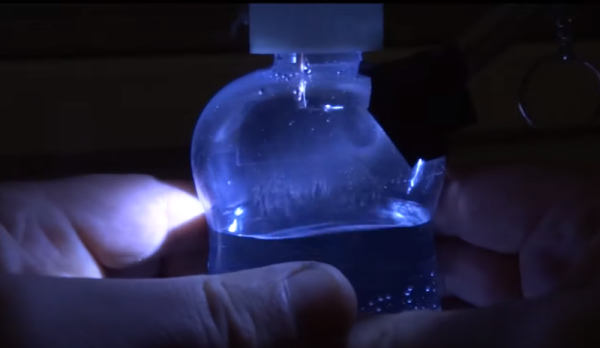
Have you ever seen a Wilson cloud chamber — a science experiment that lets you visualize ionizing radiation? How hard would it be to build one? If you follow [stoppi’s] example, not hard at all (German, Google Translate link). A plastic bottle. some tape, a flashlight, some water, hot glue, and — the only exotic part — a bit of americium 241. You can see the design in the video below and the page also has some more sophisticated designs including one that uses a CPU cooler. Even if you don’t speak German, the video will be very helpful.

You need to temper your expectations if you build the simple version, but it appears to work. The plastic bottle is a must because you have to squeeze it to get a pressure change in the vessel.

Continue reading “Maybe The Simplest Cloud Chamber”

One Tool Twists Wires, And Skewers Shish Kebabs

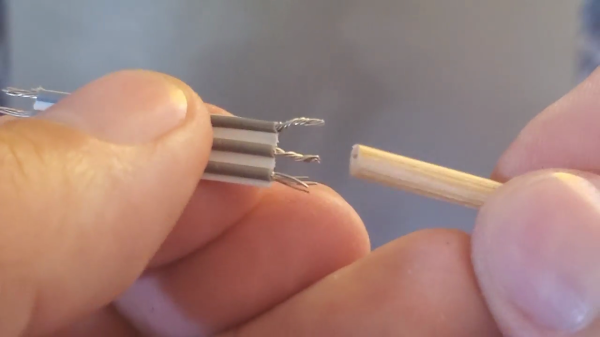
Twisting stranded wire with your fingers in preparation for tinning and/or soldering is almost a reflex for folks making electronic assemblies. But what if the wires are too close to get your fingers around, or you have the fingers of a sumo wresters? Well [DIYDSP] has a solution for you (see video below the break) that’s easy to make from a shish kebab skewer that’s probably rolling around your kitchen drawer. The reason that [DIYDSP] wanted to twist such closely spaced wires was to solder a length of 0.1 in O.C. stranded ribbon cable directly onto a PCB pin header pattern.

The method is very simple. Drill a long hole in the factory-cut flat end, followed by using a countersink bit to give a conical taper to guide the wires in. [DIYDSP] found that a 1/16 inch (1.6 mm) drill bit was a bit too large to grip the types of wires he was using, and finally settled on a 0.6 mm bit. If you are using larger wires, you should experiment to get the right size, or just build a handful of these of differing diameters since they’re so easy to make — just mark them clearly so you don’t accidentally grill shish kebabs with them on the BBQ.

The resulting tool is not unlike the business end of a hand-held wire-wrap tool, but works different principle and is a fraction of the cost. If you do any amount of interconnect wiring with stranded wires, then you should check out this video and whip up a couple of these to throw in your tool box.

Continue reading “One Tool Twists Wires, And Skewers Shish Kebabs”

Tiny TV Celebrates The Forgotten Tech Of CRTs

For those of us who grew up before the Internet, the center of pretty much every house was the TV. It was the shrine before which we all worshipped, gathering together at the appointed times to receive the shared wisdom of mass entertainment. In retrospect, it really wasn’t that much. But it’s what we had.

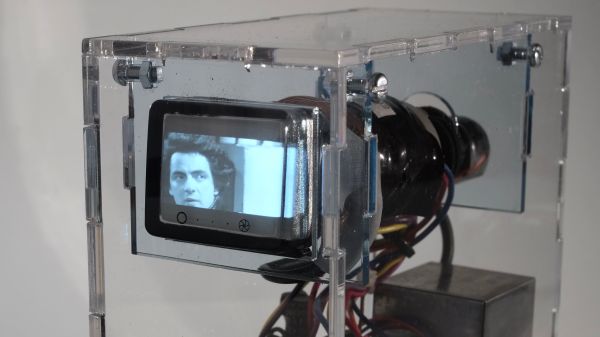
Content aside, one thing all these glowing boxes had in common was that which did the glowing — the cathode ray tube (CRT). Celebrating the marvel of engineering that the CRT represents is the idea behind [Matt Evan]’s tiny desktop TV. The design centers around a 1.5″ CRT that once served as a viewfinder on a 1980s-vintage Sony camcorder. [Matt] salvaged the tube and the two PCB assemblies that drive it, mounting everything in a custom-built acrylic case, the better to show off the bulky but beautiful tube.

The viewfinder originally used a mirror to make the optical path more compact; this forced [Matt] to adapt the circuit to un-reverse the image for direct viewing. Rather than receiving analog signals off the air as we did in the old days — and we liked it that way! — the mini monitor gets its video from a Raspberry Pi, which is set to play clips of TV shows from [Matt]’s youth. Rendered in glorious black and white and nearly needing a magnifying glass to see, it almost recaptures the very earliest days of television broadcasting, when TVs all had screens that looked more like oscilloscope CRTs.

This project is a nice homage to a dying technology, and [Matt] says it has spurred more than one conversation from people you grew up knowing only LCD displays. That’s not to say CRTs are totally dead — if you want to build your own old-school TV, there’s a kit for that.

Pick and place reels

Pick And Place Hack Chat Reveals Assembly Secrets

These days we’ve got powerful free tools to do CAD and circuit design, cheap desktop 3D printers that can knock out bespoke enclosures, and convenient services that will spin up a stack of your PCBs and send them hurtling towards your front door for far less than anyone could have imagined. In short, if you want to build your own professional-looking gadgets, the only limit is your time and ambition. Well, assuming you only want to build a few of them, anyway.

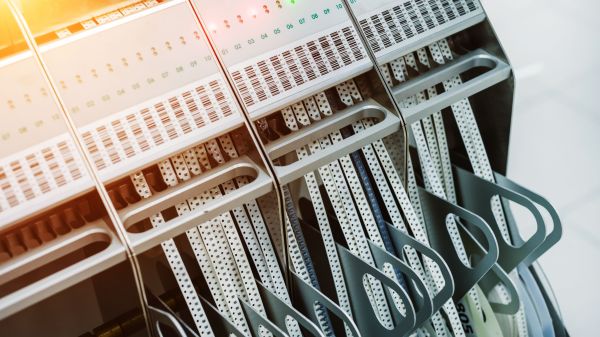
Once you start adding some zeros to the number of units you’re looking to produce, hand assembling PCBs quickly becomes a non-starter. Enter the pick and place machine. This wonder of modern technology can drop all those microscopic components on your board in a fraction of the time it would take a human, and never needs to take a bathroom break. This week Chris Denney stopped by the Hack Chat to talk about these incredible machines and all the minutiae of turning your circuit board design into a finished product.

Chris is the Chief Technology Officer (CTO) of Worthington Assembly, a quick turn electronics manufacturer in South Deerfield, Massachusetts that has been building and shipping custom circuit boards since 1974. He knows a thing or two about PCB production, and looking to help junior and mid-level engineers create easier to manufacture designs, he started the “Pick, Place, Podcast” when COVID hit and in-person tours of the facility were no longer possible. Now he says he can tell when a board comes from a regular listener by how many of his tips make it into the design.

So what should you be doing to make sure your board assembly goes as smoothly as possible? Chris says a lot of it is pretty common sense stuff, like including clear polarity indicators, having a legible silkscreen, and the use of fiducial markers. But some of the tips might come as something of a surprise, such as his advice to stick with the classic green solder mask. While modern board houses might let you select from a rainbow of colors, the fact is that green is what most equipment has been historically designed to work with.

That black PCB might look slick, but can confuse older pick and place machines or conveyors which were designed with the reflectivity of the classic green PCB in mind. It also makes automated optical inspection (AOI) much more difficult, especially with smaller component packages. That said, other colors such as white and red are less of a problem and often just require some fine tuning of the equipment.

He also pulled back the curtain a bit on how the contract manufacturing (CM) world works. While many might have the impression that the PCB game has moved overseas, Chris says orders of less than 10,000 units are still largely handheld by domestic CMs to minimize turnaround time. He also notes that many assembly houses are supported almost entirely by a few key accounts, so while they may be juggling 50 customers, there’s usually just two or three “big fish” that provide 80% of their business. With such a tight-knit group, he cautions CMs can be a bit selective; so if a customer is difficult to work with they can easily find themselves on the short end of the stick.

While the Hack Chat is officially only scheduled for an hour, Chris hung out for closer to three, chatting with community members about everything and anything to do with electronic design and production. His knowledge and passion for the subject was readily apparent, and we’re glad he was able to make time in his schedule to join us.


The Hack Chat is a weekly online chat session hosted by leading experts from all corners of the hardware hacking universe. It’s a great way for hackers connect in a fun and informal way, but if you can’t make it live, these overview posts as well as the transcripts posted to Hackaday.io make sure you don’t miss out.

Hackaday Podcast 155: Dual Integrating Spheres, More Magnetic Switches, PlottyBot, Red Hair In Your Wafers

This week Hackaday Editor-in-Chief Elliot Williams and Managing Editor Tom Nardi take a close look at two pairs of projects that demonstrate the wildly different approaches that hackers can take while still arriving at the same conclusion. We’ll also examine the brilliant mechanism that the James Webb Space Telescope uses to adjust its mirrors, and marvel over a particularly well-developed bot that can do your handwriting for you. The finer points of living off home-grown algae will be discussed, and by the end of the show, you’ll learn the one weird trick to stopping chip fabs in their tracks.

Take a look at the links below if you want to follow along, and as always, tell us what you think about this episode in the comments!

Direct Download (~70 MB)

Continue reading “Hackaday Podcast 155: Dual Integrating Spheres, More Magnetic Switches, PlottyBot, Red Hair In Your Wafers”