Microwave Forge Casts The Sinking-est Benchy Ever

As a test artifact, 3DBenchy does a pretty good job of making sure your 3D printer is up to scratch. As an exemplar of naval architecture, though — well, let’s just say that if it weren’t for the trapped air in the infilled areas, most Benchy prints wouldn’t float at all. About the only way to make Benchy less seaworthy would be to make it out of cast iron. Challenge accepted.

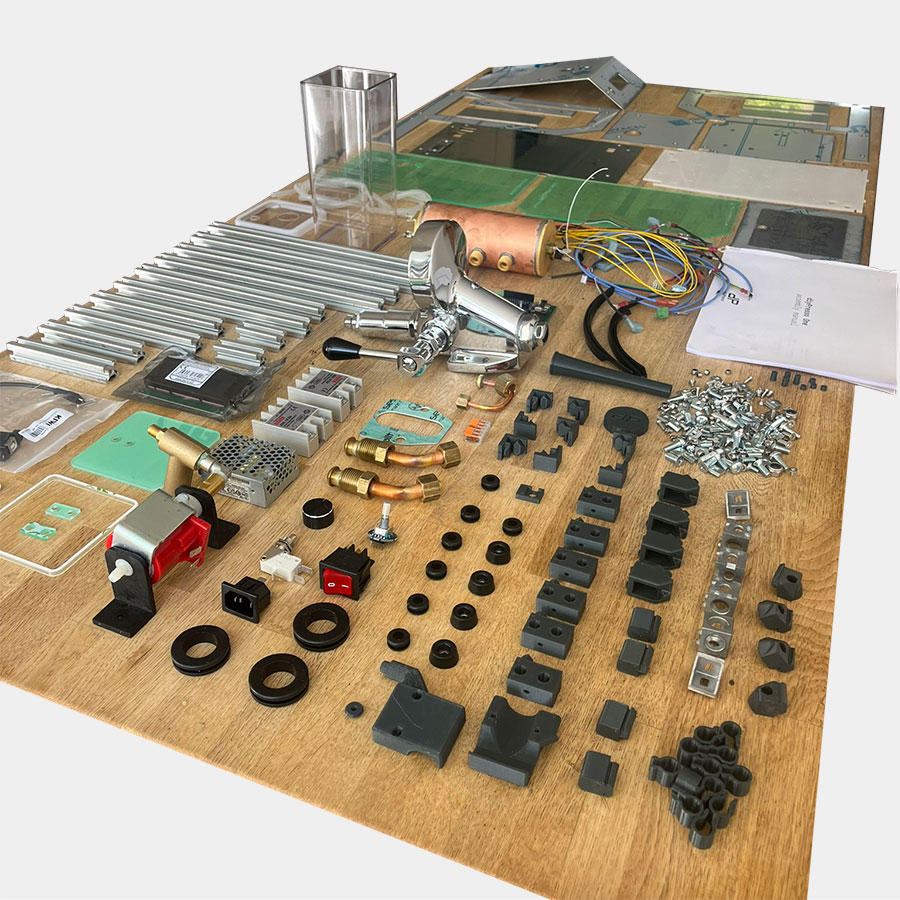
We’ve grown accustomed to seeing [Denny] over at “Shake the Future” on YouTube using his microwave-powered kilns to cast all sorts of metal, but this time he puts his skill and experience to melting iron. For those not in the know, he uses standard consumer-grade microwave ovens to heat kilns made from ceramic fiber and lots of Kapton tape, which hold silicon carbide crucibles that get really, really hot under the RF onslaught. It works surprisingly well, especially considering he does it all on an apartment balcony.

For this casting job, he printed a Benchy model from PLA and made a casting mold from finely ground silicon carbide blasting medium mixed with a little sodium silicate, or water glass. His raw material was a busted-up barbell weight, which melted remarkably well in the kiln. The first pour appeared to go well, but the metal didn’t quite make it all the way to the tip of Benchy’s funnel. Round two was a little more exciting, with a cracked crucible and spilled molten metal. The third time was a charm, though, with a nice pour and complete mold filling thanks to the vibrations of a reciprocating saw.

After a little fettling and a saltwater bath to achieve the appropriate patina, [Denny] built a neat little Benchy tableau using microwave-melted blue glass as a stand-in for water. It highlights the versatility of his method, which really seems like a game-changer for anyone who wants to get into home forging without the overhead of a proper propane or oil-fired furnace. Continue reading “Microwave Forge Casts The Sinking-est Benchy Ever”

Exploring TapTo NFC Integration On The MiSTer

[Ken] from the YouTube channel What’s Ken Making is back with another MiSTer video detailing the TapTo project and its integration into MiSTer. MiSTer, as some may recall, is a set of FPGA images and a supporting ecosystem for the Terasic DE10-Nano FPGA board, which hosts the very capable Altera Cyclone V FPGA.

The TeensyROM C64 cart supports TapTo

The concept behind TapTo is to use NFC cards, stickers, and other such objects to launch games and particular key sequences. This allows an NFC card to be programmed with the required FPGA core and game image. The TapTo service runs on the MiSTer, waiting for NFC events and launching the appropriate actions when it reads a card. [Ken] demonstrates many such usage scenarios, from launching games quickly and easily with a physical ‘game card’ to adding arcade credits and even activating cheat codes.

As [Ken] points out, this opens some exciting possibilities concerning physical interactivity and would be a real bonus for people less able-bodied to access these gaming systems. It was fun to see how the Nintendo Amiibo figures and some neat integration projects like the dummy floppy disk drive could be used.

TapTo is a software project primarily for the MiSTer system, but ports are underway for Windows, the MiSTex, and there’s a working Commodore 64 game loader using the TeensyROM, which supports TapTo. For more information, check out the TapTo project GitHub page.

We’ve covered the MiSTer a few times before, but boy, do we have a lot of NFC hacks. Here’s an NFC ring and a DIY NFC tag, just for starters.

Continue reading “Exploring TapTo NFC Integration On The MiSTer”

Hackaday Links Column Banner

Hackaday Links: September 15, 2024

A quick look around at any coffee shop, city sidewalk, or sadly, even at a traffic light will tell you that people are on their phones a lot. But exactly how much is that? For Americans in 2023, it was a mind-boggling 100 trillion megabytes, according to the wireless industry lobbying association CTIA. The group doesn’t discuss their methodology in the press release, so it’s a little hard to make judgments on that number’s veracity, or the other numbers they bandy about, such as the 80% increase in data usage since 2021, or the fact that 40% of data is now going over 5G connections. Some of the numbers are more than a little questionable, too, such as the claim that 330 million Americans (out of a current estimate of 345.8 million people) are covered by one or more 5G networks. Even if you figure that most 5G installations are in densely populated urban areas, 95% coverage seems implausible given that in 2020, 57.5 million people lived in rural areas of the USA. Regardless of the details, it remains that our networks are positively humming with data, and keeping things running is no mean feat.

Continue reading “Hackaday Links: September 15, 2024”

Archiving Data On Paper Using 2D Images

It seems like only yesterday we covered a project using QR codes to archive data on paper (OK, it was last Thursday), so here’s another way to do it, this time with a dedicated codec using the full page. Optar or OPTical ARchiver is a project capable of squeezing a whopping 200 Kb of data onto a single A4 sheet of paper, with writing and reading achieved with a standard laser printer and a scanner. It’s a bit harder than you might think to get that much data on the page, given that even a 600 DPI printer can’t reliably place every dot each time. Additionally, paper is rarely uniform at the microscopic scale, so Optar utilizes a forward error-correcting coding scheme to cater for a little irregularity in both printing and scanning.

The error-correcting scheme selected was an Extended Golay code (24, 12, 8),  which, interestingly, was also used for image transmission by the NASA Voyager 1 and 2 missions. In information theory terms, this scheme has a minimum Hamming Distance of 8, giving detection of up to seven bit errors. This Golay code implementation is capable of correcting three-bit errors in each 24-bit block, with 12 bits available for payload. That’s what the numbers in those brackets mean.

Another interesting problem is paper stretch during printing. A laser printer works by feeding the paper around rollers, some of which are heated. As a printer wears or gets dirty, the friction coefficient along the rollers can vary, leading to twisting and stretching of the paper during the printing process. Water absorbed by the paper can also lead to distortion. To compensate for these effects, Optar regularly inserts calibration targets throughout the bit image, which are used to locally resynchronize the decoding process as the image is processed. This is roughly similar to how the alignment patterns work within larger QR codes. Finally, similar to the position detection targets (those square bits) in QR codes, Optar uses a two-pixel-wide border around the bit image. The border is used to align to the corners well enough to locate the rows of bits to be decoded.

In the distant past of last week, we covered a similar project that uses QR codes. This got us thinking about how QR codes work, and even if encoding capacity can be increased using more colors than just black and white?

Thanks to [Petr] for the tip!

An 80386 Upgrade Deal And Intel 486 Competitor: The Cyrix Cx486DLC

The x86 CPU landscape of the 1980s and 1990s was competitive in a way that probably seems rather alien to anyone used to the duopoly that exists today between AMD and Intel. At one point in time, Cyrix was a major player, who mostly sought to provide a good deal that would undercut Intel. One such attempt was the Cx486DLC and the related Tx486DLC by Texas Instruments. These are interesting because they fit in a standard 386DX mainboard, are faster than a 386 CPU and add i486 instructions. Check your mainboard though, as these parts require a mainboard that supports them.

This is something that [Bits und Bolts] over at YouTube discovered as well when poking at a TX486DLC (TI486DLC) CPU. The Ti version of the Cyrix Cx486DLC CPU increases the 1 kB L1 cache to 8 kB but is otherwise essentially the same. He found the CPU and the mainboard in the trash and decided to adopt it. After removing the very dead battery from the Jamicon KMC-40A Baby AT mainboard, the mainboard was found to be in good working order. The system fired right up with the Ti CPU, some RAM, and a video card installed.

Continue reading “An 80386 Upgrade Deal And Intel 486 Competitor: The Cyrix Cx486DLC”

A beige computer monitor with a green glow sits atop a flat, beige Apple IIc with a mouse next to it on a dark wooden table. A vase full of bright pink flowers is in the background.

G4 Mac Mini Is A Wolf In Apple IIc Clothing

Restomods let us relive some of the glory days of industrial design with internals that would blow the socks off the original device. [Mental Hygiene] decided to update an Apple IIc with a G4 brain.

Starting with a broken IIc, they pulled the internals, including the venerable 6502, and transplanted the parts from a G4 Mac mini into the case. There was plenty of room for the small desktop and its power supply. We love how they were able to repurpose the 5 1/4″ floppy access on the side of the IIc as a DVD drive.

A Mac OSX install DVD peeks out from the disc slot on a beige Apple IIc. You'd never guess this was originally a floppy drive.
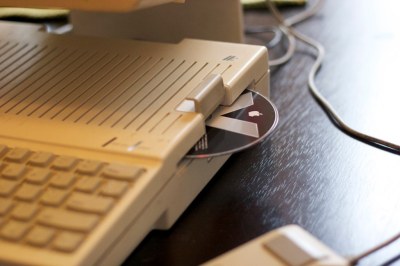
The original keyboard was adapted with an Arduino Teensy into a USB unit for the mini, but the internals of the mouse were replaced with a modern USB laser mouse running the signals over the original connector. What really sells this particular restomod is the “VGA adapter that outputs monochrome NTSC via RCA” allowing a vintage Apple CRT to make this look like a device that somehow upgraded all the way to OSX.

This mod looks to be from 2012, so we’re wondering if it’s time someone did this with an Apple Silicon mini? We’ve previously covered a few different minis inside G4 iMacs. We’ve even seen someone tackle the Compact Macintosh with an iPad mini.

An Espresso Machine For The DIY Crowd

Want to build your own espresso machine, complete with open-source software to drive it? The diyPresso might be right up your alley.

diyPresso parts, laid out and ready for assembly.

It might not be the cheapest road to obtaining an espresso machine, but it’s probably the most economical way to turn high-quality components (including a custom-designed boiler) and sensors into a machine of a proven design.

Coffee and the machines that turn it into a delicious beverage are fertile ground for the type of folk who like to measure, modify, and optimize. We’ve seen DIY roasters, grinders, and even a manual lever espresso machine. There are also many efforts at modifying existing machines with improved software-driven controls but this is the first time we’ve seen such a focused effort at bringing the DIY angle to a ground-up espresso machine specifically offered as a kit.

Curious to know more? Browse the assembly manual or take a peek at the software’s GitHub repository. You might feel some ideas start to flow for your next coffee hack.