Groovin’ With A Gesture-Controlled MP3 Player

Touchscreens are great, but they’re not always the perfect solution. Trying to operate one with gloves on (even alleged “touchscreen-friendly” ones) can be cumbersome at best, and if the screen is on a publicly-shared device, such as a checkout kiosk it can easily become a home for bacteria, viruses and all sorts of other nasty stuff.

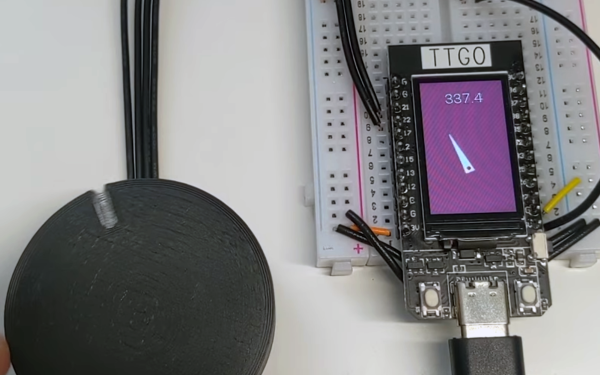
That’s what [Norbert Zare] was thinking when he built his gesture-controlled MP3 player. It uses a PAJ7620U2 gesture sensor to register a few intuitive hand motions including finger twirls to control the volume, hand swipes to skip forward and backwards, and a flat hand to play and pause the song. It even has a motorized knob and cute cutout music notes that move to provide some visual feedback for the gestures, which you can see in-action in the video below. If this seems familiar, it’s because on Tuesday we took a look at the camera-based, glance-to-skip-tracks controller he built.

To actually play some music, he gutted an old MP3 player and hooked the solder pads from the control buttons up to an Arduino, which reads gesture information from the sensor and emulates the MP3 player’s buttons by setting the appropriate pins to HIGH and LOW. Finally, he topped the whole thing off with an LCD screen and a case.

The great thing about [Norbert]’s approach is that it isn’t just limited to an MP3 player — it can be extended to replace the buttons on pretty much any device. Because the Arduino only needs to be connected to the button inputs of the device, it should be relatively easy to adapt most existing tactile interfaces to be touch-free. Paired with this gesture-tracking macro keyboard we saw earlier in the year, the days of actually having to touch our tech may soon be behind us.

Continue reading “Groovin’ With A Gesture-Controlled MP3 Player”

Fluidized Bed In A Pringles Can Paints Parts Inside And Out

Powder coating is a wonderful way to apply a smooth, colored surface to a part, whether for aesthetic reasons or corrosion protection. Traditionally, powder is applied via a air gun that sprays it towards a part while giving the grains an electrostatic charge. The part to be coated (generally metal) is hanging on a rack and given an opposite charge, and the powder readily flows to the surface and sticks well. The dry coated part is then placed in an oven which melts the powder into a solid, continuous surface. The main drawback of the process is that while simple parts with large surfaces are easy to coat, it can become difficult to get powder to flow evenly into deep crevices, or inside a hollow part such as a tube.

Enter fluidized bed powder coating — a process in which air shoots through a vat of powder, making it move like a fluid. A heated part can be dipped inside the vat, instantly melting a thin layer of powder around the part. This much simpler method is great at getting inside all those pesky crevices that traditional coating can’t touch, and hacker [Amper] was able to build a custom fluidized bed coater in a Pringles can. This rendition, inspired by this video tour of Dan Gelbart’s workshop, uses a coffee filter to evenly distribute the air flow supplied by a small compressor — [Amper] quickly learned that just sticking a tube in a bucket of powder results in more of a volcano than a nice, fluid surface. A burner heated up some pieces of metal that were then dipped them in the can, resulting in complete coverage, even inside the tiny 5 mm diameter hole down the center of a piece of 80/20 extrusion. Once [Amper] got the basic idea working, the idea scaled up into a larger machine that you can check out in the video below.

Powder coating is usually one of those processes though of as only viable in professional shops, but [Amper] along with some other intrepid hackers have done a great job demonstrating that it can be possible for the rest of us too. We’ve even seen some others experiment with fluidized bed coating before — it’s always great to see a process such as this one gradually become more and more accessible.

Thanks to [mip] for the tip!

Continue reading “Fluidized Bed In A Pringles Can Paints Parts Inside And Out”

Magnesium: Where It Comes From And Why We’re Running Out

Okay, we’re not running out. We actually have tons of the stuff. But there is a global supply chain crisis. Most of the world’s magnesium is processed in China and several months ago, they just… stopped. In an effort to hit energy consumption quotas, the government of the city of Yulin (where most of the country’s magnesium production takes place) ordered 70% of the smelters to shut down entirely, and the remainder to slash their output by 50%. So, while magnesium remains one of the most abundant elements on the planet, we’re readily running out of processed metal that we can use in manufacturing.

Nikon camera body
The magnesium-alloy body of a Nikon d850. Courtesy of Nikon

But, how do we actually use magnesium in manufacturing anyway? Well, some things are just made from it. It can be mixed with other elements to be made into strong, lightweight alloys that are readily machined and cast. These alloys make up all manner of stuff from race car wheels to camera bodies (and the chassis of the laptop I’m typing this article on). These more direct uses aside, there’s another, larger draw for magnesium that isn’t immediately apparent: aluminum production.

But wait, aluminum, like magnesium is an element. So why would we need magnesium to make it? Rest assured, there’s no alchemy involved- just alloying. Much like magnesium, aluminum is rarely used in its raw form — it’s mixed with other elements to give it desirable properties such as high strength, ductility, toughness, etc. And, as you may have already guessed, most of these alloys require magnesium. Now we’re beginning to paint a larger, scarier picture (and we just missed Halloween!) — a disruption to the world’s aluminum supply.

Continue reading “Magnesium: Where It Comes From And Why We’re Running Out”

Oscilloscope Clocks: Now In Color!

Ordinarily, when we hear the words “clock” and “oscilloscope” in the same sentence we conjure images of measuring a stable, repeating square wave that acts as the heartbeat of a system. Of course, that’s not the only meaning– there’s a much more fun and less useful one: using an oscilloscope to display the time.

That’s what [Wolfgang Friedrich] set out to do when he cobbled some protoboard, probes, and an FPGA into the Multi Color Oscilloscope Clock. Each digit on the clock is treated like a seven-segment display, made up of three horizontal bars and four vertical bars. The horizontal bars are generated by constant voltage at different levels, and the vertical bars are generated by quickly switching between two voltages. [Wolfgang] decided to use an R-2R resistor ladder DAC to create the appropriate analog signals from the FPGA’s digital outputs. For bonus points, each set of digits (hours, minutes, and seconds) are output concurrently through separate channels, so they can be displayed in different colors on the screen of his four-channel scope (the fourth channel is used for the points between numbers).

Misusing oscilloscopes in the name of fun has become a time-honored tradition– from Tennis for Two back in 1958 (which later became the beloved Pong) to the plethora of analog o-scope clocks we’ve seen, it’s clear that hackers just can’t get enough of the unique vector display style that a scope can provide. We love [Wolfgang]’s idea of using the scope’s channels to create a multi-color display, and we’re left wondering what kind of wacky waveforms we’ll be seeing next.

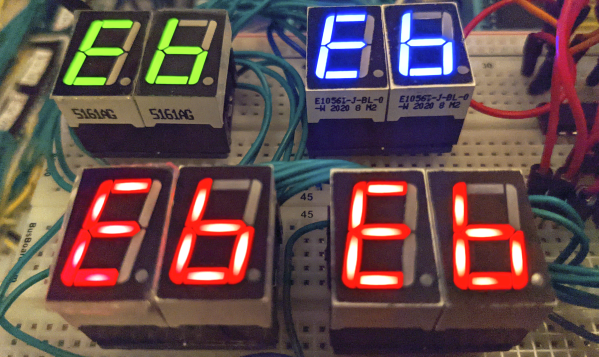
mechanical seven segment display

Mesmerizing Mechanical Seven-Segment Display

Seven-segment displays are ubiquitous. From where I’m writing this, I can see several without even having to swivel my chair. We’re all familiar with their classic visage; slightly italicized numbers that are brought to life by LEDs. There are a boatload of variants available– you can get displays with a decimal point, ones with multiple numbers, and even versions in just about any color you desire, but at the core they’re all basically the same thing- an array of LEDs sitting behind a faceplate. Except for those ones that have some gears inside.

Wait, what?

You read that right– a seven-segment display that contains gears, along with a handful of cams for good measure. Artist [Kango Suzuki] created this stunning all-mechanical seven-segment display that sequentially counts up from zero to nine when a thumbwheel is spun. All of the components are cut from wood and mesh together beautifully, complete with a satisfying click when the display rolls into a new digit, which you can hear in the video at the above link. You may recognize [Kango]’s style from this incredible mechanical clock he made a few years back. Unlike his earlier work, the seven-segment display is tiny, relatively speaking. Maybe we’ll see it integrated into a larger project some day, like a mechanical-digital clock.

We just love when somebody uses intricate mechanisms to artfully emulate some piece of existing tech. This isn’t even the first time we’ve seen a mechanical seven-segment display; [Peter Lehnér] built one back in 2019, and judging by [Kango]’s twitter feed, it appears to have inspired his design. There have even been a few other 3D printed ones over the years, but as far as we know this is the first wooden one– and, in true [Kango] fashion, its beautiful.

Thanks to [J. Peterson] for the tip!

Continue reading “Mesmerizing Mechanical Seven-Segment Display”

The Low-Down On Long-Wave: Unlicensed Experimental Radio

In the 125 years since Marconi made his first radio transmissions, the spectrum has been divvied up into ranges and bands, most of which are reserved for governments and large telecom companies. Amidst all of the corporate greed, the “little guys” managed to carve out their own small corner of the spectrum, with the help of organizations like the American Radio Relay League (ARRL). Since 1914, the ARRL has represented the interests of us amateur radio enthusiasts and helped to protect the bands set aside for amateur use. To actually take advantage of the wonderful opportunity to transmit on these bands, you need a license, issued by the FCC. The licenses really aren’t hard to get, and you should get one, but what if you don’t feel like taking a test? Or if you’re just too impatient?

Well, fear not because there’s some space on the radio spectrum for you, too.

Welcome to the wonderful world of (legal!) unlicensed radio experimentation, where anything goes. Okay, not anything  but the possibilities are wide open. There are a few experimental radio bands, known as LowFER, MedFER, and HiFER where anyone is welcome to play around. And of the three, LowFER seems the most promising. Continue reading “The Low-Down On Long-Wave: Unlicensed Experimental Radio”

Thor does battle with a man shooting lasers from his hands

Of Lasers And Lightning: Thwarting Thor With Technology

Most of us don’t spend that much time thinking about lightning. Every now and then we hear some miraculous news story about the man who just survived his fourth lightning strike, but aside from that lightning probably doesn’t play that large a role in your day-to-day life. Unless, that is, you work in aerospace, radio, or a surprisingly long list of other industries that have to deal with its devastating effects.

Humans have been trying to protect things from lightning since the mid-1700s, when Ben Franklin conducted his fabled kite experiment. He created the first lightning rod, an iron pole with a brass tip. He had speculated that the conductor would draw the charge out of thunderclouds, and he was correct. Since then, there haven’t exactly been leaps and bounds in the field of lightning rod design. They are still, essentially, a metal rods that attract lightning strikes and shunt the energy safely into the earth. Just as Ben Franklin first did in the 1700s, they are still installed on buildings today to protect from lightning and do a fine job of it. While this works great for most structures, like your house for example, there are certain situations where a tall metal pole just won’t cut it.

Continue reading “Of Lasers And Lightning: Thwarting Thor With Technology”