FOSDEM 2023: An Open-Source Conference, Literally

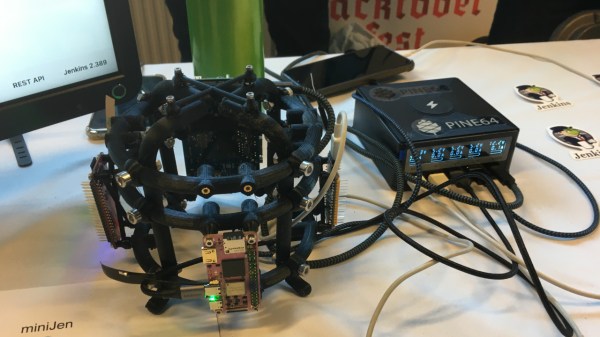
Every year, on the first weekend of February, a certain Brussels university campus livens up. There, you will find enthusiasts of open-source software and hardware alike, arriving from different corners of the world to meet up, talk, and listen. The reason they all meet there is the conference called FOSDEM, a long-standing open-source software conference which has been happening in Belgium since 2000. I’d like to tell you about FOSDEM because, when it comes to conferences, FOSDEM is one of a kind.

FOSDEM is organized in alignment with open-source principles, which is to say, it reminds me of an open-source project itself. The conference is volunteer-driven, with a core of staff responsible for crucial tasks – yet, everyone can and is encouraged to contribute. Just like a large open-source effort, it’s supported by university and company contributions, but there’s no admission fees for participants – for a conference, this means you don’t have to buy a ticket to attend. Last but definitely not least, what makes FOSDEM shine is the community that it creates.

FOSDEM’s focus is open software – yet, for hackers of the hardware world, you will find a strong hardware component to participate in, since a great number of FOSDEM visitors are either interested in hardware, or even develop hardware-related things day-to-day. It’s not just that our hardware can’t live without software, and vice-versa – here, you will meet plenty of pure software, a decent amount of pure hardware, and a lot of places where the two worlds are hard to distinguish. All in all, FOSDEM is no doubt part of hacker culture in Europe, and today, I will tell you about my experience of FOSDEM 2023. Continue reading “FOSDEM 2023: An Open-Source Conference, Literally”

A picture showing acupuncture needles wedged into the inside of the payment terminal

Aaron Christophel Brings DOOM To Payment Terminal

Payment terminals might feel intimidating — they’re generally manufactured with security in mind, with all manner of anti-tamper protections in place to prevent you from poking around in the hardware too much. But [Aaron Christophel] thinks that level of security isn’t aren’t always in practice however, and on his journey towards repurposing devices of all kinds, has stumbled upon just the terminal that will give up its secrets easily. The device in question is Sumup Solo terminal, a small handheld with a battery, LTE connection and a payment card slot – helping you accept card payments even if you’re on the go.

Now, this terminal has security features like the anti-tamper shield over the crucial parts of the device, leading to payment processing-related keys being erased when lifted. However, acupuncture needles, a tool firmly in [Aaron]’s arsenal, helped him reach two UART testpoints that were meant to be located under that shield, and they turned out to be all that a hacker needed to access the Linux system powering this terminal. Not just that, but the UART drops you right into the root shell, which [Aaron] dutifully explored — and after some cross–compilation and Linux tinkering, he got the terminal to, naturally, run Doom.

The video shows you even more, including the responsible disclosure process that he went through with Sumup, resulting in some patches and, we hope, even hardware improvements down the line. Now, the payment processing keys aren’t accessible from the Linux environment — however, [Aaron] notes that this doesn’t exclude attacks like changing the amount of money displayed while the customer is using such a terminal to pay.

If you’d like to take a closer look at some of the hardware tricks used in these secure devices, we did a teardown on one back in 2019 that should prove interesting.

Continue reading “Aaron Christophel Brings DOOM To Payment Terminal”

The completed oscilloscope in parts, with the screen in the front connected with prototyping wires, protoboarded buttons on the right, and the BlackPill board somewhere behind

DIY STM32 Scope Is Simple, Cheap, And Featureful

Would you like to have a small digital oscilloscope? Do you have a spare BlackPill (STM32F401) board and a TFT display laying around? [tvvlad1234] presents us with a simple and educational digital storage oscilloscope design that barely needs any components for you to build one, and it’s packed with features just like you would expect from a self-respecting open-source project. Not just that — it can even stream data to your computer, in a format compatible with the TekScope software!

The same scope design, but now on a self-etched boardIt’s hard to overshadow just how easy this scope is to build, use, and hack on. You really don’t need much in the way of parts, a protoboard will do, though you can also etch or order your own PCBs. The front-end is super straightforward to find components for and assemble, a few opamps and resistors is all you need. So after jumper-wiring the LCD and three push buttons to your BlackPill, you’re golden.

Of course, the simple frontend results in the input range being from -3.3 V to 3.3 V, but as you could guess, this is exactly the kind of project where you could tweak the resistors and even upgrade it later on. Are you a bit lost in how oscilloscopes work? [tvvlad1234] has an explainer for you, too!

This build could easily take up a honorary “temporary turned permanent” place on your bench, thanks to its McGyver-esque qualities. It’s also, quite possibly, a better scope than the red “soldering kit” ones we’ve seen online. All in all, it’s a strong contender in the “simple and powerful DIY scope” arena, before this, we’ve seen one built with an Arduino Nano, and one with a Pi Pico.

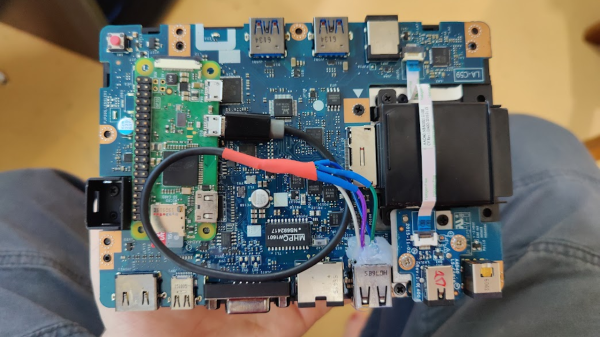
Laptop Motherboard? No, X86 Single-Board Computer!

Sometimes a Raspberry Pi will not cut it – especially nowadays, when the prices are high and the in-stock amounts are low. But if you look in your closet, you might find a decently-specced laptop with a broken screen or faulty hinges. Or perhaps someone you know is looking to get rid of a decent laptop with a shattered case. Electronics recycling or eBay, chances are you can score a laptop with at least some life left in it.

Let’s hack! I’d like to show you how a used laptop motherboard could be the heart of your project, and walk you through some specifics you will want to know.

And what a great deal it could be for your next project! Laptop motherboards can help bring a wide variety of your Linux- and Windows-powered projects to life, in a way that even NUCs and specialized SBCs often can’t do. They’re way cheaper, way more diverse, and basically omnipresent. The CPU can pack a punch, and as a rule PCIe, USB3, and SATA ports are easily accessible with no nonsense like USB-throttled Ethernet ports.

Continue reading “Laptop Motherboard? No, X86 Single-Board Computer!”

The sensor hub in all its glory, sensor itself on top, standing on 3D-printed feet, and the PCB on the bottom

Hacker-Friendly And Elegant Air Quality Sensor Hub

Ever wanted an indoor environment sensor that’s dead simple yet a complete package? That’s the anotter-sensor-hub project from [Jana Marie], designed for the Sensirion SEN05x series sensors, with a SEN055 sensor shown in the picture above. Given such a sensor, you can measure VOCs and NOCs (Volatile and Non-Volatile Organic Compounds), as well as PM1, PM2.5, PM4 and PM10 particulate matter indices, with temperature and humidity sensing thrown in for good measure. Fully open and coupled with 3D printable stand files, this alone makes for an air quality hub fit for a hacker’s desk. That’s not all, however — this board’s elegant extensibility is a good match for the sensor’s impressive capabilities!

The PCB itself might look simple, it’s simply an ESP32 and some supporting circuitry required. But you’ll notice there’s also a trove of connector footprints for different interfaces; whatever else you might want to add to your sensor hub, whether it connects through I2C, SPI or PWM, you can! As usual, the sensor itself is the most expensive part of such a project — the boards themselves are around $5 USD apiece fully assembled, but one sensor-included hub will set you back roughly $42 USD. That said, it’s a great value for the price, and the trove of sensing data you can get might just more than pay for itself in quality-of-life improvements you make. Of course, everything is open-source and comes as a complete packages for you to start using. The firmware, KiCad files, 3D holder and even Grafana dashboard files can be found on GitHub.

Such air quality sensor platforms have been getting more and more popular, and hackers have been paying attention. Having a full open-source package like this at our disposal is amazing. If you’re looking for a cheaper “baby’s first air quality sensor”, drop by your local IKEA — there’s a way less featureful but quite cheap sensor that you can equip with an ESP8266, perhaps, even on a custom PCB.

All About USB-C: Replying Low-Level PD

Last time, we configured the FUSB302 to receive USB PD messages, and successfully received a “capability advertisement” message from a USB-C PSU. Now we crack the PD specification open, parse the message, and then craft a reply that makes the PSU give us the highest voltage available.

How did the buffer contents look, again?

>>> b
b'\xe0\xa1a,\x91\x01\x08,\xd1\x02\x00\x13\xc1\x03\x00\xdc\xb0\x04\x00\xa5@\x06\x00<!\xdc\xc0H\xc6\xe7\xc6\x00\x00\x00\x00\x00\x00\x00\x00\x00\x00\x00\x00\x00\x00\x00\x00\x00\x00\x00\x00\x00\x00\x00\x00\x00\x00\x00\x00\x00\x00\x00\x00\x00\x00\x00\x00\x00\x00\x00\x00\x00\x00\x00\x00\x00\x00\x00\x00\x00'

The zeroes at the end might look non-significant, and they indeed are not with 99.99% certainty – that said, don’t just discard the entire tail end; one of the bytes in the beginning encodes the length of the message. We’ll read those bytes first, and then read only exactly as much as we need, making sure we aren’t reading two messages and interpreting it as one, and that we’re not discarding zeroes that are part of the message.

Today, we will write code that parses messages right after reading them from the FIFO buffer – however, keep this message handy for reference, still; and if you don’t have the hardware, you can use it to try your hand at decoding nevertheless. If you wanna jump in, you can find today’s full code here!

Continue reading “All About USB-C: Replying Low-Level PD”

All About USB-C: Talking Low-Level PD

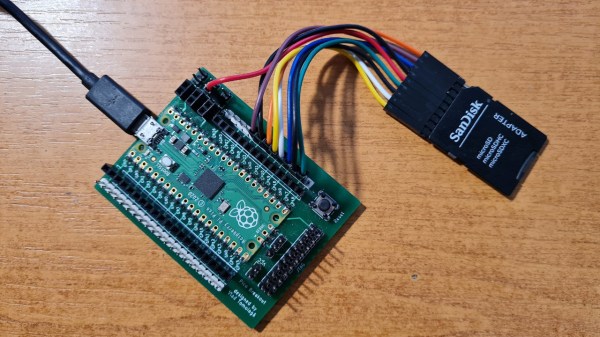
In this USB-C series, we’ve covered quite a bit of USB-C – things that are well known, things that should beĀ  better known, and a couple things that just appeared online for the first time. We’ve covered almost everything in some depth except USB Power Delivery. I’ve described the process a bit in the “Power” article, but that was mostly about how to use PD by simply buying the right solution. However, that’s not enough for a hacker. Let’s see if we can make our own PD trigger board. Continue reading “All About USB-C: Talking Low-Level PD”