Z80 Based Raspberry Pi Look-alike

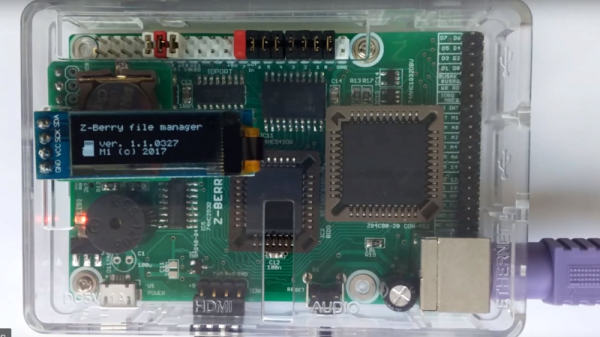
Homebrew computers are the ‘in thing’ these days and the Zilog Z80 is the most popular choice for making one on your own. We have seen some pretty awesome builds but [Martin K]’s Z-berry is the smallest on record yet. As the name suggests, the retrocomputer conforms to the Raspberry Pi form factor which includes the GPIO header.

The Z-berry is designed with a Z80 CPU running at 10 MHz (20 MHz possible) and comes with 32 kB ROM
and 512 kB RAM. In addition to the serial interface, the computer boasts an I2C bus, an SPI bus, and a PS/2 keyboard connector to boot. [Martin K] has a video where the finished system is enclosed in a Raspberry Pi case and has an I2C OLED display attached and working.

[Martin K] has posted a lot of details on how to make your own Z-berry which includes the BOM, schematic and preliminary information. We reached out to him to find out more about the software which is stable and available on request along with PCBs and sample code. Additionally, this project promises to draw much less current than the Raspberry Pi and should prove useful for anyone looking to create a retro solution to a modern problem.

It is interesting to see projects that combine modern techniques with retro technologies. One of the best Z80 projects we have seen is the FAP80 and there are some awesome homebrew computer projects on Hackaday.io for you to take a look and get inspiration.
Continue reading “Z80 Based Raspberry Pi Look-alike”

USB Charger Fooled Into Variable Voltage Source

USB chargers are everywhere and it is the responsibility of every hacker to use this commonly available device to its peak potential. [Septillion] and [Hugatry] have come up with a hack to manipulate a USB charger into becoming a variable voltage source. Their project QC2Control works with chargers that employ Quick Charge 2.0 technology which includes wall warts as well as power banks.

Qualcomm’s Quick Charge is designed to deliver up to 24 watts over a micro USB connector so as to reduce the charging time of compatible devices. It requires both the charger as well as the end device to have compatible power management chips so that they may negotiate voltage limiting cycles.

In their project, [Septillion] and [Hugatry] use a 3.3 V Arduino Pro Mini to talk to the charger in question through a small circuit consisting of a few resistors and diodes. The QC2.0 device outputs voltages of 5 V, 9 V and 12 V when it sees predefined voltage levels transmitted over the D+ and D- lines, set by Arduino and voltage dividers. The code provides function calls to simplify the control of the power supply. The video below shows the hack in action.

Quick Charge has been around for a while and you can dig into the details of the inner workings as well as the design of a compatible power supply from reference designs for the TPS61088 (PDF). The patent (PDF) for the Quick Charge technology has a lot more detail for the curious.

Similar techniques have been used in the past and will prove useful for someone looking for a configurable power supply on the move. This is one for the MacGyver fans.

Continue reading “USB Charger Fooled Into Variable Voltage Source”

How To Build Your Own Google AIY Without The Kit

Google’s voice assistant has been around for a while now and when Amazon released its Alexa API and ported the PaaS Cloud code to the Raspberry Pi 2 it was just a matter of time before everyone else jumped on the fast train to maker kingdom. Google just did it in style.

Few know that the Google Assistant API for the Raspberry Pi 3 has been out there for some time now but when they decided to give away a free kit with the May 2017 issues of MagPi magazine, they made an impression on everyone. Unfortunately the world has more makers and hackers and the number of copies of the magazine are limited.

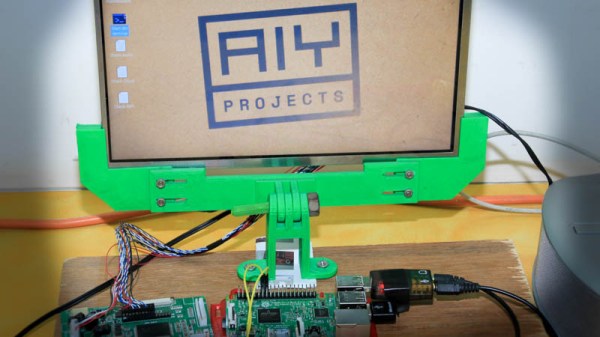
In this writeup, I layout the DIY version of the AIY kit for everyone else who wants to talk to a cardboard box. I take a closer look at the free kit, take it apart, put it together and replace it with DIY magic. To make things more convenient, I also designed an enclosure that you can 3D print to complete the kit. Lets get started.

Continue reading “How To Build Your Own Google AIY Without The Kit”

Doomed Thermostat

It is amazing how the game Doom has been ported to so many things. Enter one more port, where the hardware in question is a Honeywell Prestige thermostat.

In his video, [cz7asm] shows us the game running quite nicely on the 480 x 272 LCD with an NES controller plugged into the USB port originally intended for software updates. The thermostat runs on a STM32F429 which is an ARM9 processor that has the juice to pull it off. The Doom engine being used is based on Chocolate Doom, an open source port of the game, and the binaries can be downloaded for Windows and Mac. The source code is also available as a download for your tinkering pleasure. This project by [cz7asm]  is extended from a code on GitHub by [floppes] that was meant for the STM32F429IDISCOVERY evaluation board.

The author shares his code for the STM32F4 on Dropbox as a zip and in order to compile it, the Atmel BSP for GNU GCC is used. The video below demonstrates the hack in action and, though there is no sound yet, the satisfaction that comes from such modifications is its own reward.

What else can you run Doom on? How about a calculator or maybe the Intel Edison or even an ATM machine! If there is a processor with enough muscle power, hackers will find a way to run Doom on it. So have you seen any alien computers lately that you think can be hacked? Continue reading “Doomed Thermostat”

Multipurpose ESP8266 Keychain

One of the best feature of the ESP8266 is its ability to self-host a web server, allowing for fairly complicated user interactions. The dEEbugger by [S-March] is a nifty little ESP8266 based device with a plethora of features in a small package.

The USB-powered device has a web user interface that enables it to be used as a low-bandwidth oscilloscope, I2C terminal, or UART terminal. As a scope, you may connect to it via your tablet and then use it as a remote voltage monitor. There is a peak detection feature which is a nice touch and gives the entire project a premium feel.

The serial terminal on an ESP8266 is not something new yet it is helpful in disconnecting the console window from the bench. The I2C terminal is where the device really shines as it can scan for connected devices on the connected bus. This Bus-Pirate like feature is useful for beginners as the software can scan the registers addresses of the devices as well.

[S-March] has made the schematic in PDF format as well as the entire code for the project available on GitHub so go right ahead and make it your own. We have had an ESP8266 based VT Terminal device in the past and merging the two would make for an excellent maker tool.

Thanks for the tip [René Arts]

Pedometer For Calorie Conscious Hamster Owners

The Arduino has inspired many a creative projects that can be beneficial to humanity. The Arduino Hamster Wheel Pedometer by [John Mueller] on the other hand is a creation that is meant for the cute furry rodent pets. When [John Mueller]’s daughter wanted to keep track of her hamster’s night-time strolls, her maker-dad saw it as an opportunity to get her involved in technology. The project consists of a hamster-wheel with a magnet that triggers a reed switch on completing a revolution. The entire assembly is custom-made and [John Mueller] does an excellent job documenting the build with a lot of clear images.

The wheel is affixed to a shaft with a ball bearing at one end and the entire thing is mounted on the side of the cage so that it can be removed with ease for maintenance. The reed switch is embedded in the wooden mounting block such that the connecting cables pass from inside the assembly. This prevents the hamster from coming in contact with the cabling or damaging it in any way. An LCD and the Arduino Uno are placed outside the cage and are used to display the revolutions of the wheel as well as the equivalent miles travelled.

The code for the Arduino is also supplied for anyone who wants to replicate the project and the video below shows the working of the project. The project could also be extended to count calories burned as well as running speed. This project is a prime example of how technology can be used to assist and is similar to the IoT Hamster Wheels that tweets every movement of the Hamster Life.

Continue reading “Pedometer For Calorie Conscious Hamster Owners”

Wireless Terminal Over ESP8266

From debug messages to the fundamental ‘hello world’, serial communication does it all over three little wires. Now imagine being able to cut the cord to your next microcontroller project and use your phone as a VT100 terminal. This was the premise of [Ondřej Hruška]’s Wireless Terminal Project where he took an ESP8266  and added an in-browser terminal emulator which can be accessed over WiFi. The final hardware uses an ESP-01 module mounted atop a breadboard adapter with a 3.3V LDO, protection circuitry for the pins and under-voltage disable.

The firmware is based on [SpriteTM]’s libesphttpd code which was modified to include the VT100 escape sequence parser. The parser, in turn, was coded as a state machine and compiled using Ragel which simplifies such projects greatly. When you access the tiny web server, the loaded webpage starts to communicate over web sockets to the ESP-01. Key-presses from the terminal are sent to the buffer and onto the parser and control logic. The characters are then passed to the hardware UART lines at 115200bps and if an escape sequence is detected, the corresponding action is executed instead.

[Ondřej Hruška] shares the code as well as a user manual in PDF for anyone who would like to try it out and help improve the project. With a little inspiration on learning about state machines, you could extend the project to your own use case as well.

Thanks for the tip [Marco Saarloos]