Etching Your Own Boards Really, Really Fast

Sometimes the planets align and the Hackaday tip line gets two posts that are begging to be used together. Here’s two hacks to etch your own boards at home in just a few minutes.

Toner transfer PCBs on the quick

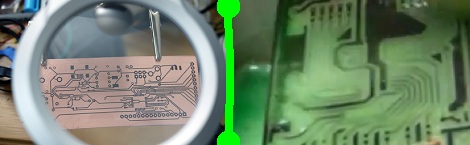
One way of putting an etch mask on a PCB is with the toner transfer method: print your circuit on a piece of inkjet photo paper using a laser printer, lay that circuit face down on a sheet of copper, and go at it with a clothes iron. This takes a heck of a lot of time and effort, but [Dustin] found another way. He used parchment paper instead of inkjet photo paper. Once the paper was on the board, he rolled it through a laminator. The results are awesome. It’s a very fast process as well – you don’t need to soak your board in water to get the photo paper off.

Etching that’s like wiping the copper away

[Royce] wrote in from the Milwaukee Makerspace to tell us about [Tom]’s etching process that is like wiping the copper off the board.  He used Muratic (Hydrochloric) acid and Hydrogen Peroxide with a sponge to wipe that copper away. The trick in this, we think, comes from the 30% H202 [Tom] picked up at a chemical supply company, but we’re pretty sure similar strengths can be purchased from beauty supply stores. Check out the video after the break to see [Tom] etch a 1 oz. board in just a few seconds.

Continue reading “Etching Your Own Boards Really, Really Fast”

Bitbanging Super Smash Bros.

[Kyle] and an a few of his classmates are wrapping up a microcontroller interfacing class at Purdue and thought it best to send in the results of their efforts. It’s a version of Super Smash Bros. made by just bitbanging pins on a microcontroller.

The hardware for the project is based around a Freescale 9S12c32, an updated version of the 30-year-old M68HC11 microcontroller. For the controls, the guys used a Playstation 2 joystick and buttons housed in an Altoids box, and the actual console is made out of strips of wood stapled together to look like a crate from Super Smash Bros.

There are nine playable characters:  Pikachu, Captain Falcon, Yoshi, Donkey Kong, Mario, Luigi, Link, Kirby, and Fox. Despite these characters being only four pixels high, the game looks extremely playable (at least when two players don’t choose the same character). After the break is the video demo of Super Smash Bros: Bitbang edition, along with a gallery of pics showing the console and gameplay. All the code is up on GitHub for your perusal.

Continue reading “Bitbanging Super Smash Bros.”

A Novel Binary Clock From Hackaday’s Own

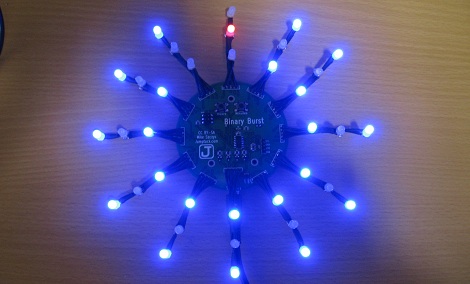
Hackaday’s very own [Mike Szczys] just shared an awesome binary clock he’s been working on. Unlike a normal binary clock that is only readable by self-admitted geeks and nerds, [Mike]’s clock is nearly comprehensible by the general population.

There are 12 lines of three LEDs around the face of [Mike]’s clock. These LEDs represent the time in minutes in binary – the inner LED is 1, the middle LED is 2, and the outer LED is 4. Adding up each of the LEDs around the clock face gives the number of minutes passed since the top of the hour.

To display the hour, [Mike] used a red/blue bi-color LED in the center of each line of LEDs. For example, at 1:03 the one ‘o clock hand will have a blue LED in the first position and a purple LED in the second position. A minute later at 1:04, this changes to blue, red, blue.

If that is a little confusing, there’s a wonderful video demonstrating the pattern of LEDs throughout the hour.

For such an interesting clock, the build is fairly simple – just an ATtiny44 with an STP16CP05 LED driver. Time is kept with a battery-backed MCP7940 real-time clock, and power is provided by a simple USB port.

[Mike] had enough boards manufactured for several dozen clocks, but only had enough parts (and patience) to solder up four clocks. You can check out the time-lapse of him going to town with a soldering iron on one of these boards after the break. As with all good builds, the code and schematics are provided on GitHub if you’d like to make your own.

Continue reading “A Novel Binary Clock From Hackaday’s Own”

Hackaday Links: April 29, 2012

More old computers on FPGAs!

[Andy] loves his Memotech MTX computer. It’s an oldie with a Z80 running at 4MHz; the perfect target for an FPGA port. The ReMemotech has everything the old one has – cassette interface and all – and can run up to six times faster than the original.

Also found in 10-forward

If you’re going to build a jukebox, why not go all out? Here’s a touch screen jukeboxwith an LCARS skin. Yep, the same interface found on Star Trek: The Next Generation.

New desktop wallpaper for you

[McMonster] found a great pair of blog posts (1, 2) showing what ancient ICs look like without their casing. Since these were CERDIP packages (two ceramic plates glued together) they were exceptionally easy to take apart leaving the entire chip intact. Pages are in Polish, but there’s a Google Translate button on the sidebar

Cheap and easy Arduino wi-fi

Quick quiz: what’s the easiest way to get data onto an Arduino wirelessly? XBees? GSM modules? Nope, just get a wireless router and an Ethernet shield. The Ethernet module only cost [Doss] $20, and we’re sure Hackaday readers have a spare wireless router around somewhere.

Chiptunes! Chiptunes I say!

[mdmoose29] has been working on making a custom SNES cartridge for a dubstep artist (tell us more, [moose]…). In his search for programming tools, he found theSNES Game Maker. We tried it out for a bit and it’s still a very unrefined beta. Still, making SNES programming easier is awesome.

You people are awesome. Here’s six things for a links post.

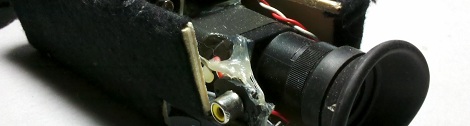
[Valentin] made a night vision monocular from an old VHS camcorder, a small spy camera, and a handful of infrared LEDs. Here’s a video of [Valentin]‘s build in action.

Home Brew Motorized Bicycle Is A Super Grocery Getter

[Thor] sent in an awesome motorized bike build he found coming from the fruitful workshop of [Jim Gallant]. It’s an incredible piece of work built nearly entirely from scratch.

[Jim] welded the frame together on a home-built jig that keeps all the chrome-moly tubes in alignment before they’re pieced together. With the jig, the frame was kept extremely straight making a bike that turns very well and can be ridden no-handed.

All of [Jim]’s previous motorized bikes used small Honda engines, but after hearing Robin Subaru engines are more reliable he decided to give one a go. The motor is attached to the derailleur gears with a continuously variable transmission usually found in scooters. [Jim]’s earlier motorized bikes didn’t have indexed shifting and disc brakes like modern motorized bikes, but he decided to throw them in anyway. Everyone who rides his new super grocery getter comments on how smooth the ride is with these additions.

While [Jim] doesn’t have an official speed or MPG rating, he’s guessing this bike can carry three bags of groceries at 30 mph at 170 miles per gallon. A very efficient mode of transportation that is much safer than the other motorized bikes we’ve seen before.

Printing Custom Whistles For Everyone At Your RepRap Conference

When [Josef Prusa] speaks at a conference extolling the virtues of 3D printing, he likes to give out printed objects to show off the possibilities home-brew fabrication. A favorite of [Prusa] are whistles – they’re functional and show off exactly what a 3D printer can do. Printing out hundreds of whistles is a job for a factory and not a printer, so [Prusa] decided to customize each whistle with the initials of a conference attendee.

When [Prusa] was asked to attend the INFOTRENDY conference in Bratislava, he had a small audience (only 150 people) and a list of all the attendees a week before hand. It was the perfect scenario to whip up a Python script to generate the models for a whistle with the initials of each attendee emblazoned on the side.

The WhistleGen code is up on [Prusa]’s GitHub ready to print out custom whistles for your next conference. While the capabilities of WhistleGen are limited to just two letters of text, we’re sure someone will figure out a way to automate the generation custom conference badges very shortly.

See the example he sent us after the break.

Continue reading “Printing Custom Whistles For Everyone At Your RepRap Conference”

Build A Stereo Microscope From Binoculars And A Camera Lens

Here’s an oldie but a goodie. [RunnerPack] stumbled upon an article from 2001 about building a stereo microscope from a pair of binoculars and a camera lens. With a ring light attached to the end of the camera lens, we couldn’t think of a better microscope for SMD work.

To mount the binoculars to the camera lens, [Giorgio Carboni] made a very nice adapter containing four prisms. These prisms are very carefully aligned and glued down with a little bit of epoxy. By using an 8×30 pair of binoculars and a 35-100 mm camera lens, [Giorgio] was able to get a magnification factor of 10-57x. With a macro lens this factor can be increased (a 28mm lens bumps it up to 71x, but a lot more light is needed).

The pedestal is just a few ground rods and ground steel rods, something that requires a bit of machining. Since 2001, though, a lot of tinkerers have 3D printers so it could be possible to build a more easily manufactured version of the focusing apparatus.

[RunnerPack] had a pair of binoculars and a camera lens handy and tried a mono version of this build. He says he was blown away, but unfortunately didn’t provide any pictures. If you decide to build this project, be sure to snap a few pics and send it in on the tip line.