Here’s Pi In Your Eye – HUD Goggles

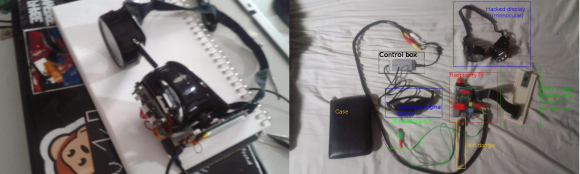
[John Ohno] has found what is perhaps the best possible use for steampunk goggles: framing a monocular display for a Raspberry Pi-based wearable computer. [John]’s eventual goal for the computer is a zzstructure-based personal organizer and general notifier. We covered [John]’s zzstructure emulator to our great delight in July 2011. Go ahead and check that out, because it’s awesome. We’ll wait here.

[John] has been interested in wearable computing for some time, but is unimpressed with Google Glass. He had read up on turning head-mounted displays into monocular devices and recognized a great opportunity when his friend gave him most of an Adafruit display. With some steampunk goggles he’d bought at an anime convention, he started on the path to becoming a Gargoyle. He encountered a few problems along the way, namely SD card fail, display output issues, and general keep-the-parts-together stuff, but came out smelling like a rose. [John] has ideas for future input additions such as simple infrared eye tracking, the addition of a chording keyboard, and implementing a motorized glove for haptic learning. 

Want to make your own wearable display but have an aversion to steampunk? Check out this homebrew solution with (mostly) 3-D printed frames. And it has servos!

[Thanks John]

Retrotechtacular: The Genesis Of The Transistor

Few births are easy. Even fewer result in a Nobel Prize, and hardly any at all are the work of three men. This 1965 film from the AT&T archives is a retrospection on the birth of the transistor nine years after its creators, [Walter Brattain], [John Bardeen], and [William Shockley] received a Nobel Prize in Physics for their discovery and implementation of the transistor effect.

The transistor is the result of the study of semiconductors such as germanium. Prior to the research that led directly to the transistor, it was known that the conductivity of semiconductors increases when their temperature is raised. The converse is true for metals such as tungsten. Semiconductor conductivity also increases when they are exposed to light. Another key to their discovery is that when a metal such as copper is in contact with a semiconductor, conductivity is less in one direction than the other. This particular property was exploited in early radio technology as seen in crystal radios, for copper oxide rectifiers used in telephony, and for microwave radar in WWII.

After WWII, AT&T’s Bell Labs put a lot of time and research into the study of semiconductors, as their properties weren’t fully understood. Researchers focused on the simplest semiconductors, silicon and germanium, and did so in two areas: bulk properties and surface properties. During this time, [Shockley] proposed the field effect, supposing that the electrons near the surface of a semiconductor could be controlled under the influence of an external electric field.

Continue reading “Retrotechtacular: The Genesis Of The Transistor”

Automated Decanting Machine Pairs Wine With Pi

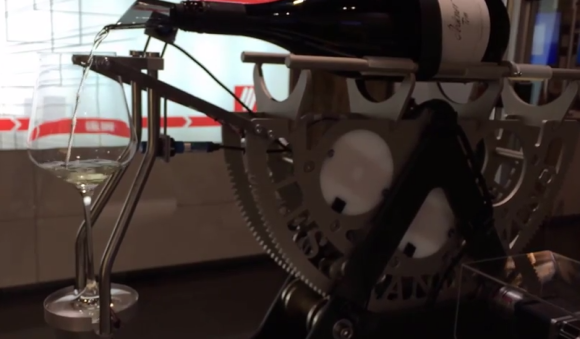
[Logi.cals], a German software company focused on process, automation, and facilities planning has devised an automated wine decanting machine to demonstrate its logi.CAD 3 PLC programming tool. Sommeliers use these simple machines to handle heavy, expensive bottles of wine. [Logi.cals] added sensors and a stepper motor to a very nice looking specimen and automated the decanting process with a Raspberry Pi.

The outstanding feature of this design is the built-in redundancy. A pair of micro switches detect the presence of both a bottle and a glass. Failing these, a load cell is there to weigh the bottle, reporting naturally whether one is present. The load cell also plays a part in monitoring the liquid level in the bottle, as do capacitive sensors that register the wine flow. The design also includes strain gauges that measure the weight in the glass as well as the liquid level. To bring it full circle, they also verify that a glass is present.

[Logi.cals] used two expansion boards, the Quick2Wire interface with an I²C analogue board and the PiFace. The I²C analogue board takes information from the strain gauges over its ADC, and the Quick2Wire communicates with the load cell’s measurement amplifier over the serial connection. The PiFace handles the remaining sensors and the stepper motor, and provides high voltage protection for the Pi.

If you’re fresh out of heavy, expensive bottles of wine but have some cheap ones lying around, you could use a Pi to make them dance.

Continue reading “Automated Decanting Machine Pairs Wine With Pi”

I Am The Midnight Message Board What Messages At Midnight

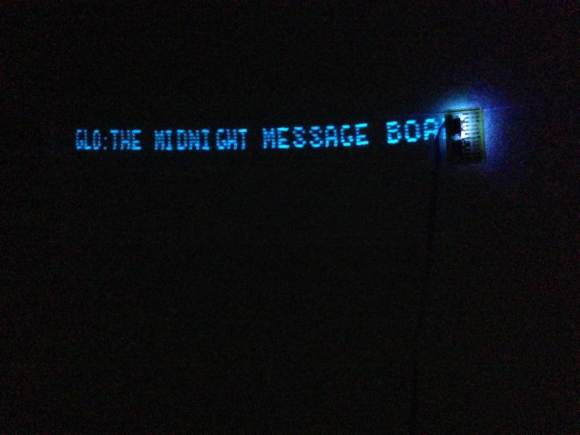
Photoluminescent stars on your bedroom wall or ceiling are pretty cool, though the stationary shapes can become boring. [Adi] felt this way, too. While doodling with a bright white light on some glow in the dark vinyl, it occurred to him that this could make for an interesting display. He set about making GLO, the midnight message board and RSS display.

[Adi]’s light writer uses 12 UV LEDs on a linear axis powered by a stepper motor to write RSS headlines, Twitter trends, or custom text on his wall. He finds the slow fade of the text very soothing to fall asleep by, and it’s easy to see why. The LED array imprints a section of a character consisting of a 6×5 bit pattern. The 12 LEDs are split into two groups, so it can write two lines at 45-50 characters each. [Adi] designed his own pixel font for this project, and advises that only upper case letter forms be used.

[Adi]’s write-up is quite admirable and comprehensive. In the circuit build section, he advises that the LEDs must be very close to the vinyl for optimum results, but that they should protrude farther than the shift registers so the chips don’t rub the vinyl. Of course you could opt for more intense light sources, like laser. See it in action after the break.

Continue reading “I Am The Midnight Message Board What Messages At Midnight”

Self-Balancing Robots Wobble, But They Don’t Fall Down

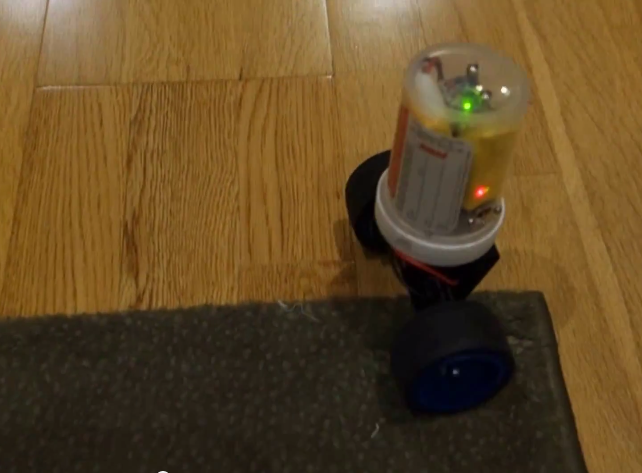
[Trandi] can check ‘build a self-balancing robot’ off of his to-do list. Over a couple of weekends, he built said robot, and, in his own words, managed not to over-design it. It even kept the attention of his 2-year-old son for several minutes, and that’s always a plus.

He was originally going to re-purpose one of his son’s RC cars, but didn’t want to risk breaking it. Instead, he designed a triangular 3-D printed chassis to hold a motor and some cogs to fit both the motor shaft and some re-used Meccano wheels. [Trandi]’s design employs an MPU 6050 6-DOF IMU for the balancing act and is built on an Arduino Nano clone.

[Trandi] is controlling the motor with an L293D, which has built-in flyback diodes to minimize spikes. He found that the Nano clone was not powerful enough to handle everything, so he added an L7805CV voltage regulator. After the break, watch [Trandi]’s cute bot tool around on various types of terrain, with and without a payload.

Don’t have an IMU lying around? You don’t really need one to build a self-balancing bot, as this IR-based lilliputian bot will demonstrate.

Continue reading “Self-Balancing Robots Wobble, But They Don’t Fall Down”

Ride, Captain, Ride Aboard Your Arduino-Controlled Autopiloted Sailboat

[Jack], a mechanical engineer, loom builder, and avid sailor wanted an autopilot system for his 1983 Robert Perry Nordic 40 sailboat with more modern capabilities than the one it came with. He knew a PC-based solution would work, but it was a bit out of reach. Once his son showed him an Arduino, though, he was on his way. He sallied forth and built this Arduino-based autopilot system for his sloop, the Wile E. Coyote.

He’s using two Arduino Megas. One is solely for the GPS, and the other controls everything else. [Jack]’s autopilot has three modes. In the one he calls knob steering, a potentiometer drives the existing hydraulic pump, which he controls with a Polulu Qik serial DC motor controller. In compass steering mode, a Pololu IMU locks in the heading to steer (HTS).  GPS mode uses a predetermined waypoint, and sets the course to steer (CTS) to the same bearing as the waypoint.

[Jack]’s system also uses cross track error (XTE) correction to calculate a new HTS when necessary. He has fantastic documentation and several Fritzing and Arduino files available on Dropbox.

Autopilot sailboat rigs must be all the rage right now. We just saw a different one back in November.

Continue reading “Ride, Captain, Ride Aboard Your Arduino-Controlled Autopiloted Sailboat”

Green Light LEGO, Red Light Stop

Master LEGO craftsman [Baron von Brunk] had the same childhood passions as a lot of us—LEGO (obviously), Transformers, and Nintendo. But he also harbored a passion for traffic lights and road signs. His latest offering, a fully functional LEGO traffic light, is some pretty fantastic plastic. You might recall that we featured [Baron von Brunk]’s LEGO mosaic lamps a few weeks ago. This project is that one on steroids.

The body is made of 1700+ LEGO and Technic pieces. [Baron von Brunk] was kind enough to provide his LDD file, though he says it should be considered a rough guide to construction. The red, yellow, and green 1×1 areas are each lit with a 48-SMD LED floodlight bulb. Colored lights are available, but he used the solid white variety for greater luminescence. The lights are driven by a traffic light controller typically used for model railroads.

[Baron von Brunk] ended up lining the inside with black 1x1s and metallic reflective duct tape to keep the light from leaking out of the masonry. He used some Technic bricks on the rear door to form hinges, and Technic pins to hold the LED lamps.