What’s life without a little mystery? There’s one less rolling around after historians finally identified a donated mystery machine that had been in storage for years.
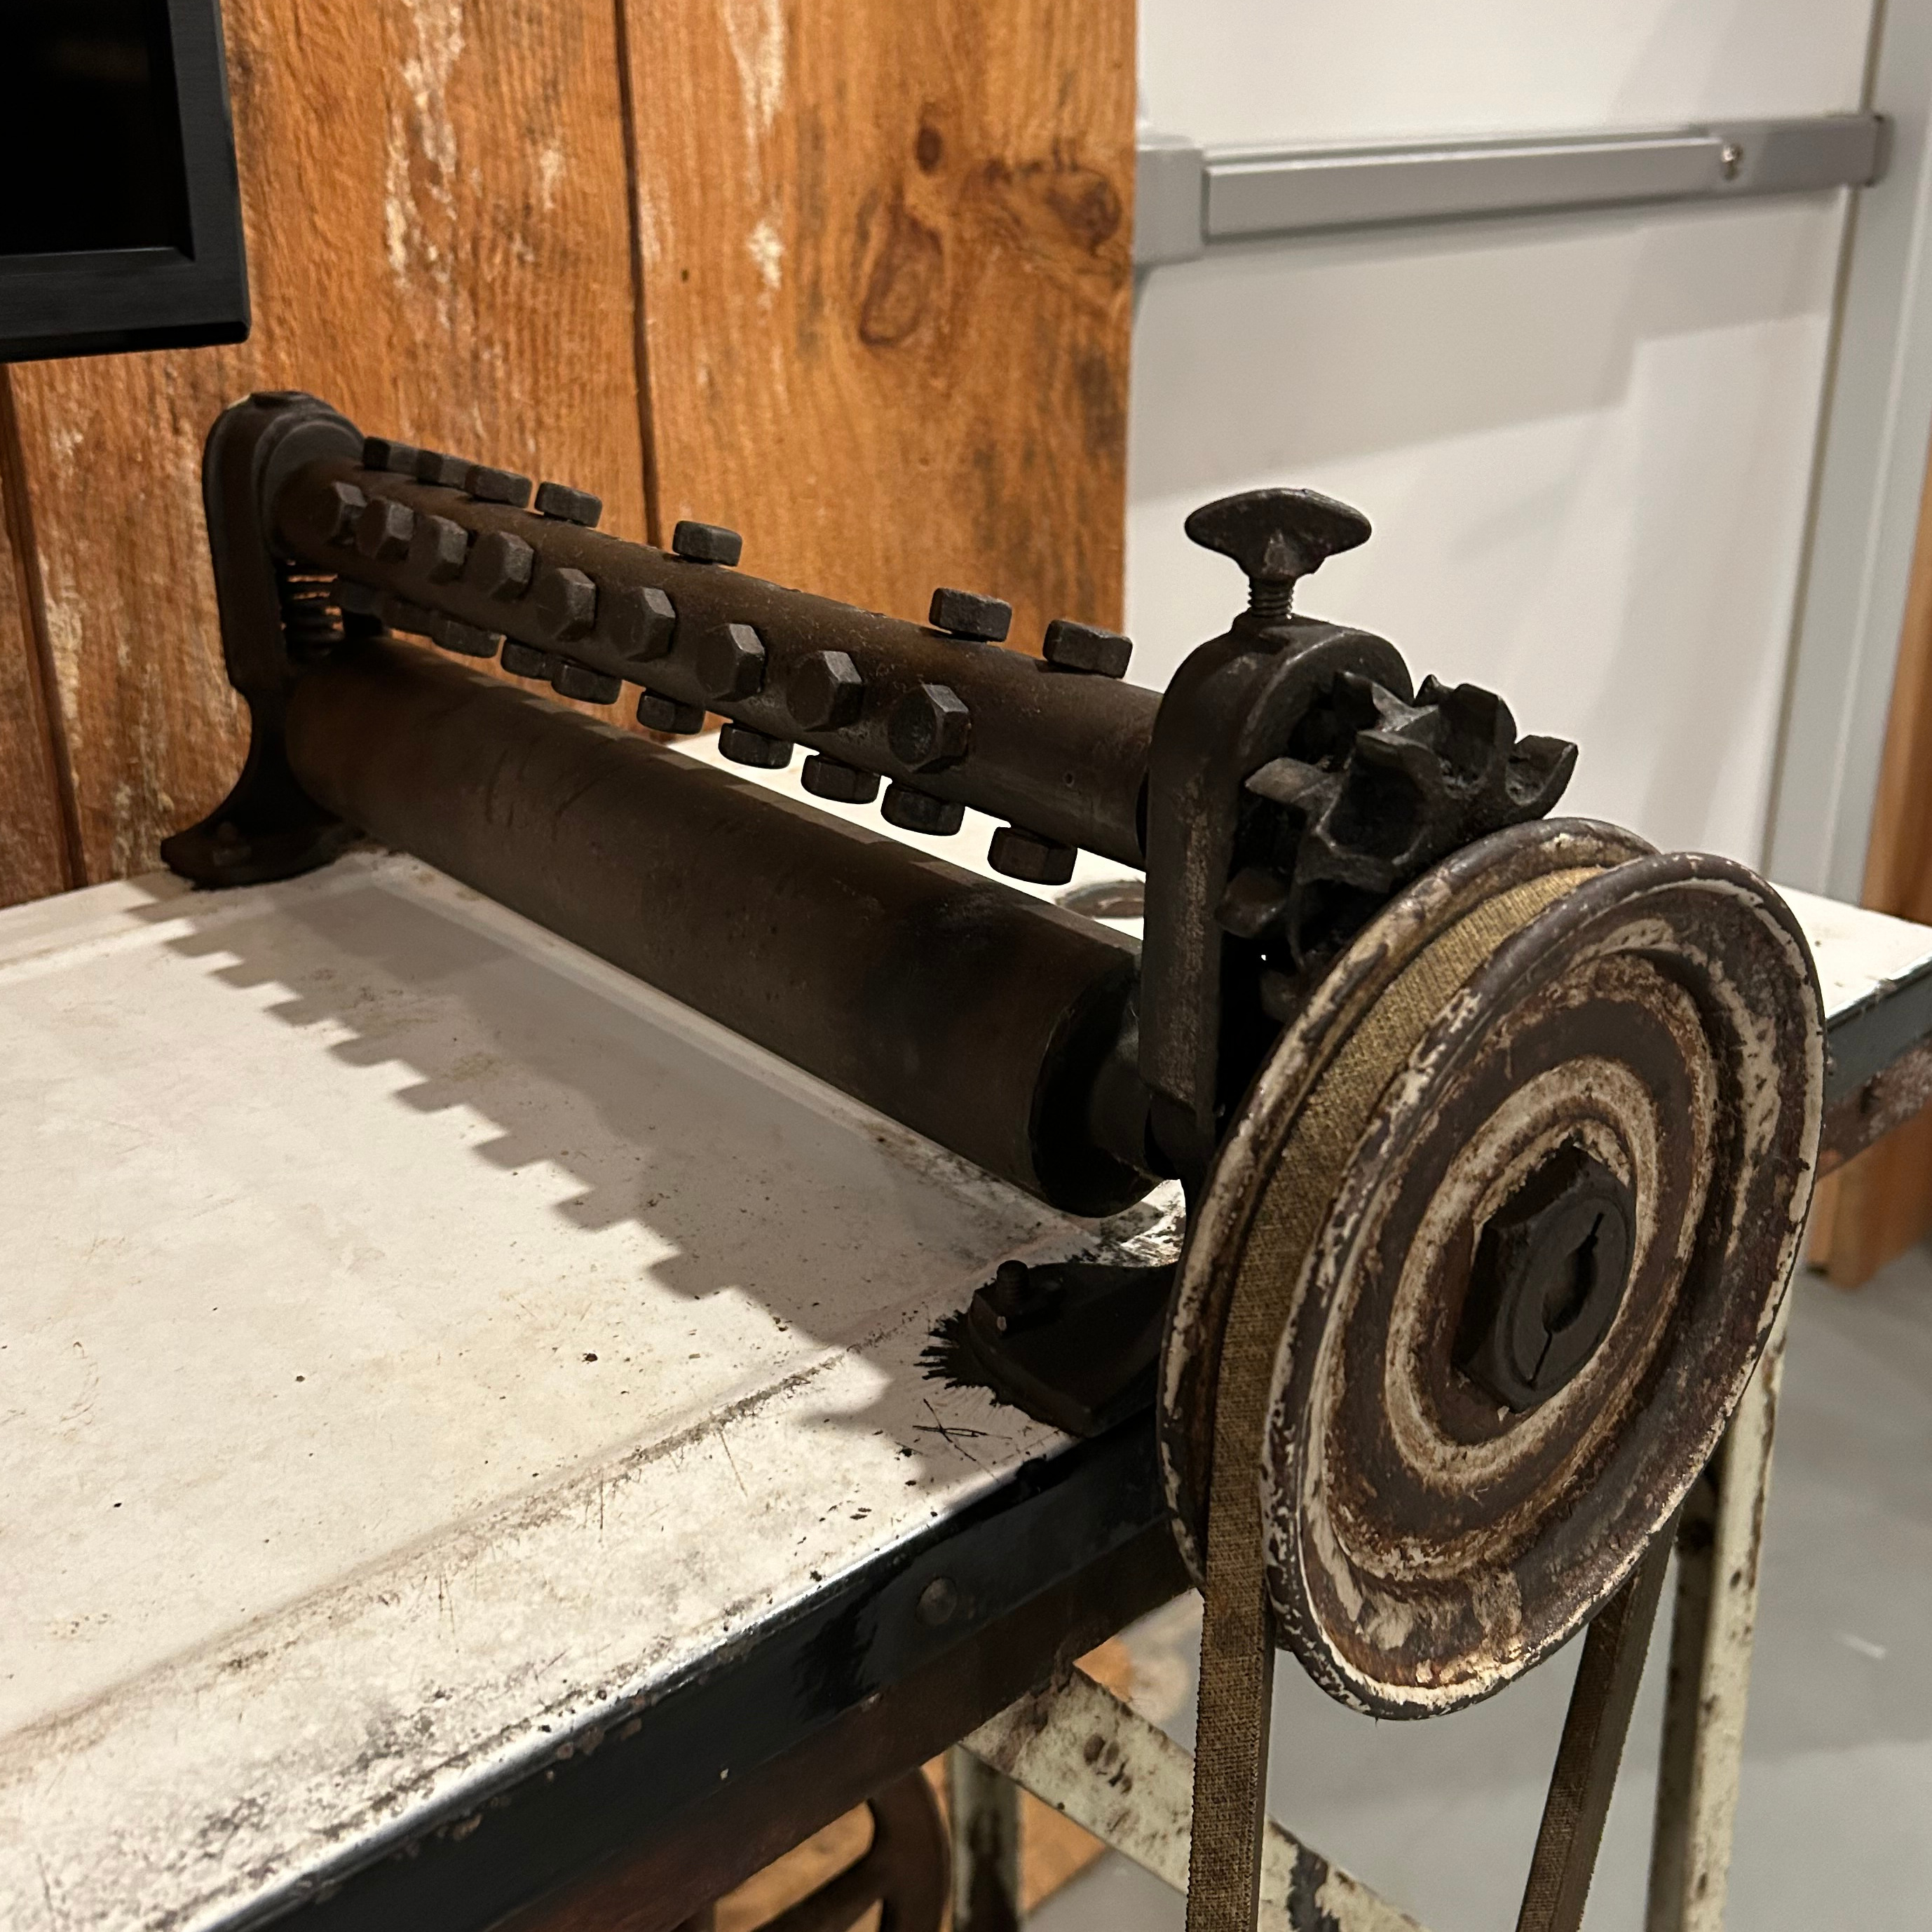
The main pieces of the machine are about a century old and any staff who may have known more about the undocumented device were no longer around to ask. The historical society finally posted pictures and asked for any insights, which eventually led to solving the mystery.
The machine is in all likelihood a beaten biscuit maker, which was a type of dense baked good popular in the American south. Making them called for a long and labor-intensive process of pounding and working the dough, and the society says this machine was likely created by a fellow trying to help his aunt streamline her business, offloading the labor of working the dough to a machine.
The machine had no branding of any sort and lacked any identifying marks. Its purpose was doubtlessly obvious at the time, but no records remained and quite possibly none existed in the first place. Sound familiar? Perhaps someday our own undocumented projects and prototypes will mystify people. It’s certainly happened in the case of mysterious Roman dodecahedrons, which remain a head-scratching mystery.