No, that watch isn’t broken. In fact, it’s better.
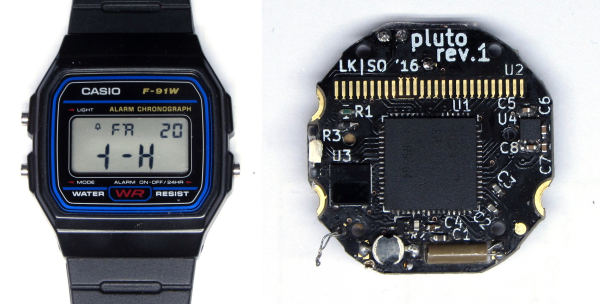
[Lukas] got so used to his binary-readout ez430 Chronos watch that when the strap disintegrated he had to build his own to replace it. But most DIY wristwatches are so clunky. [Lukas] wanted something refined, something small, and something timeless. So he shoe-horned some modern components, including an MSP430, into a Casio F-91W watch.
The result is a watch that tells time in binary, has a built-in compass, and with some more work will be updatable through an IR receiver that he also managed to fit in there somehow. Now he has the watch that Casio would make today, if fashion had stayed stuck firmly in the early 1990s. (Or not. Apparently, Casio still makes and sells the F-91W. Who knew?)
Anyway, back to an epic and pointless hack. Have a look at the tiny, tiny board that [Lukas] made. Marvel in the fact that he drove the original LCD screen. Dig the custom Kicad parts that match the watch’s originals. To get an accurate fit for the case, [Lukas] desoldered the piezo buzzer contact and put the board onto a scanner, which is a great trick when you need to get accurate dimensions. It’s all there, and well-documented, in his GitHub, linked above.
All in all, it’s an insane hack, but we love the aesthetics of the result. And besides, sometimes the hacking is its own reward.