Bone Conducting Headphones Built Into Eye Glasses

There are times when being seen to listen to music through headphones might get you into trouble. For these moments, reach for a handy solution: bone conduction speakers that discreetly pipe the music to your eardrums through the bone of your skull. [Samuel] wanted just such a covert music listening device, so created his own in a set of 3D-printed glasses.

He first tried using an Adafruit bone-conducting transducer but found that to be too bulky. What you see here is a smaller module that [Samuel] found on AliExpress (search for bone conduction module). The GD-02 is much smaller and thus more suitable for hiding in the arm of a pair of glasses. For the rest of the electronics he used a PCB and battery from a donated set of broken Bluetooth headphones, a space for which he was able to conceal easily in the 3D-printed frame of the glasses. The battery is in one arm and the board in the other, and he says the wiring was extremely fiddly.

The result is a surprisingly svelte set of specs that you might not immediately think concealed some electronics. His choice of bright yellow filament might give the game away, but overall he’s done a great job. This certainly isn’t the first bone conduction project we’ve shown you, some of the others have used motors instead of bone conduction transducers.

Rooting Your Ride: Jailbreaking A Subaru QNX

A modern car still drives in the same way as the one you would have bought thirty years ago, it still has a steering wheel and all the other controls. What has changed in the cabin lies mostly beneath the dash, where enough computing power to launch several Moon shots takes care of everything from air-conditioning to entertainment. As you might expect these systems attract the curiosity of security researchers, and through their work we gain an insight into their operation.

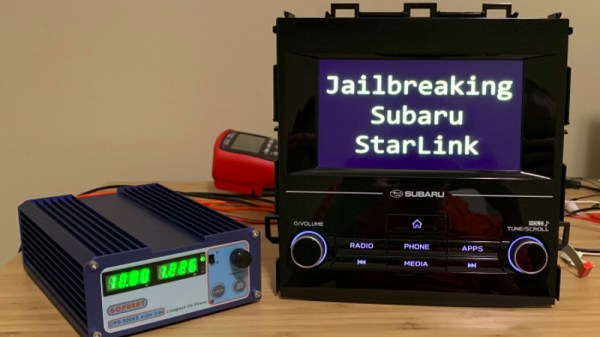
[Scott Gayou] has a Subaru, a car that has an all-in-one entertainment system head unit that is typical of what you’d find across a host of manufacturers. His account of jailbreaking it is a lengthy essay and a fascinating read for anyone. He starts with a serial port, then an SSH prompt for a root password, and a bit of searching to find it was made by Harman and that it runs the closed-source realtime OS QNX. From there he finds an official Subaru update, from which he can slowly peel away the layers and deduce the security mechanism. The write-up lays bare his techniques, for example at one point isolating the ARM assembler for a particular function and transplanting it bodily into his own code for investigation.

Eventually he could penetrate the filesystem of the update, and from there he could find that while the root user had a password there were two other accounts that while heavily locked down, had none. The discovery came that files on USB drives plugged into the system were given user-level execute permissions, at which point under the locked-down user he could execute arbitrary code from USB drives. He could then create and modify copies of the device’s filesystem which he could flash onto it, and thus place a modified password validation function into it and gain root access.

Some Hackaday readers will be accomplished in security work such as this, but many of us are hardware specialists for whom it remains something of a dark art. A comprehensive and accessible write-up such as this one is therefore invaluable, because it gives us an insight into the techniques used and perhaps more importantly, into some of the security pitfalls a hardware engineer might unwittingly introduce into their creations.

QNX is a real-time operating system with a long history of appearances in industrial and automotive applications. Readers with long memories may recall their demo floppies from the 1990s which packed a fully functional GUI, Internet connectivity, and modern (for the time) web browser onto a single 1.44Mb floppy disk. We’ve talked about it in the past in a little detail, as when someone made a desktop OS using it.

Add A Host Of 8-Bit Processors To Your Arduino

Normally when we bring you news of a retrocomputing design, it will centre around a single processor. At its heart will be a 6502, a Z80, or perhaps a 6809. There will be a host of support chips, some memory as RAM or ROM, and a bunch of interfaces. [Erturk Kocalar]’s RetroShield project for the Arduino Mega breaks all of those rules, because it supports all three of those classic processors, has no support chips, no memory, and no external interfaces beyond the shield connection to the Mega. What on earth is going on!

A closer look reveals that the project is a set of shields that use the Mega’s power to emulate all the support chips and peripherals you’d have seen on the original hardware. And while it would be impressive to have a single board with support for all three CPUs, in fact there is a PCB for each one. But that makes it no less interesting a project for those with an interest in 8-bit processors, because the focus becomes the software rather than a quest to find out-of-production silicon.

So far there is some limited demo software, and his website goes into some detail on the interfacing and code required. The Arduino can only clock the 8-bit CPU at 95kHz in software which may sound a bit low to those familiar with 1980s home computers, but it’s best to think of this as an experimentation platform and give up dreams of playing Elite. An exciting prospect comes in giving the 8-bit machine access to Arduino shields, if improbable hardware is your bag.

If this has captured your interest, you might also wish to take a look at the $4 Z80 single board computer which has a similar ethos.

Remanufacturing A Rotary Airplane Engine

If someone tells you they have seen a rotary engine, the chances are that you will immediately think of a Wankel engine, as you might find in some of the more exotic Mazda sports cars. But there is another rotary engine that has a prior claim to the name, and it can be found as the power unit for many early-twentieth-century aircraft. In these rotary engines the cylinders are arranged radially around a stationary crankshaft, and it is the engine itself that rotates. They have the advantage of extreme simplicity, smooth power, and a low parts count, at the expense of total loss lubrication, a relatively large rotating mass, and some difficulty in controlling their power. These rotary engines were largely obsolete by the 1920s, but  recent upsurge of interest in WW1-era aircraft has led to the creation of a small demand for them. New Zealand based Classic Aero Machining Service have stepped in to fill that gap and are remanufacturing the Gnome radial engine, the most numerous design of that era.

For anyone with an interest in internal combustion engines, the Gnome is a fascinating study. It’s a nine-cylinder design that runs a four-stroke Otto cycle, but instead of the two or more valves you might be familiar with from your motor vehicle it has only a single valve. The so-called Monosoupape design uses its valve for both fuel and exhaust, opening it on the inlet stroke as well as the exhaust stroke. The simplicity of a single valve and no carburetor is thus offset by a difficulty in varying its power , so rotary engines would frequently reduce the number of firing cylinders in lieu of throttling back.

The CAMS Gnome is a faithful copy of the original, but with modern metallurgy and the addition of an electronic ignition system. The original castor oil is still used — it seems classic aviation buffs like the smell — but becuase it is notorious for leaving sticky deposits in the engine they are evaluating modern alternatives. They have some technical details on their website, and there’s a good chance you my hear one of their engines one day at an air show near you.

Continue reading “Remanufacturing A Rotary Airplane Engine”

It’s (Almost) Two Keytars In One!

All the best retro-1980s chiptune acts should possess a keytar. It’s the Law, or something. [Theremin Hero] has reminded us of this with a new video we’ve shown below featuring an instrument he had a part in creating alongside [Sam Wray] and [Siddharth Vadgama] a few years ago. The Blade is a 3D-printed keytar featuring two Guitar Hero necks and an integrated pair of Game Boys to provide the sound from the authentic silicon.

To describe it in those terms though is to miss a wealth of other components and featured. The keyboard itself is from a Rock Band keytar which feeds MIDI to a Raspberry Pi running PD Extended that handles all the button press mappings. An Arduino Mega performs the same task for the two Guitar Hero necks. Midi from the various sources is processed by an Arduino Boy which then feeds the Game Boys that make the sounds. Oh – and there’s a Leap Motion 3D motion controller in the mix as well, though that doesn’t seem to be used directly in the chiptune synth functionality.

We’ve had a few keytars here over the years, but this one makes us think of the Commodore 64 instrument created by [Jeri Ellsworth].

Continue reading “It’s (Almost) Two Keytars In One!”

Implementing Qi Inductive Charging Yourself

Inductive charging is a technology that has promised a lot, but hasn’t quite delivered on the promise of never needing to plug in your phone again. The technology behind it is surprisingly simple though, and [Vinod.S] takes us through it all with an ATtiny13-based example.

An inductive charger has to be clever in its operation, for if it were to operate continuously it would soon have more in common with an inductive hob and thus become a fire risk, so it has to be sure that a compatible device is resting upon it before it tries to transmit power. It achieves this by periodically sending out a pulse of power intended to wake any devices in contact with it, and the device responds with a serial data stream encoded onto the device’s field by modifying the resonance of the receiver tuned circuit. This is done by a pair of MOSFETs under the control of the ATtiny in [Vinod]’s device, resulting in a functioning inductive power receiver built on a piece of prototyping board and sporting a buck converter capable of supplying 5 volts suitable to charge a phone. You can find the code on GitHub and see it in action below the break.

This tech has made an appearance here before a few times, such as when a Qi charger was integrated into a Chromebook.

Continue reading “Implementing Qi Inductive Charging Yourself”

An Even Smaller World’s Smallest LED Blinky

Everything can be done with a 555. It’s a universal law, as all readers know. And a flashing light, you might think, will have been done before many times. But nobody has ever created a 555 flashing light as small as thie one created by [TWires], who has taken a TI LMC555 chip-scale packaged 555 and dead-bugged a working flasher on its surface using 01005 discrete components. There is a video showing it in operation that we’ve placed below the break, and it’s tiny. We probably all consider ourselves to be quite good at soldering, but this piece of work is in another class entirely.

The project was inspired by [Mike Harrison]’s previous holder of the smallest blinky prize, which used a PIC microcontroller atop a tiny surface mount supercapacitor. It uses the same capacitor for power, but we’d say it’s taken the blinky to new levels of tininess. Does this mean a new arms race is upon us in the world of tiny blinkies? We hope so, and though it’s difficult to imagine they can get much smaller we can’t wait to see what people come up with. If there’s one thing about our community it’s that saying something can’t be done is unwise: one of you will find a way if it is at all possible. Even Microchip’s MIC1555 might be a bit big though, so something inventive is called for.

For a fascinating run-down of the state of the 555 art, read this article from our own [Ted Yapo].

Continue reading “An Even Smaller World’s Smallest LED Blinky”