The Amazon Echo and its diminutive Dot cousin have the handy feature of being able to control some home automation devices. If you own the right manufacturer’s hardware you can bend your home to your will using the power of your voice alone.
The trouble is, if your hardware isn’t on the list of supported devices or if you make your own, you’re out of luck.
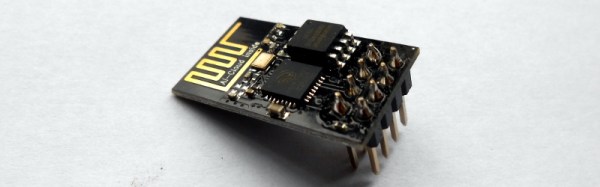
[Xose Pérez] had been sidestepping this problem by using a server running a set of scripts emulating a Belkin WeMo device, which Echo supports. The server could issue commands to his microcontrollers, but he wanted more. Why not cut out the middle man to incorporate the WeMo emulation directly on the ESP8266 that did the work?
He took the Fauxmo Python WeMo emulator he had been using, and ported it to an ESP8266 library that can be incorporated in existing code to make it appear to the world as a WeMo device. With the code itself he has provided full instructions on its BitBucket page as well as on the page linked above.
He admits that he is not the first person to have achieved this aim, and points to this earlier project. However his requirement for a library to be incorporated in another piece of software were not satisfied by it, hence his work.
We like this project, but it’s probably worth reminding readers that Alexa does have an SDK in the form of the Alexa Skills Kit. You can use it to do all sorts of clever things with your Echo or Dot… or you can make it the brains of a Big Mouth Billy Bass novelty ornament.

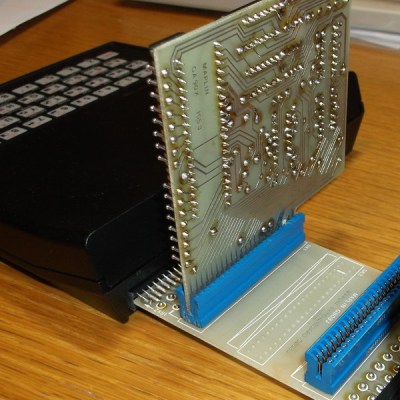 The ZX81 had a single port: a PCB edge connector at its rear that exposed all the Z80 processor’s lines. It was notorious for unreliability, as the tiniest vibration when a peripheral was connected would crash the machine. Maplin’s expansion system featured a backplane with a series of edge connector sockets, and cards with bare PCB edge connectors. Back in the 1980s it was easy to find edge connectors of the right size with the appropriate key installed, but not these days. [Alan] had to make one himself for his build.