Making A Cassette Mass Storage Interface

If you are of the generation who were lucky enough to use the first 8-bit home computers in your youth, you will be familiar with their use of cassette tapes as mass storage. Serial data would be converted to a sequence of tones which could then be recorded using a standard domestic cassette recorder, this recording could then be played back into the machine’s decoder and loaded into memory as a complete piece of software. Larger programs could take a while to load, but though it was rather clunky it was a masterful piece of making the best of what was at hand.

[Mike Kohn] was working with some microcontroller infra-red communication projects when he saw that the same techniques could be used to produce a tape interface like those on the home computers of old.

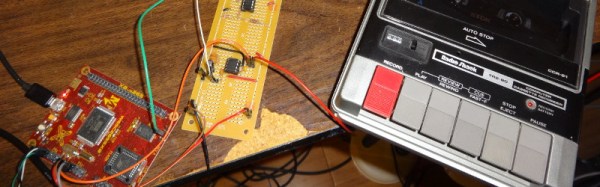
Over the years he has returned to the project a couple of times, and his original Atmel processor has been supplanted by a W65C265SXB development board based on the 16-bit derivative of the 6502. This made generating the tones as straightforward using his processor’s built-in tone generator, but decoding still presented a challenge. His earlier attempts used an LM2917 frequency to voltage converter to decode tones to logic levels, but on further consideration he decided to move to the LM567 tone decoder. This chip is designed specifically for an on-off logic output rather than the 2917’s analogue voltage output.

His recording device was originally a hi-fi separate cassette deck after experimenting with microcassettes, but eventually he used a data recorder designed for a Radio Shack TRS-80. All his code can be found in his GitHub repository.

It’s probably true to say that [Mike] has made a better cassette interface than the one you could have found on your home computer back in the day. We’ve featured a few data cassette hacks over the years, including this Commodore tape deck with an LED counter, and a tape deck emulator capable of holding an entire software archive.
3D Print An Enigma Machine That’s Close To The Real Thing

The Enigma machine as used by the German military during World War Two exerts a curious fascination among our community of hardware hackers and makers. Perhaps it is the mechanical complexity of the machine itself, or maybe the tale of how its encoded messages were decrypted by Allied codebreakers that contributes to this interest, but whatever it is we’ve seen a succession of Enigma-related projects over the years that shows no sign of abating.

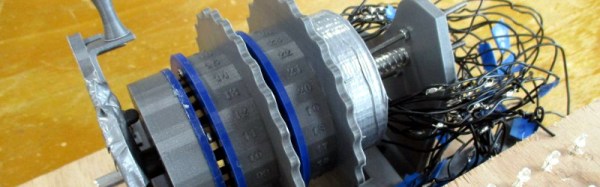
The latest Enigma project to come our way is a particularly nice one from a group of first year students at CentraleSupélec Rennes, in Northwestern France. Their Réplique Enigma is a fully mechanical Enigma replica using 3D printing techniques, and unlike so many replicas which use modern electronics it has a set of rotors just like those you would have found in the original. The rotors themselves have a 3D-printed plastic shell which houses brass contacts and the associated writing, while the keyboard and lamp board are both made from plywood. Rather than trying to replicate the original switches from the keyboard they are using modern microswitches, however the keys themselves are upright posts that resemble the original. An AZERTY layout may not have been present on the real Enigma machines, but lends a pleasing twist to the build.

It’s worth browsing all the pages for this build, as the front page does not necessarily capture the whole build. The rotors set this Enigma apart from many of the replicas we’ve featured in the past, so you may find it interesting to take a look and make a few comparisons.

Retrotechtacular: Whatever Happened To The Paper Mobile Phone

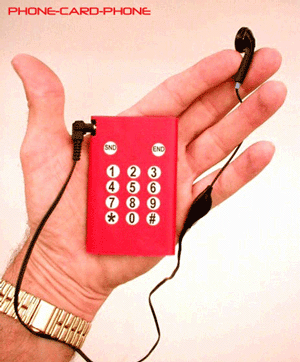
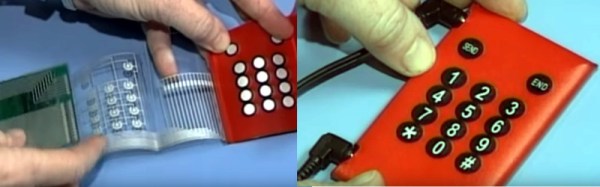
It was one of the more interesting consumer tech stories floating around at the turn of the century, a disposable cell phone manufactured using a multi-layer folded paper circuit board with tracks printed in conductive ink. Its feature set was basic even by the standards of the day in that it had no display and its only function was to make calls, but with a target price of only $10 that didn’t matter. It was the brainchild of a prolific New Jersey based inventor, and it was intended to be the first in a series of paper electronic devices using the same technology including phones with built-in credit card payment ability and a basic laptop model.

The idea of a $10 mobile phone does not seem remarkable today, it’s possible that sum might now secure you something with features far in excess of the Nokias and similar that were the order of the day at that time. But when you consider that those Nokias could have prices well into three figures without a contract, and that the new features people considered exciting were things like integrated antennas or swappable coloured plastic covers rather than the multicore processors or high-res cameras we’re used to today, a phone so cheap as to be disposable promised to be very disruptive.

The web site publicity shot for the disposable paper phone.

The product’s wonderfully dated website (Wayback Machine link, we’ve skipped the Flash intro for you) has pictures of the device, and the video below the break features shots of it in use as its inventor is interviewed. But by the end of 2002 the Wayback Machine was retrieving 404 errors from the server, and little more was heard of the product. No sign of one ever came our way; did any make it to market, and did you have one?

With the benefit of fifteen years hindsight, why did we not have paper mobile phones as part of the ephemera of the early years of the last decade? It was not a product without promise; a ten-dollar phone might have been a great success. And the description of a cheap laptop that talks to a remote server for its software sounds not unlike today’s Chromebooks.

Some of you might claim the product was vapourware, but given that they demonstrated a working prototype we’d hesitate to go that far. The likelihood is that it did not find the required combination of component price and manufacturing ease to exploit its intended market segment before its competition improved to the point that it could no longer compete. If you have ever taken apart a typical mobile phone of the period you’ll have some idea of why they were not cheap devices, for example the RF filter modules of the day were individually adjusted precision components. And paper-and-ink printed circuit boards are still a technology with a way to go even now, perhaps the idea was simply too far ahead of its time. Meanwhile within a relatively short period of time the price of simple candybar phones dropped to the point at which they would tempt the $10 buyer to spend more for a better product, so the window of opportunity had passed.

Continue reading “Retrotechtacular: Whatever Happened To The Paper Mobile Phone”

The Micro:Bit Gets A Foundation

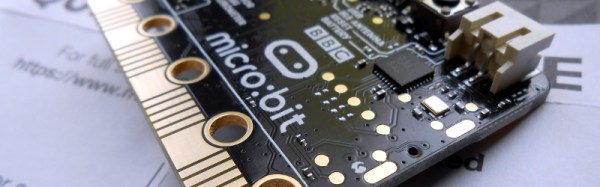
It has been announced that the BBC are to pass their micro:bit educational microcontroller board on to a non-profit-making foundation which will aim to take the project to a global audience. The little ARM-based board with its range of simple on-board peripherals and easy-to-use IDEs was given to every British 13-year-old earlier this year with the aim of introducing them to coding at an early age and recapturing some of the boost that 8-bit BASIC-programmable computers gave the youngsters of the 1980s.

Among the plans for the platform are its localization into European languages, as well as a hardware upgrade and an expansion into the USA and China. Most excitingly from our perspective, the platform will henceforth be open-source, offering the chance of micro:bits finding their way into other projects. To that end thay have placed a reference design in a GitHub repository.

We’ve covered the micro:bit story from the start here at Hackaday, from its launch to the point at which it shipped several months late after a few deadlines had slipped. We reviewed it back in June, and found it a capable enough platform for the job it was designed to do.

This is an interesting step for the little ARM board, and one that should take it from being a slightly odd niche product in one small country to the global mainstream. We can’t help however thinking that price is it’s Achilies’ heel. When it costs somewhere close to £13 in the UK, it starts to look expensive when compared to the far more capable Raspberry Pi Zero at £5 or a Chinese Arduino clone at about £2.50. Here’s hoping that economies of scale will bring it to a lower price point.

A Win For The Raspberry Pi Compute Module

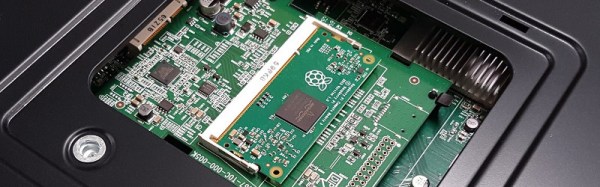
News comes from the Raspberry Pi Foundation, of something of a coup for their Compute Module product. Support for it is to be integrated into NEC’s line of commercial displays, and the electronics giant has lined up a list of software partners to provide integrated signage solutions for the platform.

It is interesting to note how NEC have done this, while it’s being spun by the Foundation as a coup for them the compute module sits on a daughter board in a slot on the back of the display rather than on the display PCB itself. They are likely hedging their bets with this move, future daughter boards could be created to provide support for other platforms should the Compute Module board fail to gain traction.

Given that this relates to a high-end commercial product from just one manufacturer, what’s in it for us in the hardware community? After all, it’s not as if you’ll be seeing Compute Module slots in the back of domestic TVs or monitors from NEC or any other manufacturer in the near future. The answer is that such a high-profile customer lends the module platform a commercial credibility that it may not yet have achieved.  Until now, it has found a home mainly in more niche or boutique products, this appearance in something from a global manufacturer takes it to a new level. And as the module finds its way into more devices the chances of them coming within the reach of our community and providing us with opportunities for adapting them for our purposes through the Pi platform become ever greater.

The use of the Compute Module in displays made for public signage is oddly a continuation of an unseen tradition for ARM-based machines from Cambridge. Aside from British schools a significant market for the Acorn Archimedes platform that spawned ARM was the embedded signage market, and even today there are still plenty of signs concealing RiscOS machines out there in the wild.

We covered the launch of the Compute Module in 2014, but it’s fair to say it’s not appeared much since in the world of Raspberry Pi projects from hardware hackers. This is not because it’s not a good platform; more likely that the Raspberry Pi models A, B, and particularly the Zero are so much cheaper when you consider the significant cost of the Compute Module development board. At the Raspberry Pi 4th birthday party earlier this year, while covering the event as your Hackaday scribe but also wearing my metaphorical Pi kit supplier and Pi Jam organizer hats I stood up in the Q&A session and asked the Foundation CEO Phil Colligan to consider a hardware developer program for the platform. Perhaps a cut-down Compute Module developer board would be an asset to such a program, as well as driving more adoption of that particular board.

The BITX Transceiver Comes Of Age

There was a time when the idea of building your own single-sideband transceiver was too daunting for all but the most hardcore of amateur radio constructors. After all the process of creating SSB is complex enough in itself without adding the extra complexity of a receiver and the associated switching circuitry.

In 2003 an Indian radio amateur, [Ashhar Farhan], [VU2ESE] changed all that. His BitX SSB transceiver used a bidirectional amplifier design and readily available components such that it could be built by almost anyone using dead bug construction techniques for an extremely reasonable price.

Over the years since [Ashhar] first published his circuit, his design has been taken and enhanced, been presented in kit form, and extended to other bands by multiple other radio amateurs. Until now though it seems as though he himself has taken very little advantage of his work.

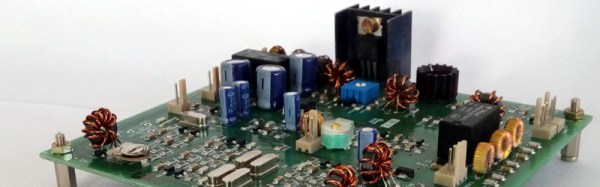
It is therefore with great interest that we note a new 40-meter BitX transceiver on the market from a company founded by the man himself. The transceiver itself is an Indian-assembled PCB with an updated circuit using a 12 MHz IF, varicap tuning, and large surface-mount components for easy modification. Just as with the original circuit, there is a full technical run-down of its operation should you wish to build one yourself. For a rather impressive $45 though you might wish to put down the soldering iron, it looks very much worth the wait for international postage.

We don’t often feature commercial product launches here on Hackaday, though we are besieged by people trying to persuade us to do so. So why this one? When the creator of a design that has been as significant as the BitX has been to its community of builders releases a new version it is newsworthy in itself, and if they are commercializing their work then they deserve that reward.

We’ve featured the BitX here in the past, with a rather impressive dead-bug build, and a look at a multiband version. We’re sure that this design thread has more to deliver, and look forward to more.

Thanks [WB9FLW] for the tip.

A Robot Arm From The Cupboard

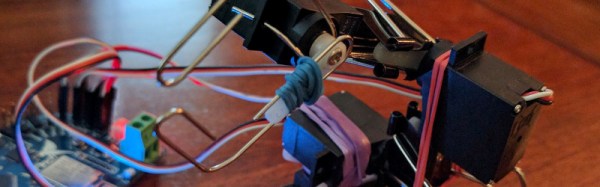
Building a simple robot arm is a lot more straightforward than it used to be.  If you have a laser cutter, or a bit of cash and don’t mind waiting for postage, there are inexpensive kits like the MeArm. If you have a 3D printer, there are any number of 3D-printed designs for you to tackle. What if you need to satisfy your urge to build a robot arm really quickly, and you don’t have a laser cutter or 3D printer? You’ve got a pile of servos from that remote-control project, how can you make the rest?

If you are [roboteurs], you raid the stationery cupboard, and create an arm using rubber bands, paper clips, and binder clips. The binder clips grip the servo arms and hold the whole thing together, the rubber bands provide extra attachment , and the paper clips are bent to form the jaws. It’s not the prettiest or perhaps the most capable of arms, but it undeniably is an arm, and we’d doubt it could be done any more cheaply.

In this particular case, the arm serves as a demonstration piece for [roboteurs]’ Printabots Maker Kit for people without a 3D printer. It uses their controller board, but there is no reason why it could not be used with any other board capable of driving servos.

We’ve covered innumerable robot arms over the years, This one may be the cheapest, but another contender might be this cardboard arm. None of them, however, are as cool as this steam-powered Armatron toy.