A DIY Electronic Load With A Twist

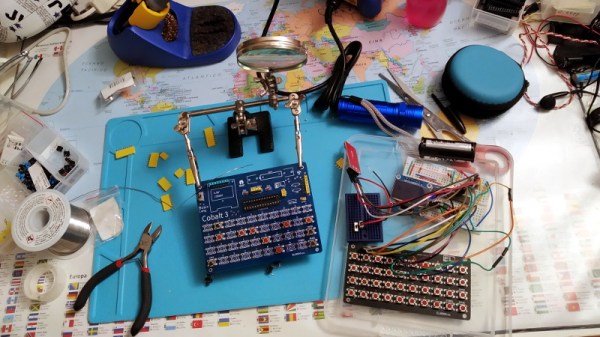
If you’re testing a power supply or battery pack, an electronic load is a nice tool to have. By watching the voltage as you crank up the resistance, you can verify the unit’s real-world capabilities quickly and easily. But [Xavier Bourlot] wanted a bit more information than is generally afforded by these devices, so he came up with his own scratch built load that can measure the voltage at multiple points in the circuit.

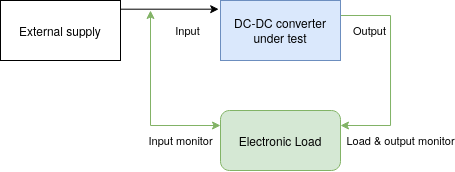
Now at first glance, it might not be obvious why you’d want such a capability. But [Xavier] is looking to do something very specific with this device: analyze the efficiency of DC-DC converters. The idea is that if the electronic load can measure the voltage on both sides of the converter, it can calculate what kind of losses are being incurred.

Could you do this with a multimeter and a traditional electronic load? Sure. But if it’s the kind of thing you’ll be doing a lot of, it’s not hard to see why this method would be preferable.

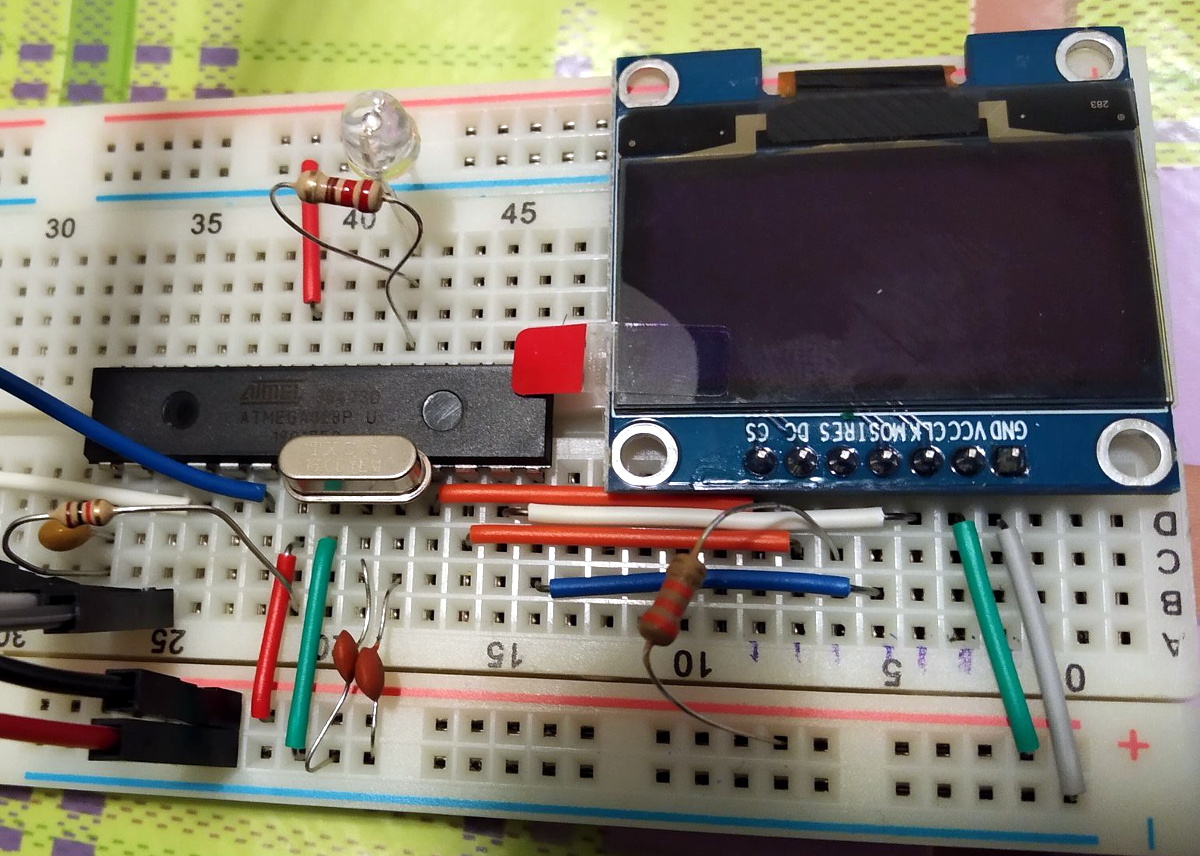
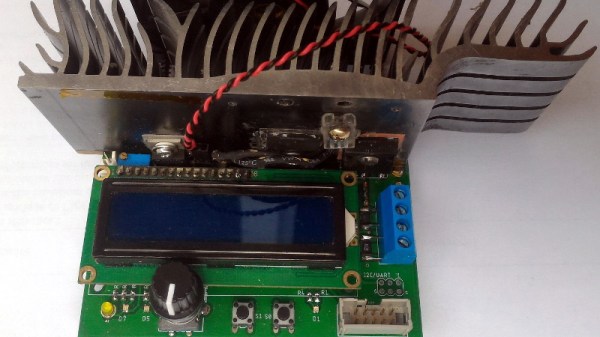
But even if you ignore the converter analysis capabilities, this looks to be a very useful device to have around the lab. [Xavier] says it can sink more than 5 amps, and handle an input voltage as high as 100 volts. Powered by an ATmega328P, the load is also fully programmable and even features an I2C expansion port that you can use to hang additional hardware or sensors on. The stock firmware is already quite capable, and the list of future enhancements has some very interesting entries such as the ability to log data over serial or to a SD card.

We’ve seen a number of programmable electronic load projects over the years, ranging from Arduino shields to VFD equipped units that would be the pride of any hacker’s bench.

Cheap Party Light Gets Arduino Upgrade

If you’ve got a party coming up and are looking to add a little bit of excitement, you might be interested in this recent project from [Gav Lewis]. The build is based on a commercially available party light, but with some upgraded components the final product is brighter and more dynamic than it was stock.

Realistically, [Gav] has changed out almost every component of this light except for the enclosure and the front lens. The original 5 mm LED array was replaced with a new 8×8 WS2812B panel, and the electronics completely replaced with an Arduino Nano. He’s still using the light’s original power supply, but as it only puts out around 4.2 V, he’s added a boost converter to provide a stable 5 V for the new hardware. He also added a small 12 V cooling fan, which he says is basically silent since it’s only getting half its rated voltage.

[Gav] has developed a number of lighting patterns with FastLED that do a good job of emulating what you might see from a much more expensive laser scanner. In the video after the break, you can see how multiple colored beams of light exit the housing at once, projecting patterns on the opposite wall. He says he’s like to restore the device’s original sound activation mode, but as of yet hasn’t gotten the code sorted out.

This project uses a off-the-shelf 8×8 matrix of WS2812B LEDs, but if you ever find yourself needing to piece together your own array from individual LEDs, we recently covered a great tip for making it a bit easier.

Continue reading “Cheap Party Light Gets Arduino Upgrade”

Vacuum Dust Collection With Self-Powered Relays

Like many people with multiple woodworking tools, [Will Stone] wanted to create a centralized dust collection system. But he quickly found that the devil was in the details, as he struggled to find an economic way to automatically kick on the vacuum when one of the tools started up. His final solution might be one of the most elegant, and surely the cheapest, we’ve ever come across.

As with other DIY systems we’ve seen over the years, [Will] is using a simple inductive current sensor to detect when AC power is being drawn by one of his tools. But where the similarity stops is that there’s nothing so pedestrian as a microcontroller reading the output of the sensor. He realized that when the coils in the sensor were energized they were putting out about 7 volts AC, which should be more than enough to trigger a relay.

So he threw together a rectifier circuit on a piece of perfboard, using four LEDs in true hacker style. With the addition of a capacitor to smooth out the voltage, this little circuit is able to trip the 40 amp solid state relay controlling power to the vacuum using nothing more than the energy harvested from the sensor’s coil.

Using a current sensor is great when the tools are close enough to all be plugged into the same line, but that doesn’t help the folks with cordless tools or supersized shops. In that case, you might need to look into a sound-activated system.

Join The Movement With This Mini Cyberdeck

The global pandemic has given many people a lot more time at home, which has undoubtedly pushed an untold number of projects over the finish line. Unfortunately, it’s also disrupted global commerce and shipping to the point that getting parts can be a lot harder than we’d like. Which is why [facelesstech] decided to put together this exceptionally mobile cyberdeck out of things he already had laying around.

Now to be fair, his parts bin is perhaps a bit better stocked for this kind of thing than most. He’s built a couple of Raspberry Pi portables already, so the Pi Zero W, display, and battery management board were already kicking around. He just had to come up with a new 3D printed enclosure that holds it all together with a little bit of cyberpunk flair.

To that end, he’s done an excellent job of documenting the build and has released the STL files for the 3D printed components. All things considered, we’d say this is probably the most approachable cyberdeck design currently available; if you’ve been wondering what all the fuss is about with these bespoke little computers, this is an ideal project to get started with.

Keep in mind that the idea of a cyberdeck is to build something custom for yourself, so there’s no need to copy this build exactly. If you’re short on parts, you could forgo the battery powered aspect and just keep it tethered. The superfluous (but very cool) GX12 connectors could certainly be deleted as well, although at serious stylistic cost. You’ll probably need to order the specific keyboard that [facelesstech] designed the lower half of the device around, but it’s common enough that it shouldn’t be hard to track down. No matter which way you take it, this design is a great base to start from.

If you’re looking for something a bit more substantial and have the filament to burn, you might take a look at the VirtuScope to fulfill your offset screen needs.

Continue reading “Join The Movement With This Mini Cyberdeck”

Nintendo’s GBA Dev Board Could Pass For Modern DIY

When the Game Boy Advance came on the scene in 2001, it was a pretty big deal. The 32-bit handheld represented the single biggest upgrade the iconic Game Boy line had ever received, not only in terms of raw processing power, but overall design. It would set the state-of-the-art in portable gaming for years, and Nintendo was eager to get developers on board.

Which could explain why the official GBA development kit, recently shown off by [Hard4Games], looks like something that was built in a hackerspace. It’s pretty common for console development systems to look more like boxy 1990s computers than the sleek injection molded units that eventually take up residence under your television, but they don’t often come in the form of a bare PCB. It seems that Nintendo was in such a rush to get an early version of their latest handheld’s guts out to developers that they couldn’t even take the time to get a sheet metal case stamped out for it.

The development board doesn’t like later GBA games.

All of the principle parts of the final GBA are here, and as demonstrated in the video after the break, the board even plays commercially released games. Though [Hard4Games] did find that some titles from the later part of the handheld’s life had unusual graphical glitches; hinting that there are likely some low-level differences that don’t manifest themselves unless the developer was really digging deep to squeeze out all the performance they could.

The board also lacks support for Game Boy and Game Boy Color games, though this is not wholly surprising. When an older game was inserted into a GBA, the cartridge would physically depress a switch that enabled a special 8080-based coprocessor that existed solely for backwards compatibility. Adding that hardware to a development board would have made it more expensive and added no practical benefit. That said, [Hard4Games] does point out that there appears to be a unpopulated area of the board where the backwards compatibility switch could have been mounted.

Hackers have always been enamored with the Game Boy, so it’s fitting to see that the official development kit for the final entry into that storied line of handhelds looked a lot like something they could build themselves. If anyone feels inclined to build their own “deconstructed” GBA in this style, you know where to find us.

Continue reading “Nintendo’s GBA Dev Board Could Pass For Modern DIY”

CNC Scroll Saw Makes Promising First Cuts

When we talk about CNC machines, we almost invariably mean a computer controlled router. Naturally you can do other forms of automated cutting, say using a laser or a water jet, but what about adding computer control to other types of saws? [Andrew Consroe] recently put together a postmortem video about this experimental CNC scroll saw. While he never quite got it working reliably, we think his approach is absolutely fascinating and hope this isn’t the last we see of the idea.

Those who’ve used a scroll saw in the past might immediately see the challenge of this build: while a router bit or laser beam can cut in any direction, a scroll saw blade can only cut in one. If you tried to make a sharp turn on a scroll saw, you’ll just snap the fragile blade right off. To work around this limitation, [Andrew] came up with the brilliant rotary table that can be seen in the video after the break.

By combining motion of the gantry with table rotation, he’s able to keep the blade from ever making too tight a turn. Or at least, that’s the theory. While the machine works well enough with a marker mounted in place of the blade, [Andrew] says he never got it to the point it could reliably make cuts. It sounds like positioning errors would compound until the machine ended up moving the work piece in such a way that would snap the blade. Still, the concept definitely works; towards the end of the video he shows off a couple of pieces that were successfully cut on his machine before it threw the blade.

While we’ve actually seen DIY scroll saws in the past, this is the first computer controlled one to ever grace the pages of Hackaday. While some will no doubt argue that there’s no sense building one of these now that laser cutters have reached affordable prices, we absolutely love this design and how much thought went into it. At the very least, we figure this it the beefiest doodle-drawing robot ever constructed. Continue reading “CNC Scroll Saw Makes Promising First Cuts”

A Pocket Retro Computer Anyone Can Build

Not satisfied with any of the DIY retro computer kits on the market, [Leonardo Leoni] decided to make his own. Built using only the finest through-hole technology and powered by the ATmega328 microcontroller, his diminutive 8-bit computer is easy to build and even easier to develop for. Whether you’re looking to hone your BASIC skills or play some Zork on the bus, this little computer looks like a great project for anyone who has a soft spot for computing’s simpler days.

All things considered, using this tiny machine looks like it would be relatively pleasant. [Leonardo] is using a common SH1106 OLED display, and there’s a full QWERTY keyboard (with number row) done up with tactile momentary buttons. There’s very few passive components involved in the build, which is sure to be appealing to new players; especially after they’ve finished soldering all those switches to the board.

On the software side, [Leonardo] says he leaned heavily on open source projects to get his machine up and running. Beyond the hardware drivers for things like the display, he specifically calls out the Tiny Basic and Tiny Lisp Computer projects for their code. If small-scale programming isn’t your style, the machine is compatible with the Arduino IDE so you can easily throw something else on it. If you’ve ever dreamed of a QWERTY Arduboy, this might be your chance.

From the way [Leonardo] describes the computer, which he calls the Cobalt 3, we get the impression a commercial kit might be in the cards. We hope the community shows enough interest to make it happen. After all, not everyone was able to make it to Hackaday Belgrade 2018 to get their own pocket retro computer.