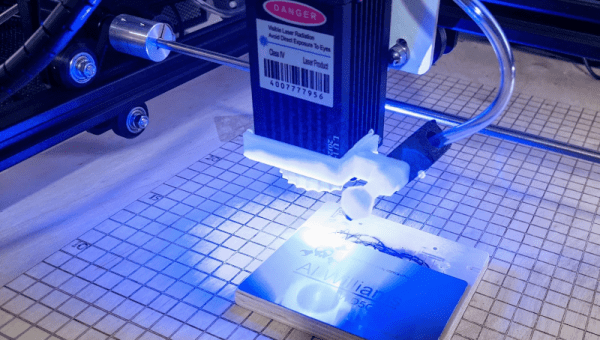
Hacking The Ortur Laser With Spoil Board, Z-Height, And Air Assist

Last month in my hands-on review of the Ortur Laser I hinted that I had done a few things to make it work a little better. I made three significant changes in particular: I anchored the machine to a spoil board with markings, I added a moving Z axis to adjust focus by moving the entire laser head, and I added an air assist.

Turns out, you can find designs for all of these things all over the Internet and I did, in fact, use other people’s designs. The problem is the designs often conflict with one another or don’t exactly work for your setup. So what I’ll tell you about is the combination that worked for me and what I had to do to get it all working together. The air assist is going to take a post all by itself, but some of the attempts at air assist led to some of the other changes I made, so we’ll talk about it some in this post, as well.

One of the modifications — the spoil board mount — I simply downloaded and the link for that is below. However, I modified the moving Z axis and air assist parts and you can find my very simple modifications on Thingiverse. You’ll also find links to the original designs and you’ll need them for extra parts and instructions, too.

Continue reading “Hacking The Ortur Laser With Spoil Board, Z-Height, And Air Assist”
PCB Reflow With A PCB

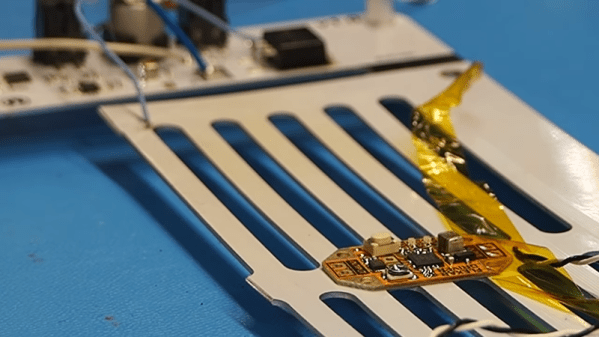
We wonder if [Carl Bugeja] was looking at a 3D printer’s heated bed when he got the idea to create a PCB reflow heater using a PCB. He tried a quick test to heat up a standard PCB and made it self-reflow. That worked, though it obviously wouldn’t be practical for all boards. But it proved he could make it work.

To improve the heating performance, he laid out a metal core PCB, along with some custom control electronics. The board’s resistance didn’t quite perform to calculations, but luckily, it was too high so a shunt wire was able to reduce the overall resistance. One important thing to consider is that the heater board needs to use higher temperature solder so it doesn’t desolder its own components

We were glad to see [Carl] use a metal core board as standard PCB material can get cranky at high temperatures over 130C. Even so, it would be good to check the boards you plan to use this way to make sure they are rated for the kind of temperatures required.

We’ve seen lots of reflow heat sources. Halogen lights come to mind. Or, raid the toy closet and find an Easy Bake oven.

Continue reading “PCB Reflow With A PCB”

Arduino And FPGA Done Differently

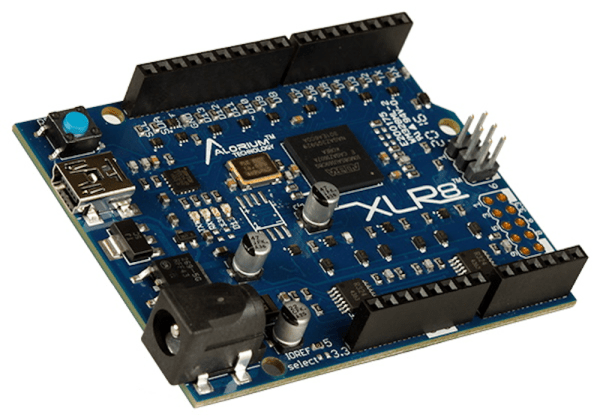
FPGA guru [Max Maxfield] recently took a look at the XLR8 (pronounced accelerate) board from a company called Alorium. On the surface, it looks like another Arduino UNO clone. But instead of a CPU, it contains an Intel MAX10 FPGA that runs a softcore AVR processor. Of course, that’s only part of the story. If the board was just a mock Arduino using an FPGA, that’s not very interesting for practical purposes. However, by incorporating accelerator blocks or XBs, you can add FPGA modules to the soft CPU. [Max] shows an example that you can see in the video below where an FPGA block controls servos more easily than a standard Arduino. There’s also a version that looks like an Arduino Nano, but can clock much faster as well as use the XBs.

In addition to prebuilt XBs, there is a workflow to build your own if you are familiar with working with FPGAs. The products aren’t exactly new, but we enjoyed [Max’s] take on the product. We also appreciated the simple code examples showing exactly how you would convert a program to use the accelerated functions. Continue reading “Arduino And FPGA Done Differently”

Phasors In LTSpice

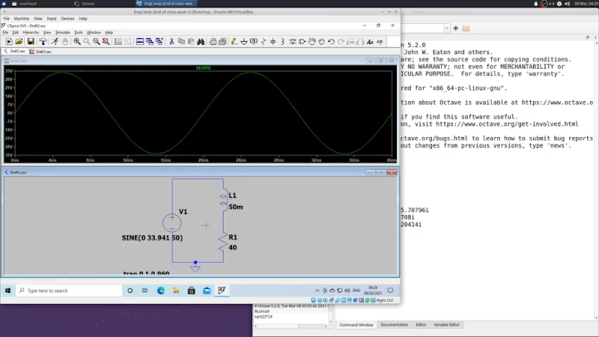
[Ted] recently demonstrated the analysis of an RL circuit using a piece of paper, Octave, and LTSpice. If you prefer, the Octave code should work fine in MATLAB, as well. If you are looking to get serious about electronic theory this is a reasonably simple case and is a good chance to get a workout with some of the tools.

We like the approach because too often it is easy to just use the computer and not pick up the understanding that you get when working through a problem by hand. You do need to understand complex numbers, but, overall, the math isn’t too hairy.

Continue reading “Phasors In LTSpice”

Science Officer…Scan For Elephants!

If you watch many espionage or terrorism movies set in the present day, there’s usually a scene where some government employee enhances a satellite image to show a clear picture of the main villain’s face. Do modern spy satellites have that kind of resolution? We don’t know, and if we did we couldn’t tell you anyway. But we do know that even with unclassified resolution, scientists are using satellite imagery and machine learning to count things like elephant populations.

When you think about it, it is a hard problem to count wildlife populations in their habitat. First, if you go in person you disturb the target animals. Even a drone is probably going to upset timid wildlife. Then there is the problem with trying to cover a large area and figuring out if the elephant you see today is the same one as one you saw yesterday. If you guess wrong you will either undercount or overcount.

The Oxford scientists counting elephants used the Worldview-3 satellite. It collects up to 680,000 square kilometers every day. You aren’t disturbing any of the observed creatures, and since each shot covers a huge swath of territory, your problem of double counting all but vanishes.

Continue reading “Science Officer…Scan For Elephants!”

Custom Components In LTSpice

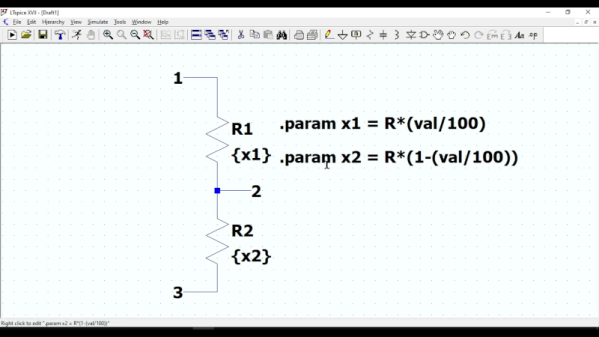
If you enjoy simulating circuits, you’ve probably used LTSpice. The program has a lot of powerful features we tend to not use, including the ability to make custom components that are quite complex. To illustrate how it works, [asa pro] builds a potentiometer component that is not only a good illustration but also a useful component.

The component is, of course, just two resistors. However, using parameters, the component gets two values, a total resistance and a percentage. Then the actual resistance values adjust themselves.

Continue reading “Custom Components In LTSpice”

Raspberry Pi Cosmic Ray Detector

[Marco] has a sodium iodide detector that indicates cosmic radiation by scintillation. The material glows when hit by cosmic rays and, traditionally, a photomultiplier tube detects the photos from the detection. After a quick demonstration that you can see in the video below, he built the Cosmic Pi, a CERN project to create a giant distributed cosmic ray detector. The Cosmic Pi uses scintillation, but not from a crystal. It uses a plastic scintillator and silicon photodetectors, so it is much easier to work with than a traditional detector.

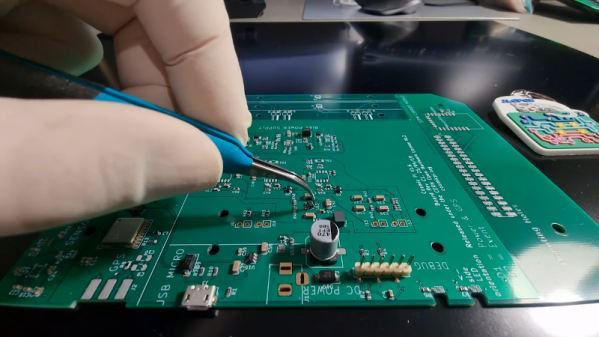
Using a four-layer board and some harvested components, the device detects muons. There are two scintillation detectors and muons striking both detectors presumably don’t have a local origin. The instrument has a GPS to get accurate time and position data. There are other sensors onboard, too, to collect data about the conditions of each detected event.

Continue reading “Raspberry Pi Cosmic Ray Detector”