Building A Bigger Cloud Chamber

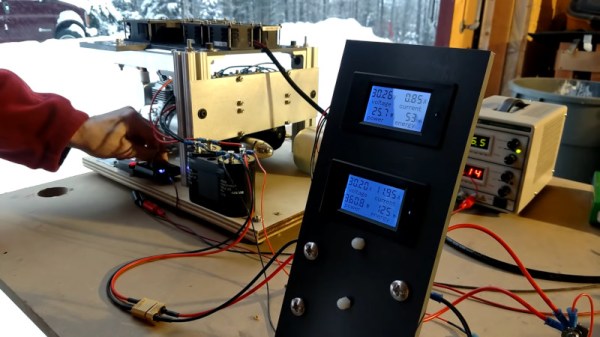
Cloud chambers are an exciting and highly visual science experiment. They’re fascinating to watch as you can see the passage of subatomic particles from radioactive decay with your very own eyes. Many elect to build small chambers based on thermoelectric Peltier elements, but [Cloudylabs] decided to do something on a grander scale.
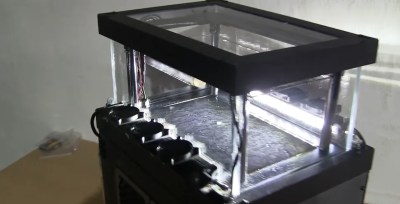
It’s a hefty chamber, and a very clean build.

[Cloudylabs] started building cloud chambers after first seeing one in a museum back in 2010. The first prototype was an air-cooled Peltier device, with a cooled area of just 4x4cm. Over the years, and after building many more Peltier-based chambers, it became apparent that the thermoelectric modules were somewhat less than robust, often failing after many thermal cycles. Wanting to take things up a notch, [Cloudylabs] elected to build a much larger unit based on phase-change technology, akin to the way a refrigerator works.

The final product is astounding, consisting of a 32x18cm actively cooled area mounted within a large glass viewing case. A magnet is mounted underneath which causes certain particles to curve in relation to the field, as well as an electrically charged grid up top. The chamber is capable of operating for up to 12 hours without requiring any user intervention.

Cloud chambers are always beautiful, and even moreso at this larger scale. When radioactive materials are introduced into the chamber the trails generated are long and easily visible. It’s a daunting build however, and the final product weighs over 30 kilograms. You might want to start with something a little smaller for your first build. Video after the break.

Continue reading “Building A Bigger Cloud Chamber” →

Breathing LED Done With Raw Logic Synthesized From A Verilog Design

Breathing LEDs are an attractive adornment on many electronic devices. These days they’re typically controlled by software but of course there were fading effects back in the days of analog too. [Pepijn de Vos] mixes a little of the new and the old by building a hardware-based fader from a Verilog design and even too the time to explain the process in depth.

Rather than using a microcontroller and software, [Pepijn] wrote the logic required to make the LED “breathe” in the hardware description language, Verilog. You may be familiar with this for FPGAs, but using it to plan out a build with logic chips is just as apt a use. The Verilog was synthesized into a circuit using 74-series logic chips, with the help of work by [Dan Ravensloft] who has made a library for the Yosys Open Synthesis Suite. With the addition of a basic clock circuit, the LED is made to breathe and the rate can be controlled by changing the clock speed.

It’s a fun way to experiment with both Verilog and old-school logic, albeit one that may not scale well. An interesting side note from the Twitter thread, [Dan] estimates that with current settings the PicoRV32 CPU would require over 2000 chips to build. Regardless, it’s an interesting tool and one that likely has further scope for experimentation.

First patented by Apple way back in 2002, the breathing LED has been a popular project for those learning electronics. We’ve even seen it on motorbikes. Video after the break.

Continue reading “Breathing LED Done With Raw Logic Synthesized From A Verilog Design” →

Designing Compact Gasoline Generator Prototype For Drone Use

Lithium batteries and brushless motors helped make multirotor drones possible, but batteries only last so long. Liquid fuels have far greater energy densities, but have not  been widely applied in these roles. [Tech Ingredients] has been experimenting with a compact gasoline-fueled generator, with the aim to extend drone flight times well beyond what is currently possible with batteries (Youtube link, embedded below).

The build began with a single-cylinder, four stroke engine. However, torque spikes and vibration made things difficult. After some iteration, the design settled on employing two single-cylinder two stroke engines, fitted with a timing belt to keep them 180 degrees out of phase. In combination with a pair of balanced flywheels, this keeps vibration to a minimum. Brushless motors are used as generators, combined with rectifier diodes and capacitors to smooth the voltage output. The generator is intended to be used in parallel with a lithium battery pack in order to ensure the drone always has power available, even in the event of a temporary malfunction.

This is a build with plenty of promise, and we can’t wait to see what kind of flight time can be achieved once the system is finished and flight ready. We’ve seen others experimenting with hybrid drones, too.

Continue reading “Designing Compact Gasoline Generator Prototype For Drone Use” →

DIY Scintillation Detector Is Mighty Sensitive

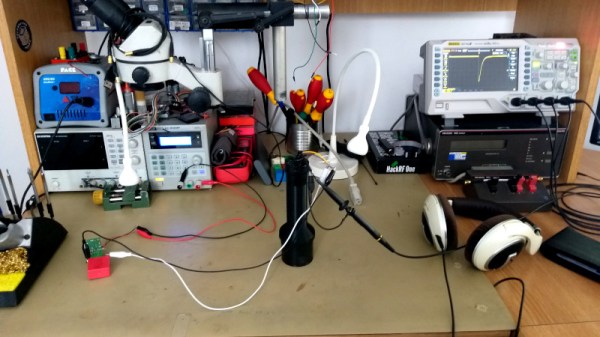
Geiger counters are a popular hacker project, and may yet prove useful if and when the nuclear apocalypse comes to pass. They’re not the only technology out there for detecting radiation however. Scintillation detectors are an alternative method of getting the job done, and [Alex Lungu] has built one of his own.

Scintillation detectors have several benefits over the more common Geiger-Muller counter. They work by employing crystals which emit light, or scintillate, in the presence of ionizing radiation. This light is then passed to a photomultiplier tube, which emits a cascade of electrons in response. This signal represents the level of radioactivity detected. They can be much more sensitive to small amounts of radiation, and are more sensitive to gamma radiation than Geiger-Muller tubes. However, they’re typically considered harder to use and more expensive to build.

[Alex]’s build uses a 2-inch sodium iodide scintillator, in combination with a cheap photomultiplier tube he scored at a flea market for a song. [Jim Williams]’s High Voltage, Low Noise power supply is used to run the tube, and it’s all wrapped up in a tidy 3D printed enclosure. Output is via BNC connectors on the rear of the device.

Testing shows that the design works, and is significantly more sensitive than [Alex]’s Geiger-Muller counter, as expected. If you’re interested in measuring small amounts of radiation accurately, this could be the build for you. We’ve seen this technology used to do gamma ray spectroscopy too.

Making Flexible Overmolded Parts With Urethane Resin

Resin casting videos have taken social media by storm of late. Everything from inlaid driftwood tables to fancy pens are getting the treatment. Pouring some nicely colored epoxy is straightforward enough, but it’s just the tip of the iceberg. [Eric Strebel] has some serious skills in resin casting, and has lately been working on some overmolded electroniics with urethane resin (Youtube link, embedded below).

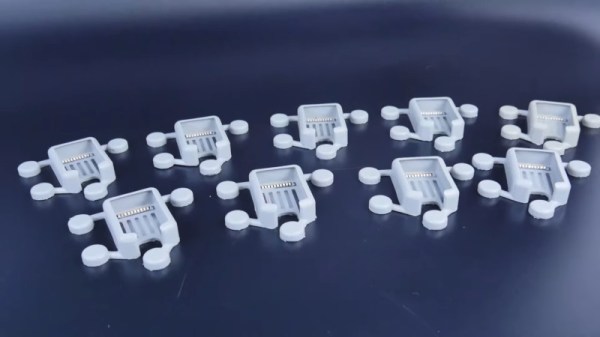
The build starts with the creation of a silicone mold, using a 3D printed SLA master. The part in question is for a prototype medical device, and requires overmolding, in which a flexible PCB is covered in flexible urethane. Wooden pins are used to allow the flexible PCB to clip into the mold for accurate location, and a small shield is placed over the metal contacts of the PCB to avoid them being covered in silicone.

Initial tests are done with an empty mold to determine the correct material to use, before the actual parts are ready to produce. [Eric] takes great care with the final production, as any mistakes would waste the expensive prototype PCBs provided to him by the client. With the electronics placed in the mold, the resin is degassed and carefully injected, using a syringe to minimise the chance of any air bubbles. With some delicate cleanup by hand, the completed parts are ready for delivery.

It’s a process that covers the basics of overmolding for a prototype part, as well as showing off [Eric]’s skill at producing quality prototype parts. We’ve seen [Eric]’s work before, too – like his discussion of the value of cardboard in product design. Video after the break.

Continue reading “Making Flexible Overmolded Parts With Urethane Resin” →

Hybrid Drones Could Have Massively Extended Flight Times

Multirotor drones truly took off with the availability of lithium polymer batteries, brushless motors, and cheap IMUs. Their performance continues to improve, but their flight time remains relatively short due to the limits of battery technology. [Nicolai Valenti] aims to solve the problem by developing a hybrid generator for drones.

The basic concept consists of a small gasoline engine, connected to a brushless motor employed as a generator. The electricity generated is used to run the main flight motors of the multirotor drone. The high energy density of gasoline helps to offset the added weight of the generator set, and [Nicolai] is aiming to reach a goal of two hours of flight time.

There are many engineering problems to overcome. Engine starting, vibration and rectification are all significant challenges, but [Nicolai] is tackling them and has already commenced flight testing. Experiments are ongoing with 500 W, 1,000 W, and 2,000 W designs, and work is ongoing to optimise the engine and electronics package.

It’s a project that holds the potential to massively expand the range of operation for medium to large multirotors, and should unlock certain capabilities that have thus far been limited by short battery runtimes. Gasoline powered drones aren’t a new idea, but we’ve seen precious little in the hybrid space. We look forward to seeiing how this technology develops. Video after the break.

Continue reading “Hybrid Drones Could Have Massively Extended Flight Times” →

A Fruity Approach To CNC Design

[Frank Howarth] found himself in need of a lamp for his dining room. Being of the maker persuasion, store-bought simply wouldn’t do. With a serious wood shop at his disposal, [Frank] took a trip down to the supermarket for inspiration.

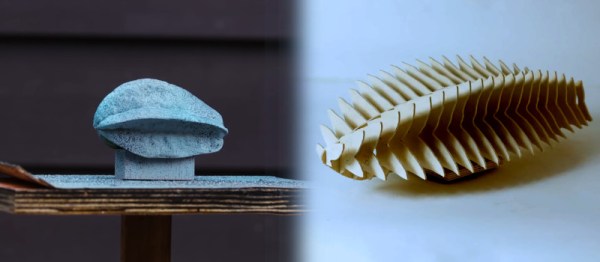
Having picked out a particularly well-formed starfruit for his project, [Frank] didn’t want to spend an inordinately long time attempting to recreate the organic lumps and bumps in modelling software, Instead, Meshroom was used to create a model through photogrammetry. After several failed attempts, success was achieved by using a textured rotating table as a background, with the starfruit painted in matte grey and a final dusting of black speckle. This gave the software enough visual cues to accurately model the fruit’s geometry.

With a 3D model to hand, Fusion Slicer was then used to generate a model that could be constructed out of flat lasercut pieces. The cutting outlines were then generated and passed to Rhino for final tweaking. With everything ready, parts were cut out of plywood and a small mockup of a potential lamp design was created. [Frank] is currently workshopping the design with the inhabitants of the dining room, prior to the final build.

Photogrammetry and modern CAD tools make working with natural forms quick and easy. We’ve also seen the technology used for other purposes too, with [Eric Strebel] providing a great example on how to use it for reverse engineering.

The starfruit tag on Hackaday is pretty sparse, so if you’ve got a project, let us know. Video after the break.

Continue reading “A Fruity Approach To CNC Design” →