A PKE Meter That Actually Detects Radiation

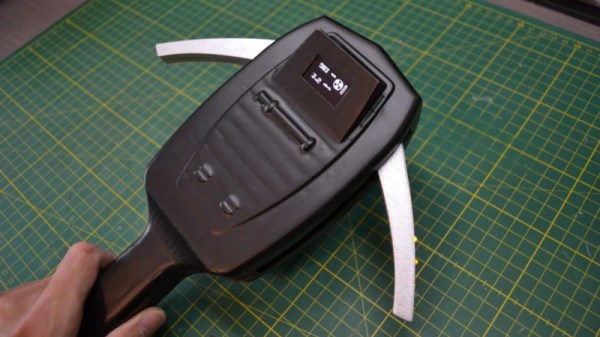
Fans of Ghostbusters will remember the PKE meter, a winged handheld device capable of detecting supernatural activity. Precious little technical data on the device remains, leaving us unable to replicate its functionality. However, the flashing, spreading wings serve as a strong visual indicator of danger, and [mosivers] decided this would be perfect for a Geiger counter build.

An SBM20 Geiger tube serves as the detection device, hooked up to an Arduino Nano. An OLED display is used to display the numerical data to the user. The enclosure and folding wings are 3D printed, and fitted with 80s-style yellow LEDs as per the original movie prop.

The device is quite intuitive in its use – if the wings flare out and the lights are flashing faster, you’re detecting an increased level of radiation. In a very real sense, it makes using a Geiger counter much more straightforward for the inexperienced or the hearing impaired. Naturally, there’s also a buzzer generating the foreboding clicks as you’d expect, too.

Geiger counters are a popular project, though we hope they don’t become common household items in the near future. Here’s a Fallout-inspired build for fans of the game. Video after the break.

Continue reading “A PKE Meter That Actually Detects Radiation” →
Doing 10 Gigabit Networking At Home, The Cheap Way

For the vast majority of us, Gigabit Ethernet is more than enough for daily tasks. The occasional big network file transfer might drag a little, but it’s rare to fall short of bandwidth when you’re hooked up over Cat 6. [Brian] has a thirst for saturating network links, however, and decided only 10 Gigabit Ethernet would do.

Already being the owner of a Gigabit Ethernet network at home, [Brian] found that he was now regularly able to saturate the links with his existing hardware. With a desire to run intensive virtual machines on his existing NAS without causing bandwidth issues, it was time for an upgrade. Unfortunately, the cost of rewiring the existing home network to Cat 6 and procuring hardware that could run 10 Gigabit Ethernet over copper twisted pair was prohibitively expensive.

It’s a little ungainly, but it does the job.

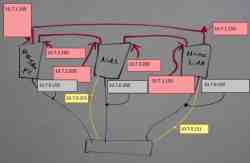
Instead, [Brian] decided to reduce the scope to connecting just 3 machines. Switches were prohibitively expensive, so each computer was fitted with twin 10 Gigabit interfaces, such that it could talk to the two other computers. Rather than rely on twisted pair, the interfaces chosen use the SFP+ standard, in which the network cable accepts electrical signals from the interface, and contains a fiber optic transciever.

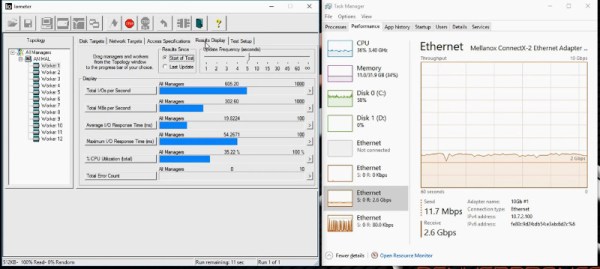
[Brian] was able to get the 3 computers networked for just $120, with parts sourced from eBay. It’s an approach that doesn’t scale well; larger setups would be much better served by using a switch and a less zany network topology. But for [Brian], it works just fine, and allows his NAS to outperform a 15,000 RPM server hard disk as far as read rates go.

If you’re curious about improving your own network performance, it might pay to look at your cables first – things are not always as they seem.

Persistence Of Vision On An Old Fan

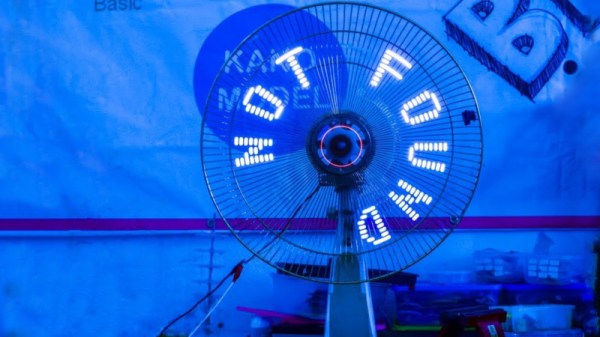
Persistence of vision is a fun feature of the human visual system, which allows us to blink a bunch of spinning LEDs at the right time to spell out messages that appear to hang in the air. [TN_Inventor] took a stab at his own POV build, using an old desk fan as a base.

The initial build relied on a rotor made of MDF and some very old-school LEDs. The rotor was heavy and unbalanced, causing issues for the motor, and the dim LEDs weren’t visible in normal daytime conditions. Like any good maker, [TN_Inventor] persevered and iterated the design.

The next revision instead relied on protoboard itself for the rotor, greatly reducing the weight and making it easier to balance. The problem of getting power to a rotating mechanism was sidestepped entirely, with a small lipo battery being mounted on the rotor itself. High-brightness white LEDs were employed, making the effect much more visible. This was helped further thanks to the use of transistors to run the LEDs directly from battery voltage, rather than obeying the current limits of the Arduino Nano’s output pins.

The build presents well, with the final POV board being built into the chassis of an old desk fan. Rather than use the original motor, instead a smaller 12 volt geared device was used, powered separately from the main board. The familiar form factor of the desk fan is a great way to finish the project off, and gives it an interesting industrial aesthetic.

POV builds can go a long way – we’ve even seen volumetric displays built in this way. Video after the break. Continue reading “Persistence Of Vision On An Old Fan” →

Nixiewatch Looks Stylish In Aluminium

Nixie tubes are a perennial favorite, with their burnt orange glow bringing a smile to the face of even the most jaded maker. Due to their power requirements they’re usually seen in desktop clocks, but [RemcoK3] decided to whip up a Nixiewatch, with stylish results.

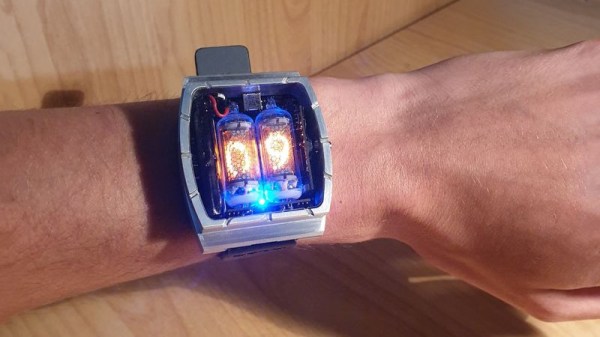
Packing twin Nixie tubes, the watch displays hours first, then minutes. An accelerometer is fitted, switching the tubes on when the user checks the watch. There’s also Bluetooth and WiFi connectivity, which can be used to set the time as well as check the remaining battery life. Standby time is estimated to be 350 hours, thanks to a low-power microcontroller and keeping the tubes off most of the time.

The presentation is where this watch really shines, sporting as it does an RGB LED for backlighting and an attractive aluminium case. The design is simple, helping to highlight the industrial beauty of the Nixie tubes themselves. The housing was first mocked up with 3D printed parts, before the final piece was CNC milled. [RemcoK3] is contemplating anodizing the watch, but we think that the brushed aluminium already looks perfect.

If you’ve grown tired of the Nixie aesthetic, fear not – numitron watches are also a thing!

Desk-Sized CNC Engraver Does The Job

CNC machine tools are highly useful for when you want to take a CAD design and make real parts as quickly and as easily as possible. Typically, they’re employed in large-scale industrial settings, but CNC machines come in all shapes and sizes. It’s possible to build a useful machine that’s just right to sit on your desk, as [More Than User] demonstrates.

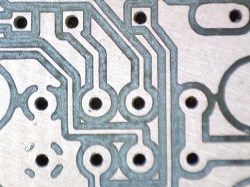
The holes pictured were made with a 0.5mm tool, showing off the precision and accuracy of the machine.

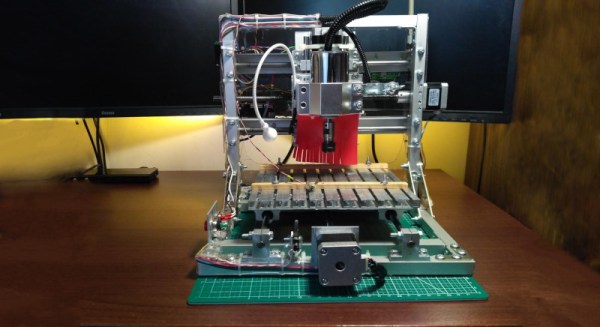
The build consists of an aluminium-framed CNC engraver, designed primarily for the production of PCBs. However, it can also handle plastic jobs, and aluminium if run slowly enough. Like most garage CNC projects, it runs with a combination of stepper motors and an Arduino. The cutting area is 16 cm x 16cm – more than enough for most hobby PCBs.

There are plenty of interesting details, such as the T-slot bed made from U-section steel bolted together, and the simple probe made from a microswitch. Perhaps most impressive though is the tight precision of the cuts. This is particularly important for PCB work, where otherwise minor issues could cause short or open circuits and make the resulting parts useless.

It’s a project that we’re sure will come in handy for [More Than User]’s future projects, and there’s nothing quite like making your own tools. If you’re new to CNC as a whole, consider picking up some design tips before you get started.

Gesture Controlled Doom

DOOM will forever be remembered as one of the founding games of the entire FPS genre. It also stands as a game which has long been a fertile ground for hackers and modders. [Nick Bild] decided to bring gesture control to iD’s classic shooter, courtesy of machine learning.

The setup consists of a Jetson Nano fitted with a camera, which films the player and uses a convolutional neural network to recognise the player’s various gestures. Once recognised, an API request is sent to a laptop playing Doom which simulates the relevant keystrokes. The laptop is hooked up to a projector, creating a large screen which allows the wildly gesturing player to more easily follow the action.

The neural network was trained on 3300 images – 300 per gesture. [Nick] found that using a larger data set actually performed less well, as he became less diligent in reliably performing the gestures. This demonstrates that quality matters in training networks, as well as quantity.

Reports are that the network is fairly reliable, and it appears to work quite well. Unfortunately, playability is limited as it’s not possible to gesture for more than one key at once. Overall though, it serves as a tidy example of how to do gesture recognition with CNNs.

If you’re not convinced by this demonstration, you might be interested to learn that neural networks can also be used to name tomatoes. If you don’t want to roll your own pose detection, check out this selfie drone that uses CMU’s OpenPose library. Video after the break.

Continue reading “Gesture Controlled Doom” →

A Baseball Cap That Films The Past

The vast majority of cameras will start recording at the press of a button. This is perfectly acceptable behaviour if you wish to film something that hasn’t happened yet. If you want to film something that’s already over, you’re out of luck. [Johan Link] has built a camera designed to do just that, however, and put it on a cap.

The project consists of a Raspberry Pi 3B, combined with a 1080p USB webcam and a 5000 mAh power bank. These are attached to a baseball cap in order to shoot footage from the point of view of the wearer. The camera records continuously, saving the last 7 seconds of recorded video when the button is pressed — perfect for capturing things just after they’ve happened.

It’s a rolling record feature similar to that included with many dashcams and action cameras. Software is available on Github for those interested. While [Johan] has chosen a New York Yankees hat as the basis for the build, we’re confident it should work similarly well with your Seattle Seahawks cap. Raiders fans should contact the garment manufacturer.