FindyBot3000 Is Listening And Ready To Help

It’s a problem every maker faces at one time or other – how to organise the ever-growing mass of components in the workshop. Some give up and just live with box upon box of disordered parts. That wasn’t good enough for [Inventor22], though – who created FindyBot3000 to tackle the job. 

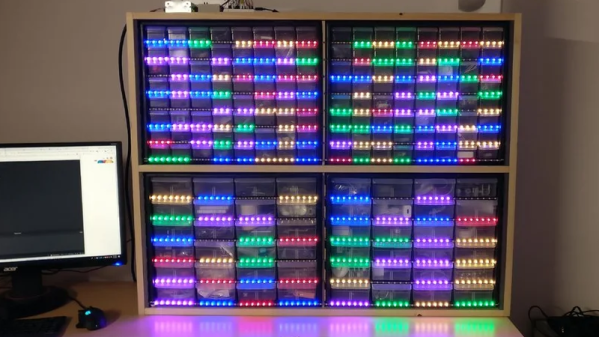
The first step is to source a set of those tiny component drawers we all know and love. These are then combined with WS2812B LED strips, which act as indicators for each individual drawer. A Particle Photon is used as the brains of the operation, and drives the strips. So far, so good.

Of course, blinking LEDs are great and all, but it’s the voice control where things get really interesting. Through Google Home and IFTTT, it’s possible to give commands to the Particle Photon. This can be used to manage the parts in the drawers, as well as to quickly highlight the location of various components. It’s backed up with an Azure backend, which manages the component database and keeps track of everything.

It’s a tidy build that does away with tiny sticky labels, and is reconfigurable on the fly as parts come and go. Of course, if you’re mostly storing SMD parts, you might prefer a reel based solution. Video after the break.

Continue reading “FindyBot3000 Is Listening And Ready To Help” →
Quick And Dirty Immobilizer Hack Lets You Use Cheaper Dumb Keys

Car enthusiasts can find themselves in a pickle if they’re into cars from the 80s and 90s. These vehicles are much beloved by some, but one can find themselves having to fork out immense amounts of money for repairs and out-of-production parts. Once a car passes that 15 year milestone, suddenly manufacturer support can start to dry up. Even just getting a set of keys can be a problem.

Modern cars tend to use a small chip implanted in the key as a security measure. This chip functions similarly to an RFID chip, being energised by the car’s reader when the driver turns the key in the ignition. If the chip returns the right code, the computer allows the car to start. Getting a new key cut and recoded is expensive, particularly on older cars. Naturally though, there’s a way to hack around the problem.

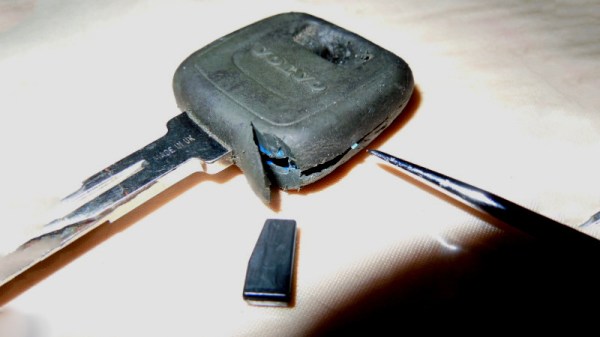
The trick is to perform surgery on an existing good key, to extract the working chip inside. This chip can then be permanently affixed to the immobilizer’s antenna in the steering column. This allows the driver to use any properly cut “dumb” key to start the car, as the chip will always provide the right signal at startup. It takes some finesse to avoid damaging the delicate chip inside and to know where to look – but with a little work, it’s achievable by even the novice hacker.

It’s a simple hack that can save hundreds of dollars, and is a great way to keep your modern classic on the road for cheap. You can always take things a step further though, and CNC yourself a key from scratch if you’re so inclined.

Interface Your C64 With Arduinos Through Firmata

Microcontrollers are cool, but sometimes the user interface options they can deliver are disappointing. The platform in question may not have the horsepower required to drive a decent screen, and often a web interface is undesirable for security or complexity reasons. Sometimes you just need a good software interface between chip and computer. Firmata is a protocol that’s designed to do just that, and [nanoflite] has brought it to the Commodore 64.

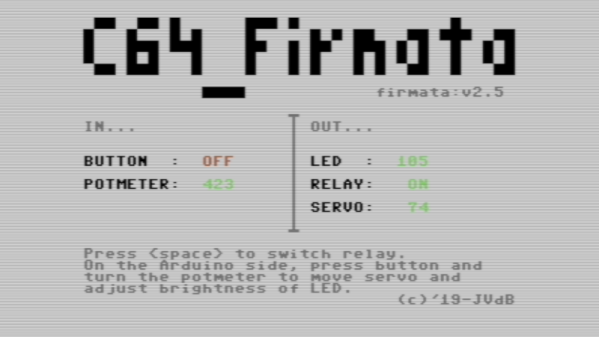
It’s a fun project, which allows one to use the C64’s charming retro graphics to interface with an Arduino-based project. Connection is achieved at 2400bps over the user port, which is plenty fast for most UI applications. [nanoflite] demonstrates the interface with an Arduino Uno and a Grove shield. The C64 is able to display the state of the LED, relay and servo outputs, as well as read the Arduino’s button and potentiometer inputs.

It’s an excellent way to integrate a Commodore 64 into a microcontroller setup without reinventing the wheel. We think it would make an awesome vintage interface to a home automation system or similar build. If you’re interested, but you don’t have a C64 of your own to play with, never fear – you can just build a new one.

Nearly Entirely 3D Printed RC Car Is 4WD Fun

Remote control cars can be great fun, particularly if you’ve got a spare carpark or dirt lot to hoon them around. Any good hobby store will have shelves stocked with all manner of vehicles – buggies, touring cars, prototypes – but you don’t have to settle for what’s already available. Why not 3D print the car of your dreams instead? (YouTube, embedded below.)

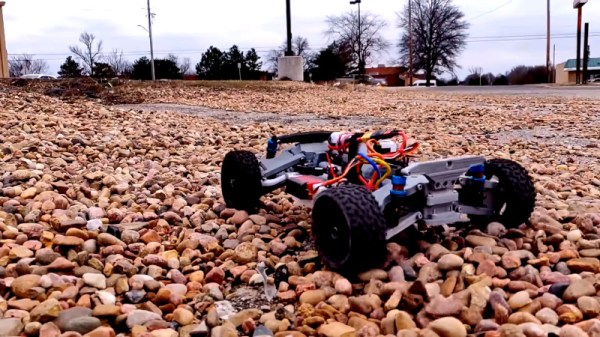
The build comes to us from [Engineering Nonsense], now in its third revision. The design is produced in PLA, to make it accessible as possible to printer owners the world over. Almost the entire car is 3D printable – not just the chassis. The gearbox, differentials and driveshafts, and even suspension arms and tie rods are all printed, rather than bought. This also means the car is easier to build, with everything being printed to the correct size, as opposed to using off-the-shelf adjustable parts.

Performance is impressive, with the car showing good grip thanks to its 4WD drivetrain and double wishbone suspension. Files are available on Thingiverse, so there’s nothing to stop you from printing this out and going for a spin this weekend. We’d love to see it take on the water with some 3D printed tyres, too.

[Thanks to Jotham for the tip!]

Continue reading “Nearly Entirely 3D Printed RC Car Is 4WD Fun” →

Reproducing Vintage Plastic Parts In Top-Notch Quality

Plastic is a highly useful material, but one that can also be a pain as it ages. Owners of vintage equipment the world over are suffering, as knobs break off, bezels get cracked and parts warp, discolor and fail. Oftentimes, the strategy has been to rob good parts from other broken hardware and cross your fingers that the supply doesn’t dry up. [Eric Strebel] shows us that’s not the only solution – you can replicate vintage plastic parts yourself, with the right tools.

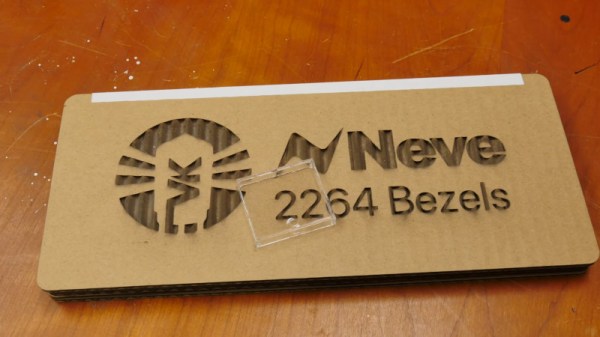
In the recording industry there’s simply no substitute for vintage gear, so a cottage industry has formed around keeping old hardware going. [Eric] was tasked with reproducing VU meter bezels for a classic Neve audio console, as replacement parts haven’t been produced since the 1970s.

The first step is to secure a good quality master for replication. An original bezel is removed, and polished up to remove scratches and blemishes from 40+ years of wear and tear. A silicone mold is then created in a plywood box. Lasercut parts are used to create the base, runner, and vents quickly and easily. The mold is then filled with resin to produce the final part. [Eric] demonstrates the whole process, using a clear silicone and dyed resin to make it more visible for the viewer.

Initial results were unfortunately poor, due to the silicone and hardener used. The parts were usable dimensionally, but had a hazy surface finish giving very poor optical qualities. This was rectified by returning to a known-good silicone compound, which was able to produce perfectly clear parts first time. Impressively, the only finishing required is to snap off the runner and vents. The part is then ready for installation. As a final piece of showmanship, [Eric] then ships the parts in a custom laser-engraved cardboard case. As they say, presentation is everything.

With modern equipment, reproducing vintage parts like knobs and emblems is easier than ever. Video after the break.

Continue reading “Reproducing Vintage Plastic Parts In Top-Notch Quality” →

Fooling Fingerprint Scanners With A Resin Printer

Biometrics have often been used as a form of access control. While this was initially limited to bank vaults in Hollywood movies, it’s now common to see such features on many laptops and smartphones. Despite the laundry list of reasons why this is a bad idea, the technology continues to grow in popularity. [darkshark] has shown us an easy exploit, using a 3D printer to fool the Galaxy S10’s fingerprint scanner.

The Galaxy S10 is interesting for its use of an ultrasonic fingerprint sensor, which continues to push to hardware development of phones minimal-to-no bezels by placing the sensor below the screen. The sensor is looking for the depth of the ridges of your fingerprint, while the touchscreen verifies the capacitive presence of your meaty digit. This hack satisfies both of those checks.

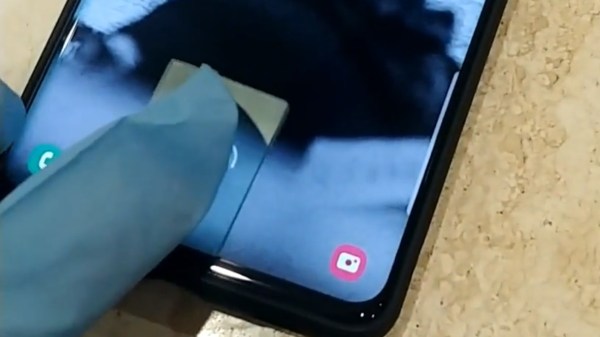
[darkshark] starts with a photograph of a fingerprint on a wineglass. This is then manipulated in Photoshop, before being used to create geometry in 3DSMAX to replicate the original finger. After making the part on an AnyCubic Photon LCD resin printer, the faux-finger pad is able to successfully unlock the phone by placing the print on the glass and touching your finger on top of it.ster

[darkshark] notes that the fingerprint was harvested at close range, but a camera with the right lenses could capture similar detail at a distance. The other thing to note is that if your phone is stolen, it’s likely covered in greasy fingerprints anyway. As usual, it serves as an excellent reminder that fingerprints are not passwords, and should not be treated as such. If you need to brush up on the fundamentals, we’ve got a great primer on how fingerprint scanners work, and another on why using fingerprints for security is a bad plan.

[via reddit, thanks to TheEngineer for the tip!]

Gliding Back Home From 60,000ft

If you want to play around with high altitudes, weather balloons are the way to go. With a bit of latex and some helium, it’s possible to scrape up against the edge of space without having to start your own rocketry program. [Blake] was interested in doing just this, and decided to build a near space glider which could capture the journey.

There are certain challenges involved with this flight regime, which [Blake] worked to overcome. There was significant investment in the right antennas and radio hardware to enable communication and control of the aircraft at vast distances. Batteries were chosen for their ability to work at low temperatures in the high altitude environment, and excess heat from the transmitters was use to keep them warm.

The glider was also fitted with an Ardupilot Mega which would control the gliders’s flight after separation from the lift balloon. [Blake] had some success flying the aircraft at 60,000 feet, but found that due to communications issues, the autopilot was doing a better job. The initial flight was largely a success, with the glider landing just 9 miles off target due to headwinds.

We’ve seen glider builds on other autopilot platforms, too. Video after the break.

Continue reading “Gliding Back Home From 60,000ft” →